Shader Editor
Ventuz supports customized shading of objects via the HLSL Shader Node and the Shader Editor is a dedicated editor for this node. This document discusses the user interface of the editor, for details on developing shader code see here.
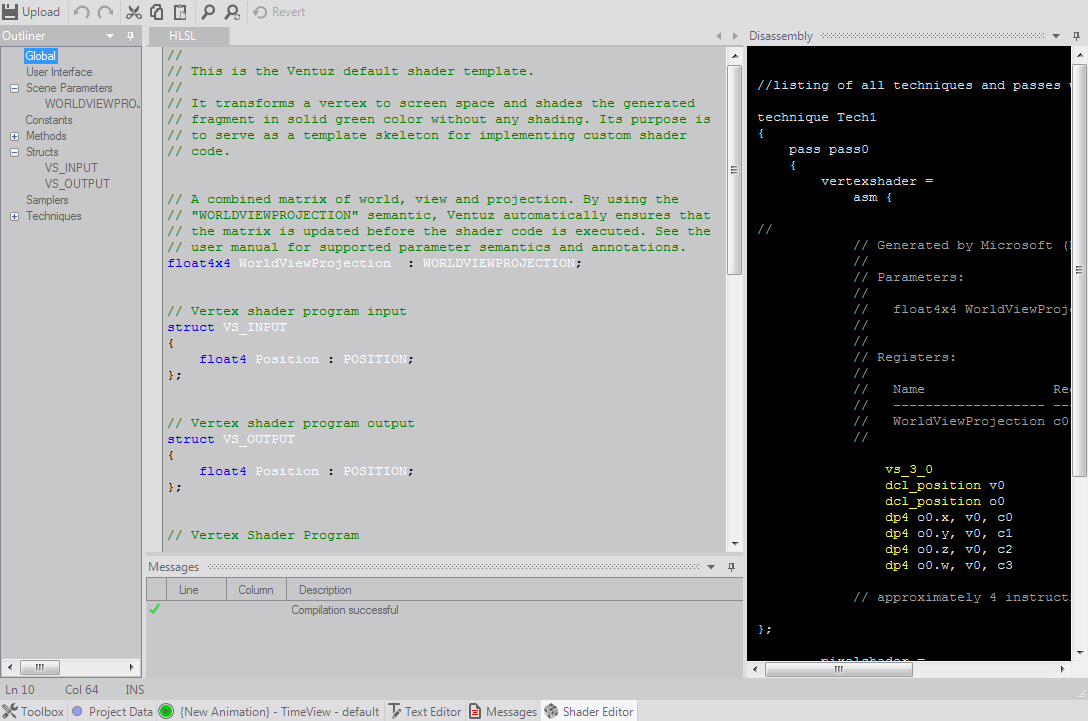
The editor consists of four areas that become visible once an HLSL shader node has been selected:
- The Main Document area: This is a full-fledged textual editor with syntax highlighting, auto-completion and more. It is customized for editing HLSL shader code.
- Outline (left): This shows a high level structure of the shader code. Double-
 on an entry to have the document area scroll to the relevant position.
- Diassembly (right): If the shader code in the document area compiles correctly, this shows the resulting assembly instructions the graphics card will perform. It is a powerful tool for analyzing and optimizing shader code.
- Messages (bottom): While editing, the shader editor constantly compiles the code in the background and shows error messages and warnings generated by the shader compiler in this docking window.
The Outliner and Disassembly are collapsed by default. To open them, click on the respective label to reveal it and click on the pin icon to keep it so. The arrangement of windows can also be changed by dragging the top bar of each window. However, the layout is not saved as part of a project/show!
Any modification of the shader code is done locally inside the editor without affecting the actual rendering. To save the code to an HLSL node, press the upload button once all errors have been resolved. Only then the results of the modified shader will be visible in the renderer output. Use the Revert button to discard changes and reload the source code from the selected HLSL.
Most of the standard short-cuts like Ctrl+S actually are not supported by the Shader Editor but are interpreted as application commands. So Ctrl+S will save the Ventuz show, not upload the shader code to the HLSL node.