Deployment
Table of Contents
A Ventuz Project usually consists of multiple scenes, multiple versions of each of these scenes and resources (images, textures and geometries) used in them. Only one scene or a tree of scenes is actually needed for the final presentation or show.
Ventuz offers two different types of deploying such a subset of a Ventuz Project.
Production Machine
Before running a show, one should make sure that Windows will not cause any problems:
- Windows automatic updates should be turned off.
- Disable Windows notification icons. They steal focus and as a result minimize presenter.
- Change the Power Plan from Balanced to Maximum Performance.
- Check firewall rules for both Ventuz Designer and Ventuz Presenter (different applications, so different firewall rules). A project that might be getting data in the Designer may not work in Presenter if the firewall rules are only set for Designer.
- Disable UAC.
- Deactive all Windows sound.
Ventuz Presentation - VPR
Export
This deployment type is used if the subset of a Ventuz Project is clearly defined and no further scenes or resources are needed during the presentation. A single VPR file contains all scenes and resources to run a show as well as the Runtime Layout Scene and required sub-scenes.
In order to export a Ventuz Presentation, open the main scene in the Ventuz Designer. After a final review of the scene in the Runtime Layout, select File/Export/Presentation (vpr) from the main menu. A resource selection window will request which resources should be included in the VPR file. In most cases, the automatic resource selection does not have to be modified and can simply be confirmed by pressing Ok.
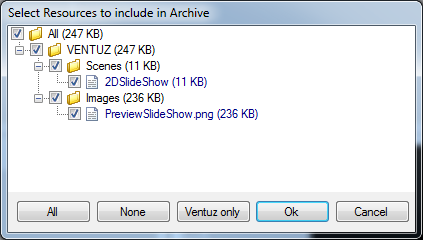
This dialog shows all resources used in the exported scene including resources of sub-scenes. If any additional resources are required which are not automatically selected use the Resource Linker Node to add them to your scene.
External resources such as FTP, HTTP, absolute or relative paths cannot be included into a VPR Presentation file. If external resources are required to run the Presentation, their availability and accessibility has to be ensured on the target system: check for the availability of an internet connection or manually deploy external files.
A Ventuz Presentation is started by simply double clicking on the VPR file. The Windows Explorer will start Ventuz Presenter/Runtime with the Runtime Options configured in the Project Properties.
Of course, Ventuz must be installed to start a VPR on a computer!
A Ventuz Presentation can be remoted but the main scene has no runtime identity. It only can be addressed as the current scene. See Remoting
Relative URIs will be resolved to files lying next to the VPR file in the folder structure. For more information, see URL Node.
Settings Override
In some cases it might be necessary to change the Project Properties that have been used for the VPR export without re-exporting the whole presentation. This might be necessary for example if the aspect ratio of the display changes. To perform a settings override, click  on the .vpr file. This brings up the Project Properties editor in a reduced version.
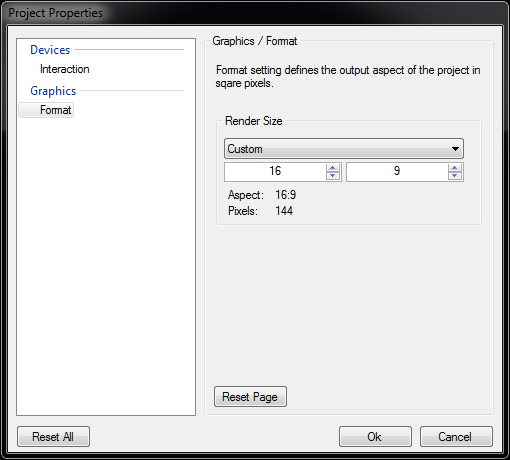
Make the necessary changes and click the OK button. A .config file with the name of the according presentation file will be saved next to the .vpr file containing the modified settings. Every time a VPR is started the Presenter will look for a according .config file. If one is found, the containing override settings will be used; otherwise the original settings which have been saved in the VPR are used.
Ventuz Archive - VZA
A Ventuz Archive is usually used for scene exchange between users, Ventuz Projects or workstations. A Ventuz Archive can be compared to a Ventuz Presentation except that an archive cannot be started as a Presentation. The steps for exporting a VZA are similar to exporting a VPR except that File/Export/Archive (vza) has to be selected from the main menu.
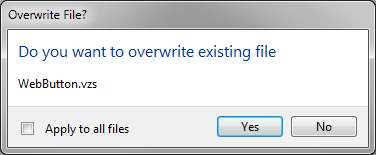
In order to import a VZA archive into an existing Ventuz Project, open the project and select File/Import/Archive (vza) in the main menu of the Ventuz Designer. The following Resource Selection dialog will ask which resources should be imported into the project. If a resource already exists, the user is asked whether to overwrite or keep the file.
VZA archives are also used to dynamically extend a running Ventuz Presenter/Runtime launched in Director Mode. For more information, see Director Mode.
Project Archive - VPA
If an entire Project has to be archived, Project Maintenance is used to create .vpa files. VPA files are ZIP archives containing the entire folder structure of the exported project. Project Maintenance lets you select which files will be part of the export by setting restritive Include and Exclude filters.
If the archive contains an image named preview.jpg or preview.png located next to the project file (.vzp), the Windows Explorer will be able to display that image in its preview pane. (Ventuz Designer must be installed for this feature)
To use or to import a Project Archive (.vpa), open it by pressing the Browse button of the Project Browser. Ventuz will ask you where to extract the archive. If that project (same project ID) has already been extracted, Ventuz will ask if the archive should be extracted again or if the existing extraction should be opened. If a Project Archive is extracted, only the location can be changed, other project properties are retained.
Another way to open and extract a Project Archive is to dbl click  on the file in the Windows Explorer or select the Import Project Archive verb by opening the context menu click on the .vpa file. The verb Install Project Archive will copy the .vpa file to the standard location for installed archives: Public Documents\Ventuz4\Packages. Installed Project Archive are always displayed in the Project Browser under Demos and Tutorials. Installing an archive is more useful for Project Templates.
Project Template - VPT
A Project Template (.vpt) is exactly the same as a Project Archive (.vpa) except for the file extension and its handling inside Ventuz. In order to create a Project Template follow the same steps as creating a Project Archive but select the .vpt file extension when exporting the archive. (or simply rename the file after exporting a .vpa file). The difference between standard archives and templates is that you can extract a template multiple times and you're allowed to change descriptive project properties when extracted. If you install a project template into the standard folder Public Documents\Ventuz4\Packages, the Project Browser will display all installed templates under the Templates group. In order to install a project template, click on the .vpt file in the Windows Explorer and select Install Template. dbl click on the .vpt file or select Create Project from Template will launch Ventuz and create a new project based on that template.
Security
There are various reasons why it can make sense to restrict the machines that a scene can run on: Protection of intellectual property or per machine licensing of a project, just to name two. This can be done by specifying the Dongle IDs that can open a project/scene in the System Lock part of the Project Properties. In addition, only dongles whose check mark box is checked will be able to edit the file in Ventuz Designer.
If any dongle ID is added, Ventuz will automatically also add the current Ventuz Designer dongle and give it editing rights to prevent an accidental lock-out.
A new ID can be added by pressing the add button which will show a list of all dongles currently attached to the machine. In addition, a dongle ID can be entered manually. To retrieve the ID of a dongle, insert it into any machine that has a Ventuz installation and launch the Ventuz License Manager. It shows the licenses and dongles available on that machine.