Projects and Scenes
Table of Contents
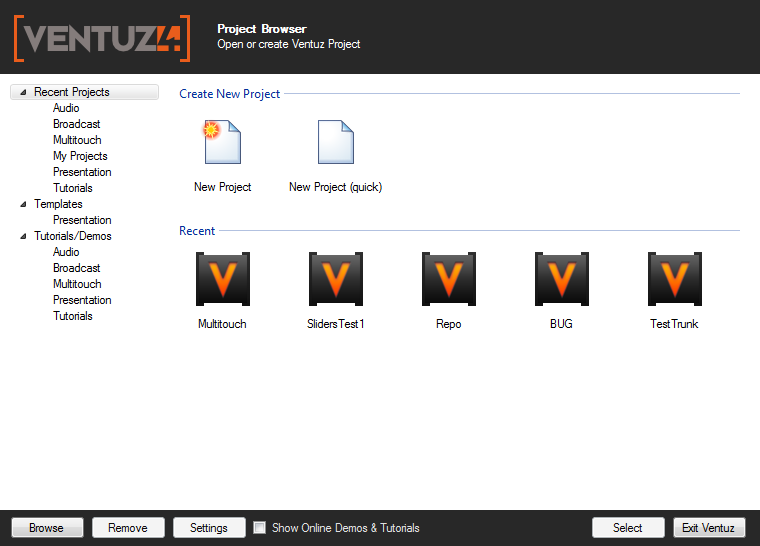
One of the most important things to understand when starting to work with Ventuz is how the generated content will be organized and why. Upon starting Ventuz, the Project Browser will appear as the very first thing:
Project
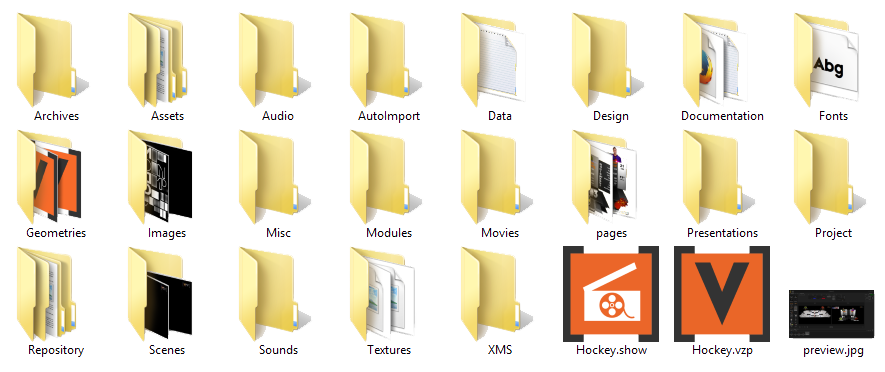
A Project is a collection of assets (such as images, audio files or geometries), scenes and a single project file with the extension .vzp. The assets are grouped into different data pools where each data pool has its own folder in the file folder structure inside the project folder itself. If an asset outside of the project is used in a scene, it will be imported into the project unless it is specifically marked as an external reference.
As an example, let us assume there is a conference with multiple speakers or topics. Each scene will be used for a single presentation but all of the presentations will probably use the same font, background and so on. Hosting the assets inside the project instead of the scene allows for reuse and thus saves both disk space and memory.
Another way to think of a project is as a working folder. Instead of searching for specific images all over the computers hard disk, they are imported into the project and thus everything relevant is in one place. A project folder can be compressed and moved to another computer without compromising integrity as scenes only reference assets within the project folder (unless specifically told not to).
Creating a new Project
Select New Project from the Project Browser to open the Create Project Wizard. Choose a name and icon for your project, the aspect ratio of your target display, language settings and finally the location of the project folder on your hard disk. Click Finish and Ventuz will create, initialize and open the project as well as a new empty scene.
The settings entered in the New Project wizard are stored in the Project Properties. To view or modify these and further settings, click on the Project Button in the top right corner.
Once a Project is opened, Ventuz switches from the Project Browser to the standard user interface. For more information on the specific windows, see User Interface.
The Scene
A Ventuz Scene is a collection of Nodes and Bindings. There are various nodes to generate geometry, assign materials, receive input from external sources and much more. Each node has various input and output properties that either influence a node (for example the size of a Rectangle) or are generated by the node (see for example the Mover node). Properties can be connected by so called Bindings to create quite complex logic without having to write a single line of code or script.
Within those concepts of parametrized nodes and binding of properties lies the power of Ventuz. Everything is calculated and rendered in real-time, almost everything can be changed in real-time as well. A presentation no longer is a linear succession of predefined content but rather a collection of possibilities. The operator or speaker can decide on the fly in which order things should happen, when to reveal certain information and so on. Although the graphic design and logic of a scene is prepared in advanced, the content to fill it can be replaced later on or even come from real-time sources such as RSS feeds or databases.
There a two ways to create a Scene.
- The first one is to create a new blank scene by clicking the tool button
 . In an empty scene everything has to be build from scratch.
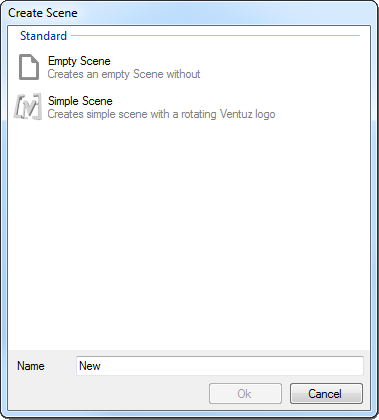
- The second way is to use the Create Scene Wizard by clicking the
 tool button. The wizards will ask for the type of scene to be created and a name for it. Scene types displayed in the wizard are either internal scenes (Standard) or scene-templates located in open Repositories.
Scene Backup and Versioning
Ventuz provides a system to minimize the damage of unexpected application crashes and to keep track of scene file changes. To enable this system, open the Designer Options dialog and select the Load & Save category. There you have to activate the AutoSave and Backup option. The AutoSave mechanism will periodically save the current state of the open scene to the Scenes.revisions folder. The scene is saved under its current name with additional .auto extension.
The backup mechanism works as follows: every time a scene is saved (under the old name) by the user, a copy of the old scene version on disk is saved to the Scenes.revisions folder with an additional extension ####.bak. #### represents a number between 0000 and 9999. This number is increased with every new save operation. If the maximal number of backup files is reached (as configured in the Designer Options) the oldest backup file (with the lowest index) is deleted before a new backup is created.
To open one of the Backup files or the AutoSave file open the Open Scene dialog and choose the desired scene version in the Revision drop-down box at the bottom of the dialog. Note that if such a backup scene is saved in the Designer, it is saved under its original name in the Scene folder - this does not overwrite the backup file!
Ventuz scenes themselves are generally not very large, even with a large number of nodes. Because the backup files need not include the assets, but only the scene itself, it is possible to have a significant number of automatic backups without using too much hard disk space.
Scene Transfer and Archiving
If one wants to transfer a Ventuz scene from one Project to another, a Ventuz Scene Archive (VZA) has to be exported (Export in the File menu). This export creates an archive file which contains the scene and all resources (images, text files, Excel Workbooks, etc.) that are used in the scene and lie within the current Project structure. All resource which are referenced by the scene and are outside the Project folder are not included in the archive. This archive can be imported in any other Ventuz Project (Import in the File menu) and the contained files are copied to the according Project sub-folder.