How To Create a Visuals Loader Node
Table of Contents
In this tutorial you will learn how to create a reusable node, that loads any kind of visual element and provides its data as a texture.
Introduction
In some cases it is not predefined whether the data you may use for a texture is always an image or a movie. Internally Ventuz handles data types of such visuals in different ways and a designer has to work a way around those differences. A node has been created for this to become possible: The Visuals Indexer Node. We will create a Hierarchy Container which contains this node to handle this.
The result can be saved into the project repository for later reuse.
This node will especially come in handy when using the Ventuz Director. You can then create Templates with selectable Textures and Movies (or even Live Videos) and the operator of the Director does not have to care about the source of the texture.
Setup
We will start up with a setup of three common nodes:
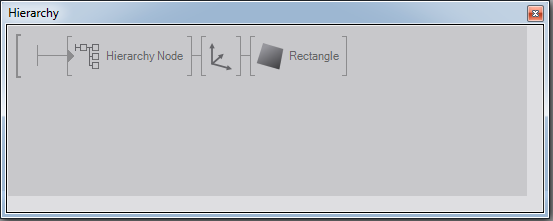
- A Hierarchy Container Node in which we will insert our logic later
- A Rectangle as a geometry to have the texture displayed
- An Axis Node for scaling of the Rectangle
Next you will need an example file for each of the visual formats for testing the node. Place them in the respective directories:
- An image file
- A texture file
- A movie file
Optionally you can create a simple scene so that you can insert scenes with this node as well (click File in the menu bar and New Scene... - instead of clicking Empty Scene choose Simple Scene, save it and you are done).
This will provide an option to alternatively display a sub-scene instead of the Rectangle with a texture.
You may also configure an input for a Live Video.
Inner Structure of the Hierarchy Container
Double click  the small gray triangle in the Hierarchy Node. You should now see a blank Content Editor and a single Output Node in the Hierarchy Editor.
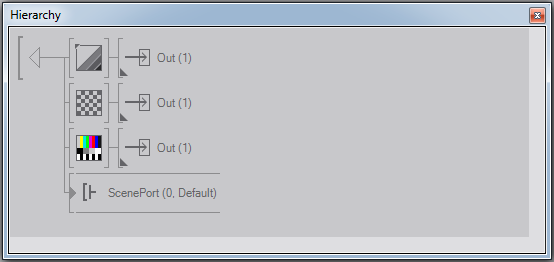
Firstly you will need to create two link copies of the Output Node. To do so hold shift + ctrl and drag the Output Node below itself (drop the node when the orange triangle appears below the Output Node).
Next insert a Texture node in front of the original Output Node and choose Texture Loader from the dropdown menu. Do so for the linked Outputs as well but choose Movie Clip and Live Video instead.
Lastly drag a Scene Port node into the Hierarchy Editor below all other nodes.
The result should look similiar to this:
Inner Logic of the Node
We now have the hierarchy structure of our node, next comes the logic.
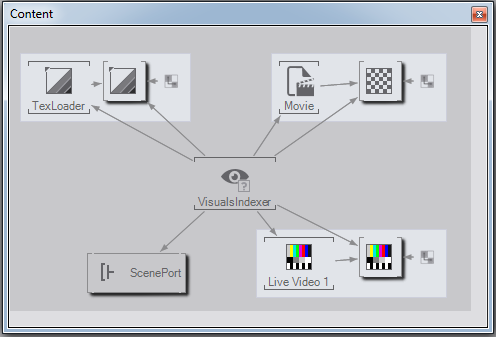
Click on the Texture node in the hierarchy structure to show its logic in the Content Editor. Insert a Visuals Indexer node here. This node has two Input Properties. Firstly the Uri, which defines the path of the file one wants to inspect and secondly a TreatTextureAsImage boolean which prevents the node from handling texture files differently from image files. Since the Texture Loader can also handle image files, we check this property and hence ignore the Texture outputs of this node.
Now you can bind the File property of the TexLoader node to the ImagesUri output of the Visuals Indexer. Drag the File property onto the Visuals Indexer node in the Content Editor and choose the ImagesUri output in the dropdown list. Hold shift and click on the Movie Texture node in the Hierarchy Editor to show its logic in the Content Editor next to the rest of the nodes. You can now bind the File property of the Movie Loader node to the MoviesUri output of the Visuals Indexer node. Repeat this for the Live Video node and the Scene Port node and its Scene property respectively.
Now each of the four nodes load the right type of file. That is due to the Visuals Indexer, which inspects the file specified in its Uri input and passes it to that output corresponding to the file type. Therefore the Movie Loader won't load any file if the Visuals Indexer does not pass it to the MovieUri output. Problem is: The texture of the Movie Loader would still be passed to the output of the Hierarchy Container node. As a consequence of this an empty texture will be rendered onto the geometries behind the Hierarchy Container and eventually override the texture of the Image Loader. The result would be a white rectangle, although an image file is loaded.
To prevent this from happening we need to block the Loaders that do not get a file as an input. This way the Loader won't operate and will not override a previously rendered texture. To do so you need to bind the Blocked property of the Texture Node to the Visuals Indexer's ImagesInvalidUri output. Do the same for the Movie Texture and Live Video nodes and the Scene Port.
Lastly all you need to do is expose the Uri property of the Visuals Indexer so that one can choose a file from outside the Hierarchy Container. To achieve this you need to click the little square left to the property. If you want to rename it for better recognition outside the container double click and change the properties as you like it.
To exit the Hierarchy Container double click the big arrow in the upper left of the hierarchy editor.
Now you can rename the Hierarchy Container (to e.g. "Visuals Loader") and change its Node Icon and finally drop it onto the Project Repository for later reuse in your project.
Usage of the Node
Testing the node in Designer
In order to test the node you have to modify some data. Open the Scene Data Dialog (Check the "Scene Data Editor" option in the View menu) and double click  on the root symbol in the Data Scheme column. Select Create Data Channel->Asset to create a new Data Channel for the assets we created in the "Setup" topic. In the properties window you can choose which assets to enable. Since we want to test the compability of our node with any visual format check all formats that are in any way a visual (Images, Movies, LiveVideo, Scenes and Textures). Next you have to drag the Uri property of our Hierarchy Container node to bind the property to this channel. Now you can browse through the specified directories to change the Uri property of the Hierarchy Node.
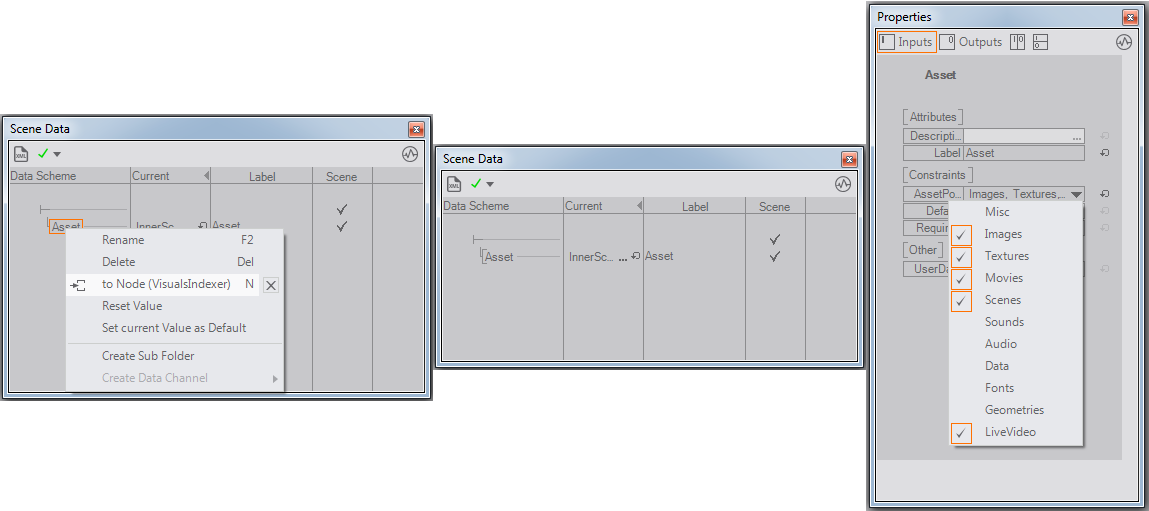
You can delete a binding of a channel to an input property of a node by right clicking "Assets" in the Scene Data Editor. In the drop down menu you have to click on the X next to the corresponding "to Node" option.
You will see that you can choose any of your visuals without compatibility problems.
Testing the node in Director
Normally you would use this node to build a Template for the Ventuz Director. Since we already modified the Scene Data in such a way that the scene will be exported as a Template for the Director you may save the project and exit the Ventuz Designer.
Now start the Ventuz Director. Create a new show and give it a name and a description. Next you need to specify your project file in the "Ventuz Project" option. In the next dialog choose both your scenes you have just build.
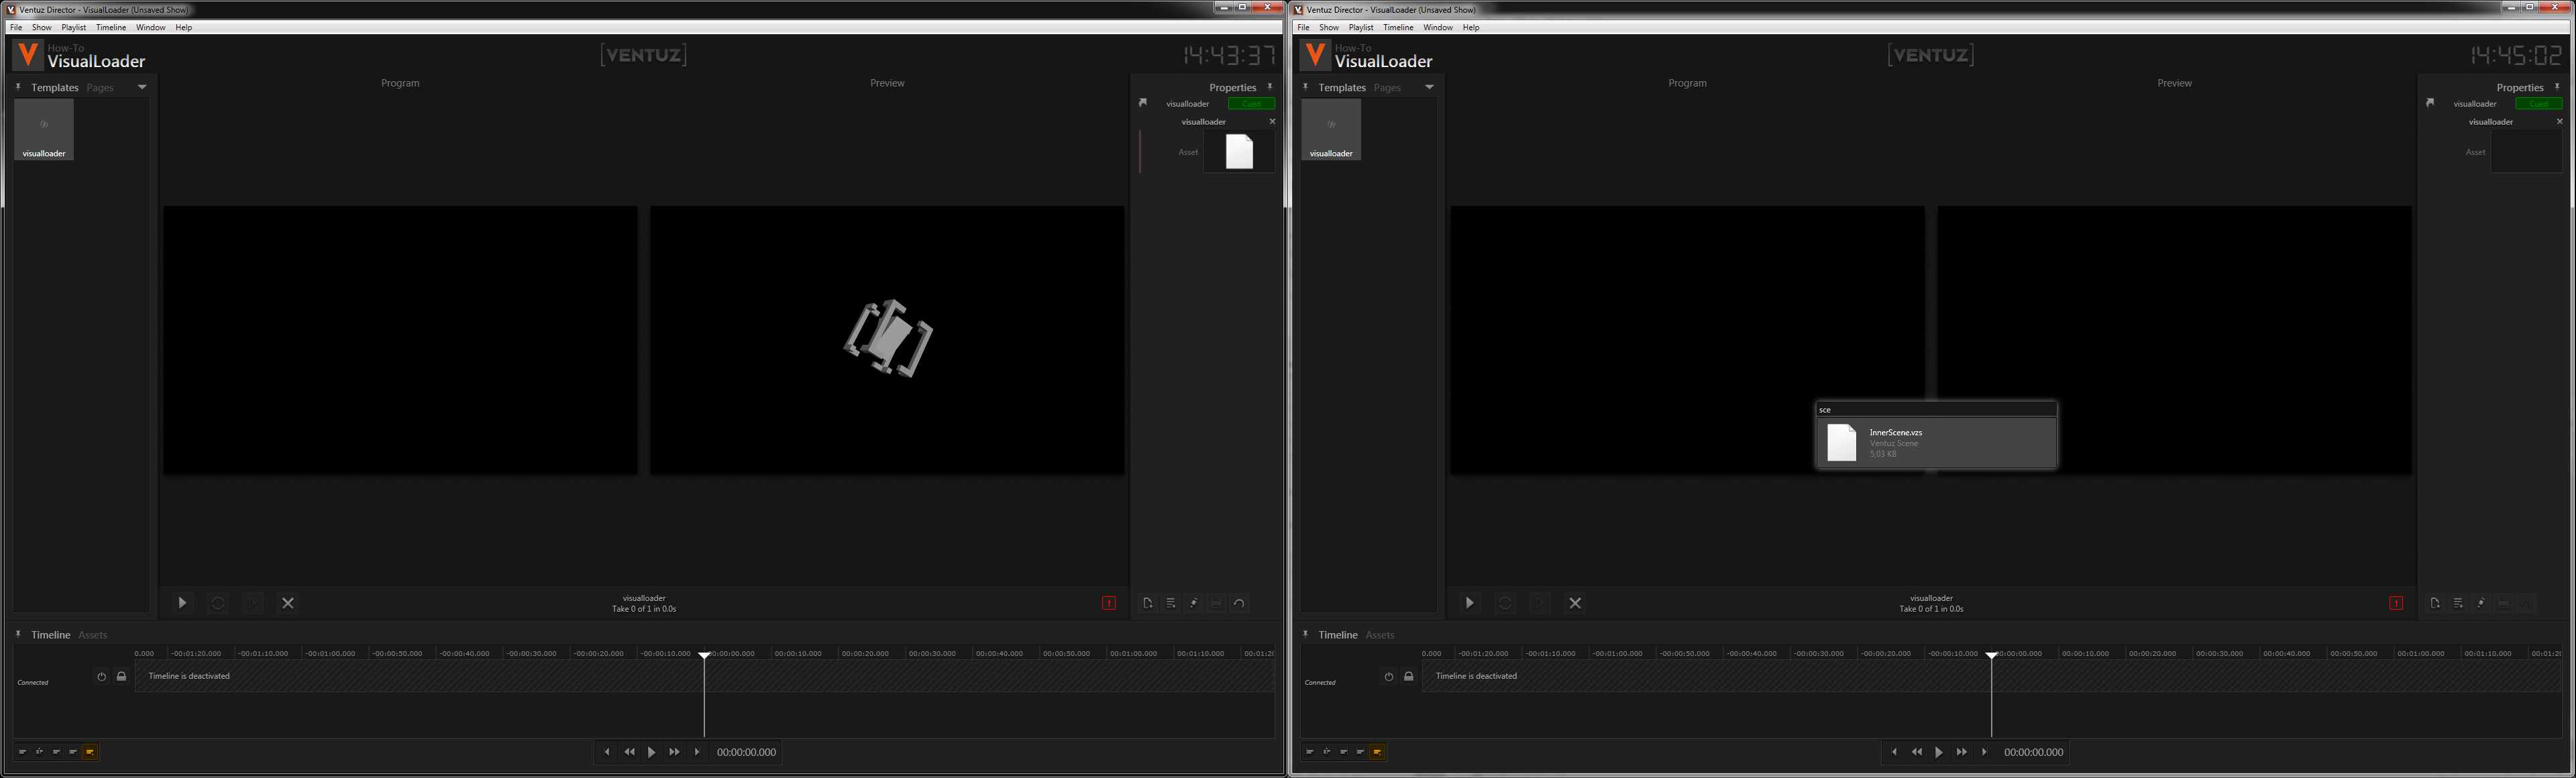
You may now drag and drop the template named after your scene into the cue and modify its Uri property. A search window will pop up that shows all results for the "Assets" directory. Again, you can add any of your visuals to this property without compatibility problems.
Note that this paragraph does not intend to teach you how to use the Ventuz Director or how to create a Template for the Director. Either see the corresponding Documentation pages or work your way through the other Director tutorials. Also you may encounter display problems with the Director which relate to a bad Machine Cofiguration and thus won't be discussed here either.
Conclusion
You now have a node that can load any visual file as a texture or even replace its subtree with a different scene if wanted. When using this node an operator of the Ventuz Director does not have to care about the file types he is loading as an asset into a template's properties.
You may now want to learn more about the Ventuz Director or read more on how to create templates. See the following sites to get more information about this feature of Ventuz: