How to Build a Template for Director
Table of Contents
The following HowTo is a guide to building a Template for use inside of Director, using the example of a simple name super.
Introduction
A main feature of the Director is the use of Templates. To create a scene that contains one or more Templates, some mechanisms are needed. A general explanation of designing Templates can be found here. This Page contains a step by step guide of how to build a scene providing a simple name super Template for the Director.
Step 1: Set up the Graphics
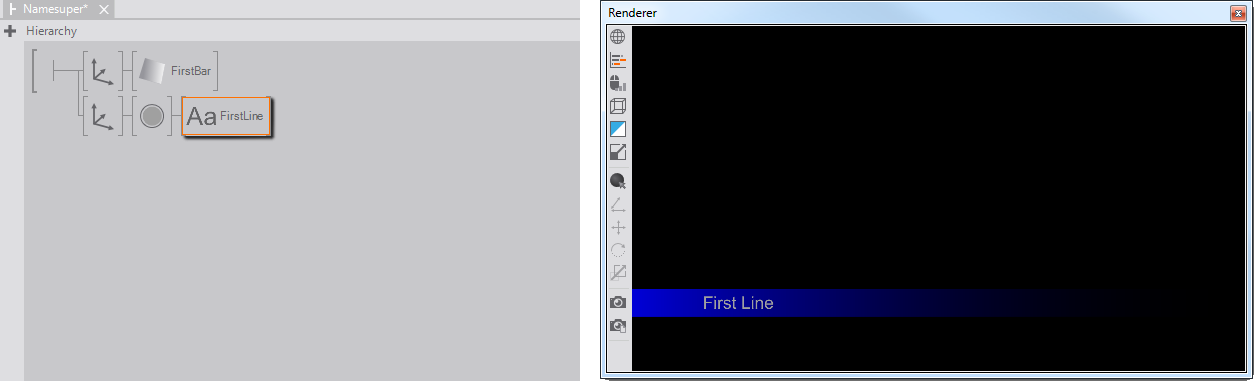
In order to create a simple name super, we just take a Gradient Rectangle with some 2D Text over it.
Step 2: Adding an Animation
Since a Template is strongly connected to animation, as can be read here, and we would like our name super to be animated when take it on air and off air, we add a Keyframe Animation to our scene. Animate the Scale X Property of the Axis in front of the Rectangle to let the name super scale in from the left. For the text, for example add an AlphaEffect and drag the Progress Property to the animation. Add three states and give it a nice animation as you would in any other Ventuz scene.

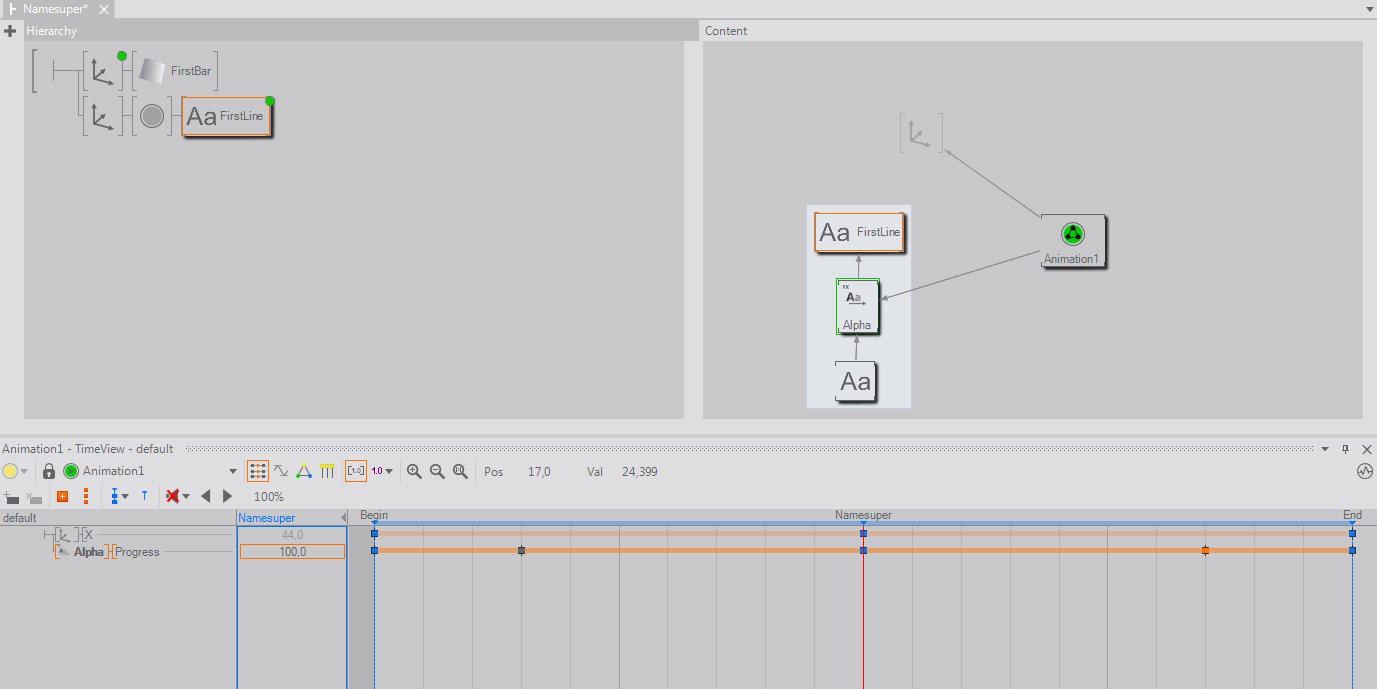
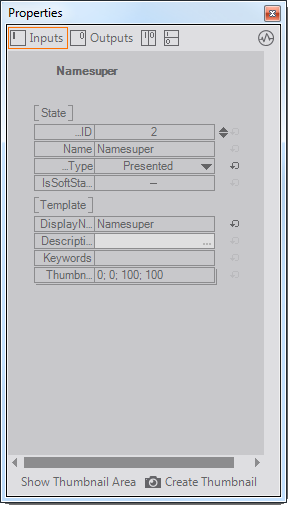
The Template irself is represented by a Present State. In the Logic View of the animation, click on the state that represents the name super fully on-screen and press P. The State Type switches to Presented Default and the icon turns yellow. You now have a Begin State, a Present State and an End State, with green, yellow and orange colors respectively.
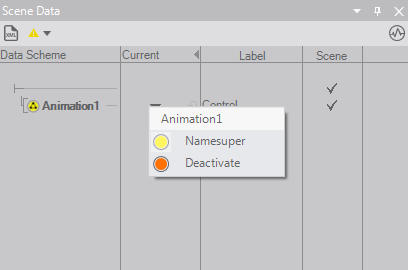
In order to have a first working Template, the animation needs to be made controllable by the Director. To achieve that,  click and drag the Control Property of the animation to the Scene Data. To see the Scene Data Window, go to View in the Menu or simply push F12. Notice the icon of the Animation Node turns yellow.
We now have a simple Template which can be loaded in the Director. To give it a first try inside the Designer, go to the Scene Data Window, click on the small triangle in the column Current and switch through the states.
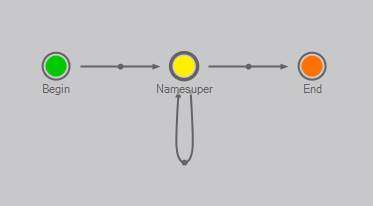
Notice that when the animation is in the Presented State and you choose it again, the animation doesn't find a route from this state to itself. So according to the Routing it goes to the End State and starts over from the Begin State to reach the state again. In broadcast terms, it performs a retake. Go to the Logic View and add a path by  click and hold on the state, then drag outwards a bit and back to the state. Now the animation knows a path from this state to itself. The use of this will be discussed later.
Step 3: Template Data
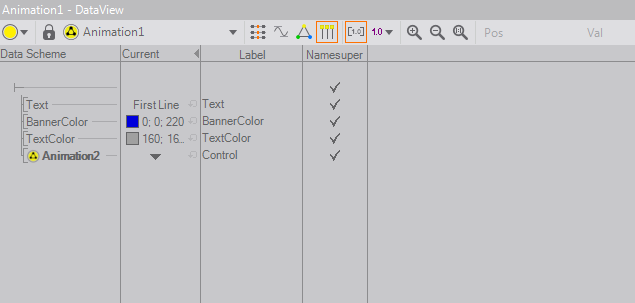
To make this Template more useful, some Data should be made accessible to the Operator who uses it in the Director. In this case it makes sense to give access to the text and the color. To make a property accessible, go to the Data View of the animation. Now go to your node, click and hold the desired property from the Properties Editor and drag it to the Data View. release when the label turns green. Properties connected to the Data View, and the nodes the properties belong to, get an indicator in the form of a yellow dot.
By selecting the Template Data Item in the first column of the Data View, a description, a label and constraints can be added.

Above, the Text, the Color of the Text and the Color of the Gradient Rectangle were added to the Template Data and some sensible labels were given to them. These three properties now will be visible and adjustable by an Operator when used in Director.
Step 4: Transition Points
This paragraph describes the need for Transition Points. In respect to this name super Template created here, a new text should only be applied when the text is faded out. This is where the path from the Present State to itself, created earlier, comes in handy.
In the Time View of the Animation Editor select the Slice containing this path. (you can just doubleclick the line connecting the states to get there). Animate the Alpha Effect to fade out and in again by adding a keyframe to the channel. Now add a Data Marker to the position where the text is faded out completely by pressing M or click on the Data Marker Icon  . A Data Marker Icon appears above the animation timeline at the point where your timeline currently is.
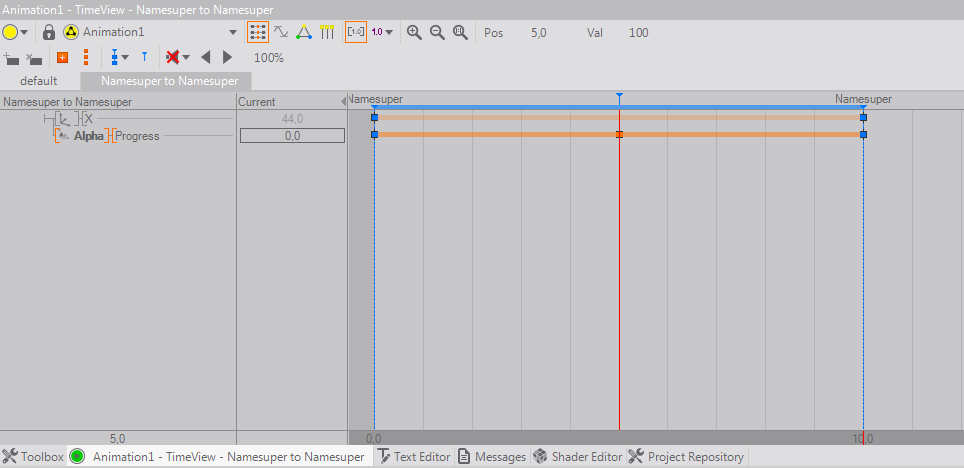
Go to the Scene Data View and animate to the Present State two times consecutively, you should see just the text out and in again.
Step 5: Thumbnails
At the top of the Scene Data View, a yellow triangle can be seen. click brings up the message that there are Thumbnails missing. Creating a Thumbnail for a Present State is a nice feature, since it will be shown in the Director and makes identifying the Template easier. To create a Thumbnail, click on a Present State in Logic View of the animation. At the bottom of the Properties Editor two buttons for creating a Thumbnail can be found.
Step 6 : Subtemplates
At this point, the Template is fully functioning and ready to use. But it leaves out the exciting feature of Subtemplates.
Imagine sometimes it would be useful for the name super to have an extra component that can be added when needed. In this case, for simplicities sake, a second, smaller bar just like the first one will be used to show how to add a Subtemplate. But any other element or structure can be used as a Subtemplate.

Here, for the Subtemplate, a second bar that matches the first one, is built. It just has different scaling and colors, plus it has its own Keyframe Animation Node. In this case the Animation behaves exactly like the one created above, but it is a separate and new animation node.
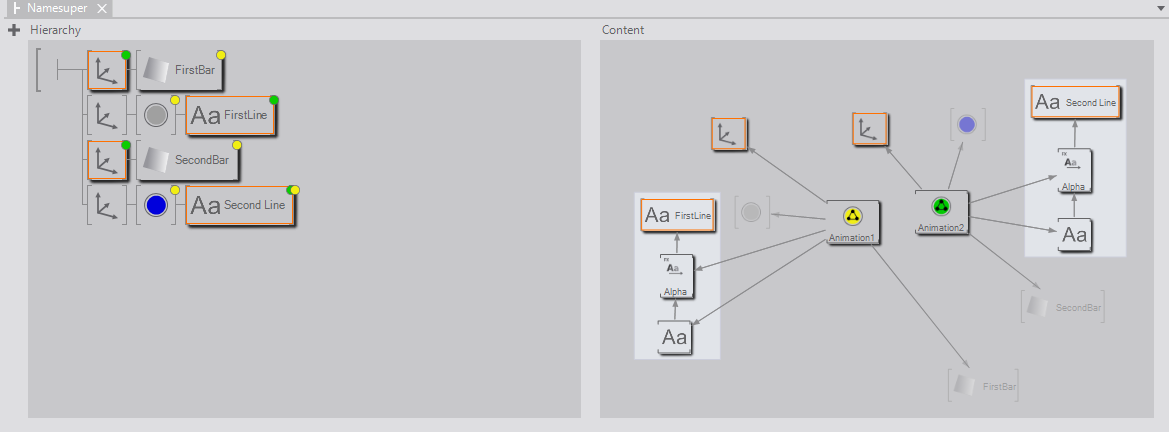
To make this second animation a Subtemplate of the other one, do not drag the Control Property to the Scene Data. Instead drag it to the Data View of the first animation. To achieve that, select the first animation and select the Data View in the Animation Editor. Then select the second animation in the Content Editor and click and hold the Control Property. Hover above the first animation until the Animation Editor switches to this animation and drag the Control Property in the Data View. The second animation now appears as a Data Channel in the first animation.
Move to the Scene Data and switch through the States again. Now the Second Bar appears as a Subtemplate of the first one.
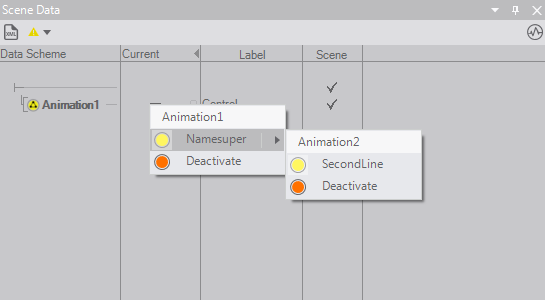
Notice the dependencies between a Template and its Subtemplates.
Conclusion
This Page showed how to create a basic Template. There are more features and possibilities to this, like using multiple Subtemplates, adding visuals, using Project Data...
Have a look at the Ventuz Demo Projects to get an idea of what can be done.