How To Convert A Scene From Ventuz 3 To Be Ready For Use In Ventuz 4 Director
Table of Contents
In the following HowTo we take an existing Project build in Ventuz 3 and reconstruct it, so it can be used in Ventuz 4 Director.
Introduction
In order to use the advantages of Ventuz 4 Director even for existing projects, they would need some refactoring. This HowTo provides an example of such a conversion. We convert the given components so they become Templates and use a different way of how global data is applied. The scene we are going to rebuild is the Sports02 scene from the Ventuz 3 online demos. In the end it will be ready for use in Director.
Step 1: Examine the Scene
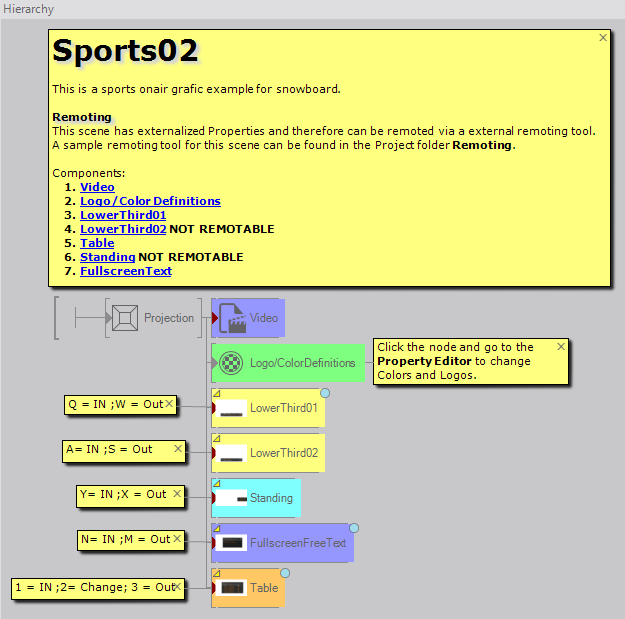
First, let's have a look at the existing scene. Open the project and load the scene Sports02_CustomVideo. It provides examples for on-air graphics for a sports event. Looking at the Hierarchy Editor from top to bottom we find the following components:
- The Video Container, where the video input for the background is applied to the scene.
- A container called Logo/ColorDefinitions. A logo and some colors are defined here globally. Which means these values are defined and adjusted in one place and are used by different components.
- !LowerThird01 and !LowerThird02 are two similar graphics for the lower third part of the screen.
- Standing offers a small table that appears somewhere in the upper right corner.
- FullscreenFreeText provides an information panel in the middle of the screen.
- Table shows a table also in the middle of the screen.
We will ignore the VideoContainer because this is for demo purposes.
Since Logo/ColorDefinitions defines virtually project wide global properties, this job can perfectly be handled by Project Data.
The other components all contain graphics we wanna show on screen. So we will refactor them to become Templates. Let's have a closer look: !LowerThird01 and !LowerThird02 appear at the bottom of the screen. Standing appears at the top, FullscreenFreeText and Table need most of the screen. We see that Standing and one of the Lower Thirds could be on screen at the same time, while the other ones need to appear exclusive. We take care of that in our design.
Step 2: Project Data
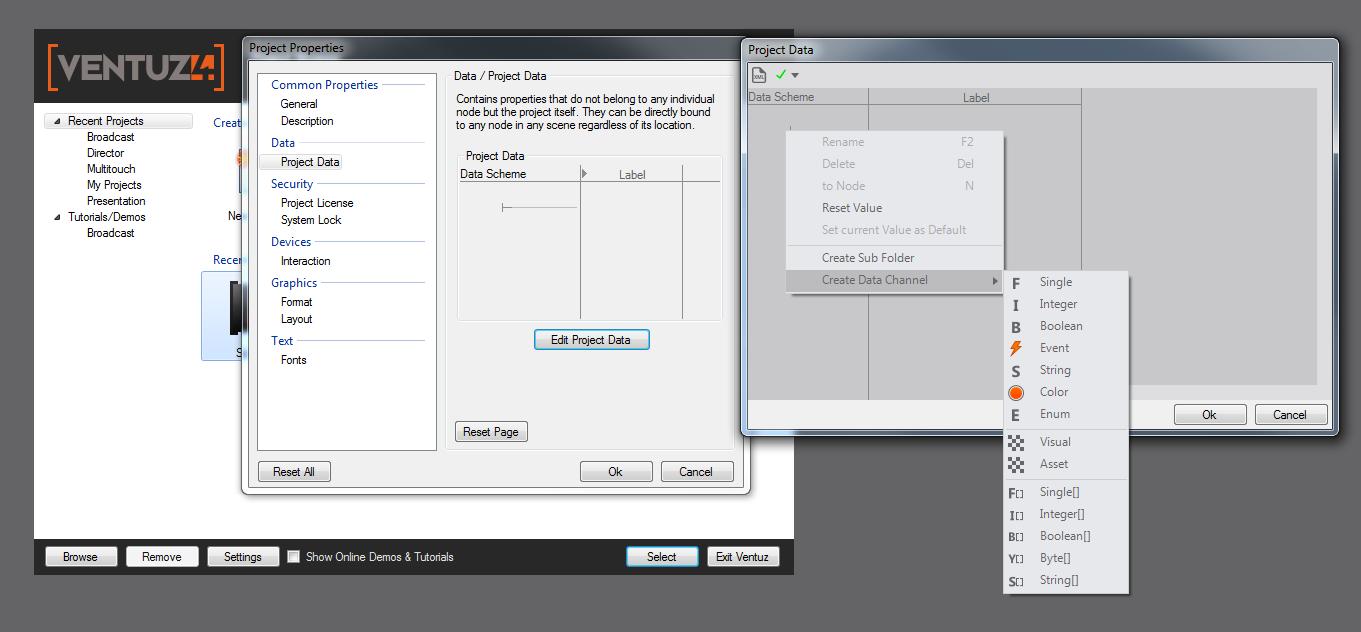
Let's start the actual refactoring. We start with replacing the Logo/ColorDefinitions Container by Project Data. For that, we need to create channels for our Project Data in the Project Properties. In the menu go to File -> Change Project. The project closes and the Project Browser appears.  click on your project and select Properties. In the Project Properties dialog, go to Project Data and
  click Edit Project Data. click on the small root symbol
  and under Create Data Channel select the desired type.
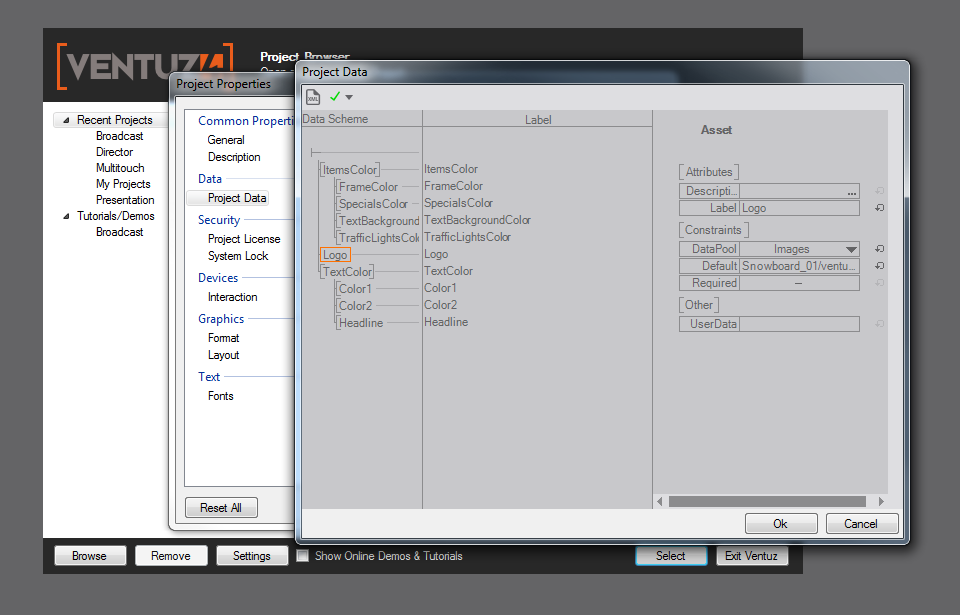
Logo/ColorDefinitions holds seven colors and one logo. So for the colors create data channels of type Color. For the logo choose Asset. Give all channels a proper name and label, and choose default values. For Logo set the DataPool to Images and set the default to ventuz://images/Snowboard_01/ventuz_logo_alpha.tif to have the same logo as used before.
You can create Subchannels to clear the appearance a bit. The result should look like this:
Finish the dialog and load your project again. Press SHIFT+F12 to open the Project Data Window and have a look at the created channels.
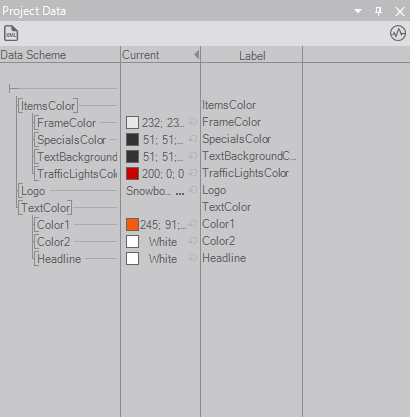
This Project Data replaces our Logo/ColorDefinitions Container - which now we don't need anymore - and every Property that was bound to it will be bound to the Project Data later. Go to the Hierarchy Container and delete the Logo/ColorDefinitions Container.
Step 3: Lower Thirds
Next step is to make the graphic components into Templates, starting with the Lower Thirds.
Inside the project, create a new empty scene. Move back to the original scene and click on the Container called !LowerThird01. Press STRG+C to make a copy, move to the empty scene and press STRG+V to insert the container. Notice that Ventuz changes the name to LowerThird02, so rename it to LowerThird01 to avoid confusion. In the Content Editor, delete the Keys and the Scene Event that were automatically copied too.
Now re-establish the former bindings, lost by discarding the old Logo/ColorDefinitions Container, by binding the properties to our new Project Data Channels. This works like any other Binding. click on the !LowerThird01 Container, click and hold the name of the desired property and drag it to the name of the appropriate data channel inside the Project Data Window. A purple dot indicates that the property is bound to the Project Data. Do that for all the properties of this container that were bound to Logo/ColorDefinitions before.
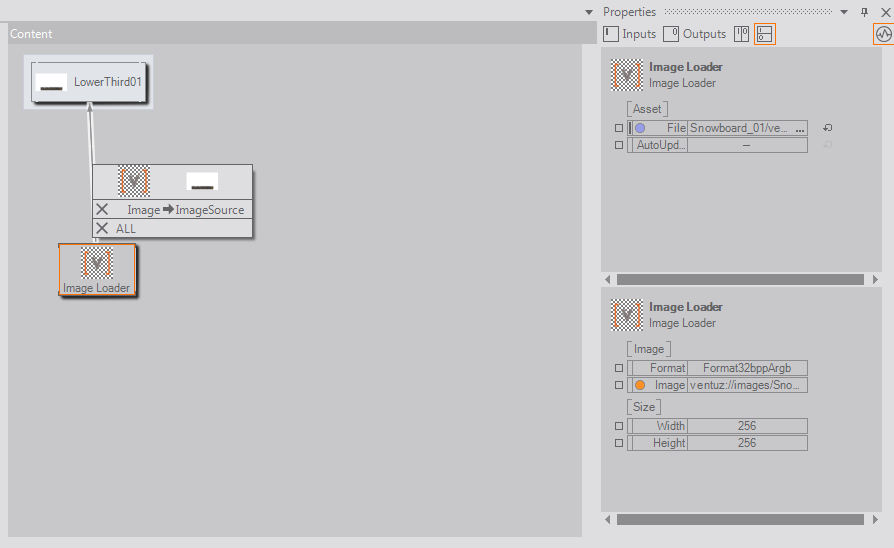
Binding the logo needs some extra attention. The !LowerThird01 Container has been designed to receive an image, so we can not bind it directly to our Project Data. Instead take an Image Loader and bind the File Property to the Project Data Channel called Logo. Then bind the outputted image of the image loader to the according input of !LowerThird01.
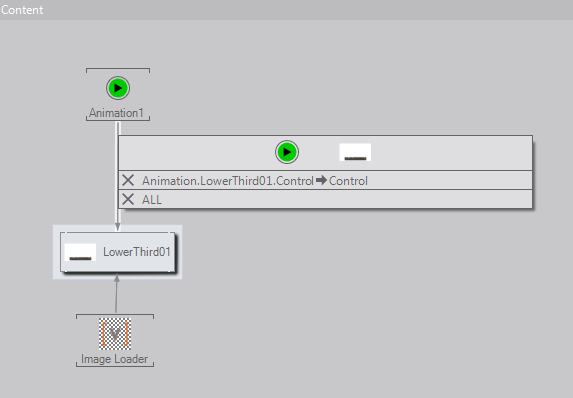
Now we take care of the animation. To make things easy, we leave the animation inside the container untouched and use the mechanism of Nested Animations. This means another animation controls the animation inside the container. Therefor we need to expose the Control property of the original animation. Do that by moving into the !LowerThird01 Container, select the animation called Insert01_MainAvi from the Content Editor and click on the small box next to the property called Control. The box should turn green. Now move out of the container, add a new Keyframe Animation node to the Content Editor and bind the newly exposed Control property of the !LowerThird01 Container to this node.
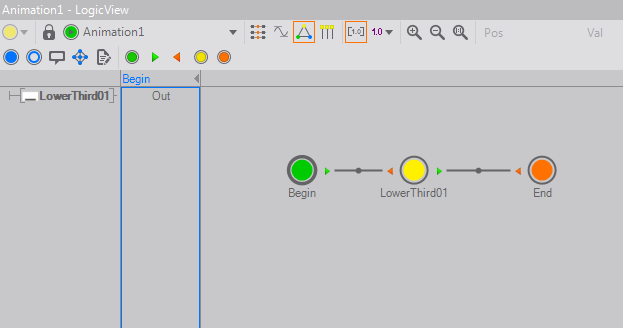
Go to the Logic View of the new animation and add three states, one of them being a Present State. Then move to the Time View and set up the animation so it looks right, respectively as in the original scene.

Next open the Scene Data Window by pressing F12 and bind the Control property of our new animation to the Scene Data. Do that by selecting the Animation node, click and hold the Control Property and drag it to the Scene Data Window. release when the label turns green. If done correctly, the icon of the animation node turns yellow and the Control property is decorated with a light blue dot.
Most Templates have some data that should be adjustable inside the Director. Add this data to the Data View. The procedure can be read under Data View and UserManual/HowTo/HowToBuildATemplate#Step3:TemplateData.
Finish with adding a Thumbnail as explained here: UserManual/HowTo/HowToBuildATemplate#Step5:Thumbnails.
This Template is now ready for use in the Director. You can save the file, load it in the Director and test it.
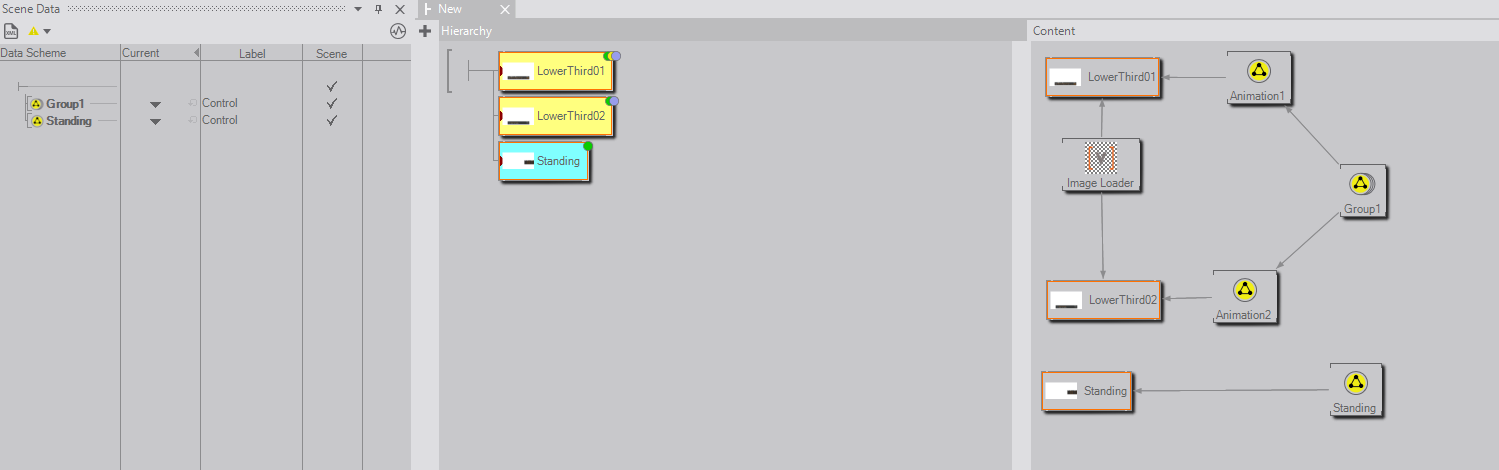
Now add the second LowerThird to your scene. Since !LowerThird02 is very similar to !LowerThird01 just repeat the steps above to add !LowerThird02 to your scene.
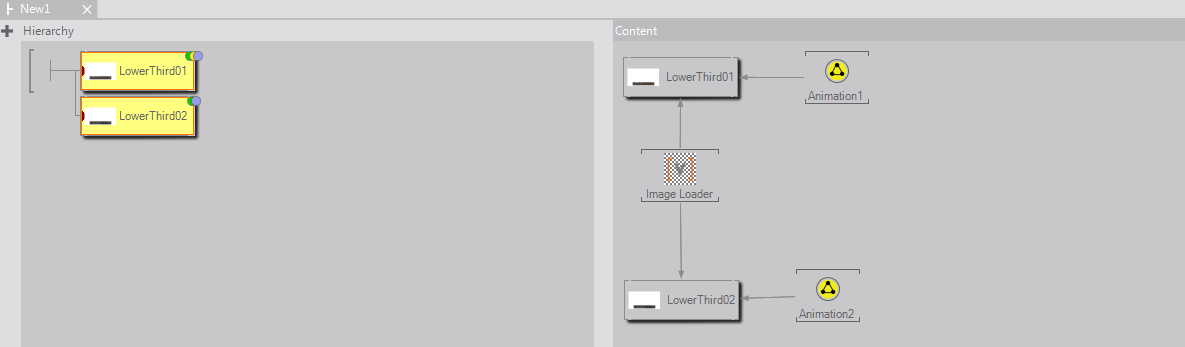
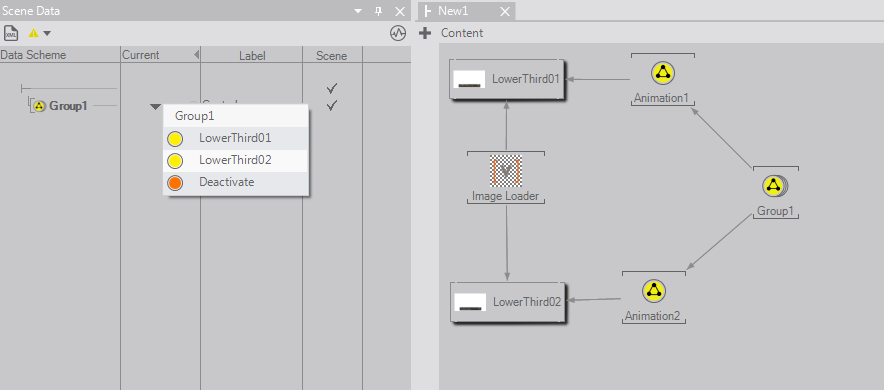
If you do it as in the screenshot above, you can put both Lower Thirds on air at the same time and they will overlap. In Step 1 we found out that we do not want this to happen. So what we do is make them exclusive by using an Animation Group Node.
Go to the Scene Data Editor and delete the two animation data channels by click and choose Delete from the context menu. Now add an Animation Group Node to the scene and bind the Control properties of the two animations to it. Lastly add the Control property of the Animation Group to the Scene Data. Have a look at the Scene Data Editor. Now one of the two Lower Thirds can be chosen, but not both at the same time.
Step 4: Standing
Take the Standing Container and copy it to the same scene as the Lower Thirds. Converting still follows the same approach.
- Bind the desired properties to the appropriate Project Data Channels
- Expose the Control of the animation called ListAnimation in the container.
- Add a new Keyframe Animation and bind the Standing to it.
- Fill the new animation with logic to behave as required.
- Add the animation control to the Scene Data.
- Add desired properties to the Template Data.
- Create Thumbnails
As said in Step 1 we will allow the Standing to be on screen together with one of the Lower Thirds. So in contrast to the Lower Thirds, simply adding the animation to the Scene Data leads to the behaviour that we want.
Step 5: Fullscreen Free Text
If you managed to follow the HowTo so far, converting the FullscreenFreeText Container should be easy. Only one thing we do differently, is to put the FullscreenFreeText in a new scene since no element should be on screen at the same time anyway. This way it is easy to separate the FullscreenFreeText but still let the Lower Thirds and the Standing share the screen.
Step 6: Table
The Table has a new problem in it. In the original scene, instead of just taking the table on and off screen, you can change it to show a second set of data. To achieve such a behaviour, a Template can have multiple takes.
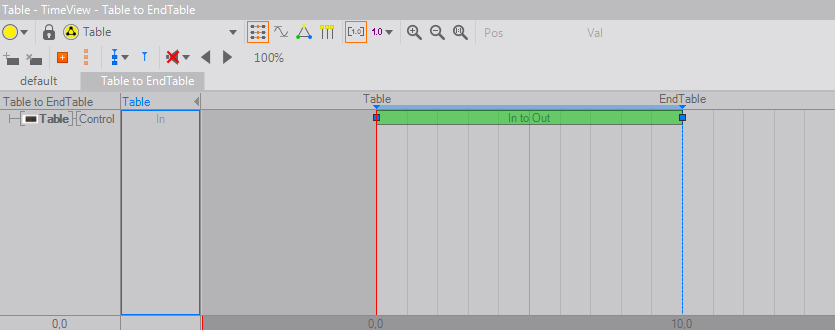
Copy the Table to a new scene and follow the same steps as with the other graphic elements. What is different is the animation logic. Instead of adding a begin, a present and a end state, add a state of the type normal and another end state as shown in the screenshot.
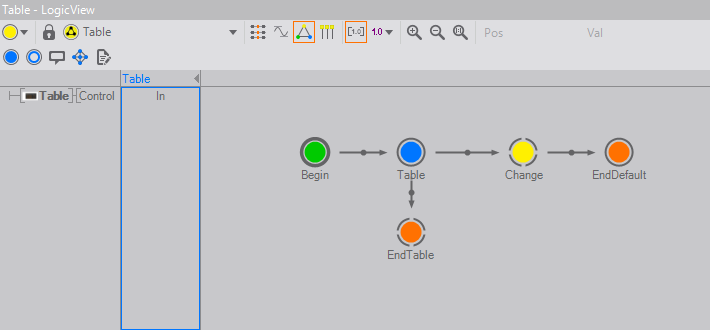
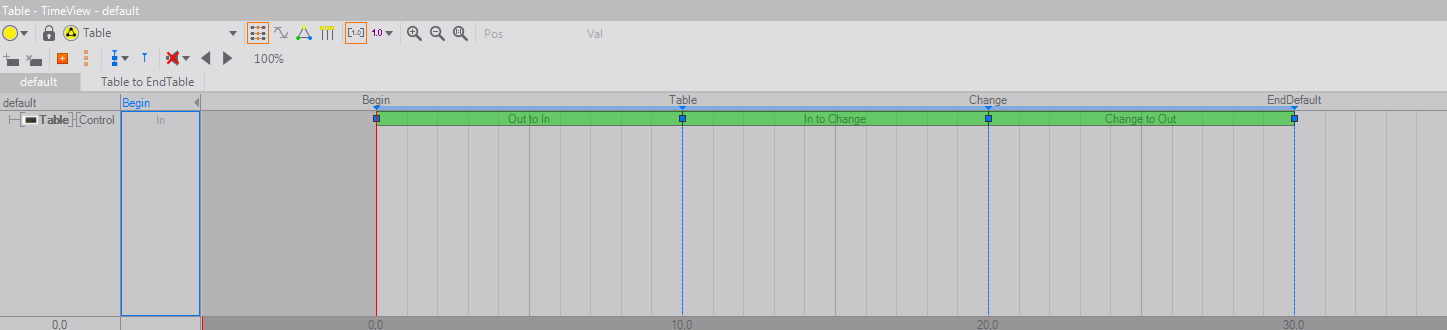
Adding states on the way to the present state leads to a so called Multi-take Template. The path from the normal state called Table to the state called EndTable is for taking the Table off air with a proper animation when not doing all takes of the Template. Of course this path needs to be animated in the Time View like any other. The screenshot shows the different slices.
Conclusion
The result of this HowTo is a project with three scenes. One containing the Lower Thirds and the Standing, one the Fullscreen Free Text and one the Table. Each of it hosts graphic elements of the original scene now acting as Templates for the Director. We designed the project to follow some restrictions we examined in Step 1.
The project has Project Data holding the global data initially managed by the Logo/ColorDefinitions Container.
Notice that at some points it is possible to find a slightly different solution. For example the Image Loader or the additional Keyframe Animations could be integrated in the containers. Or you could animate both Lower Thirds inside one Keyframe Animation. In this HowTo we have just gone the most straight forward way and tried to touch the existing containers as less as possible to keep things easy.