How To use the E2E with UnrealMGPU: , Cluster:
Table of Contents
This How To will guide you through the Unreal Integration - E2E / "Engine to Engine" and send some very basic data from Ventuz to Unreal.
Introduction
Please note that the current version of the Ventuz <-> Unreal Engine communication may have some synchronization issues which are caused by the Unreal Engine API. Epic is aware of this problem and will improve its API within the next few months. See limitations for further details.
With this How To you will learn the basics of how to use the "Engine to Engine" integration with Ventuz. We will learn about the available Nodes from within Ventuz, see how to create and use E2E Blueprint Nodes on the Unreal side and create a basic Data In/Out scenario. There are several ways to use and run the Unreal Engine. For creating in Unreal and Ventuz in parallel use the Live Link. But Ventuz is also capable of running and managing a compiled version of your Unreal project in the background or you can import your .uproject file easily to your Ventuz Scene. Even several instances of Unreal can work simultaneously with the Ventuz Designer or the Ventuz Runtime. Please be aware of the limitations in Ventuz 6.9.0 and Unreal 4.27.
Requirements
The VentuzE2E integration works with Ventuz version 6.9 and later. It is recommended that you install the latest version of Ventuz. You will need to install Unreal Engine by using the Epic Games Launcher. The E2EIntegration is compatible with Unreal Engine 4.27 or later. The latest Unreal Plugin for Ventuz can be found here: Ventuz Downloads
Preparations
- Download and install Ventuz 6.9 or later.
- Download and install the latest Unreal Engine. (Supported up to 5.0)
- In the next step we will create a new Project and copy the Ventuz Plugin for Unreal.
Basic Setup
Let's create a basic setup to get started with the E2E Integration using a Live Link. To do so, we need an existing UnReal project where we can put the plugin. If you have a project, follow the directions here to put the plugin into your project here. If you dont have a existing project follow the next steps start the Unreal Engine Editor and create one.
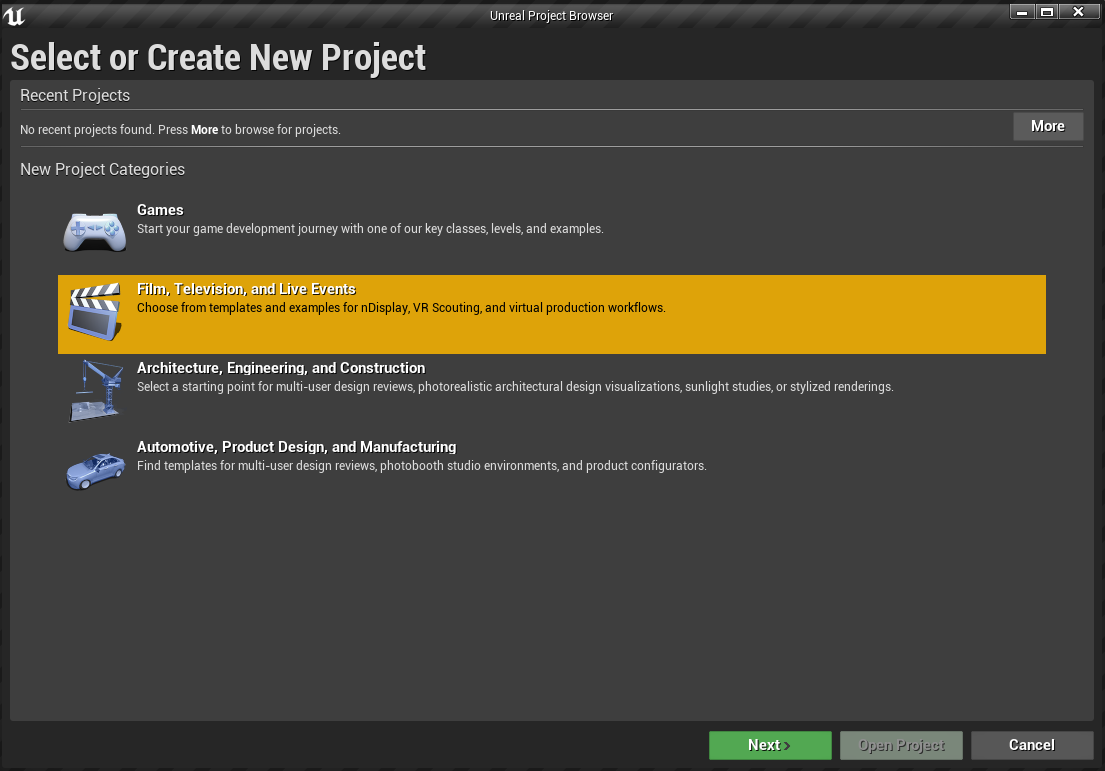
Create a new Project and use the Film, Television, and Live Events Project Category and click Next.
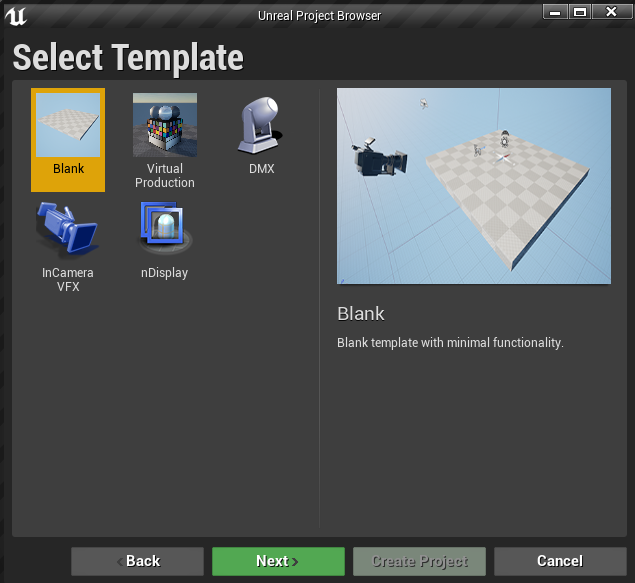
Select the Blank Template.
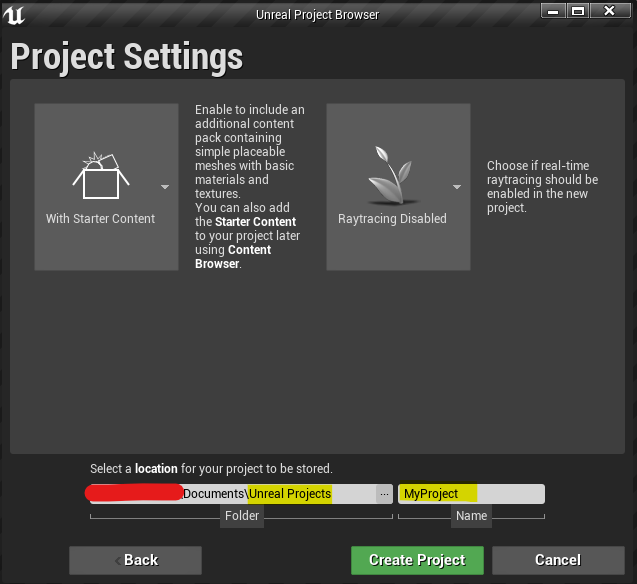
In Project Settings, choose "With Starter Content" and "Raytracing Disabled"; these settings can be changed later.
Set a location for your project to be saved and choose the project name. In this example, "UnrealVentuz" is used as the as project name.
Click the Create Project button and let the Unreal Editor create and start the new Project. The first load will take some time to build the Starter Content that we included, subsiquent loads should be much faster.
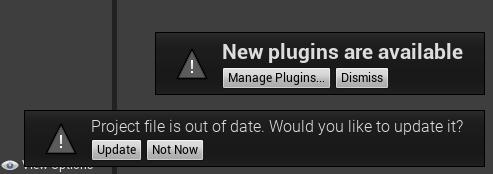
This will create a new project in the specified location. When Unreal starts, there may be several messages shown. If displayed, click Dismiss the "New plugins detected" notification. If displayed, click Update on the Out of date project notification.
Inserting the Plugin
The Ventuz Plugin must be copied to the each Unreal project folder so it can be be used in Ventuz.
Ensure you have the latest version of the Unreal Plugin downloaded from Ventuz Downloads.
Open your Unreal project folder. Look for a folder called Plugins. If it's not there, it will need to be manually created . Copy and Paste the contents of the downloaded Ventuz Plugin to the Plugins folder.
The structure would look like following:
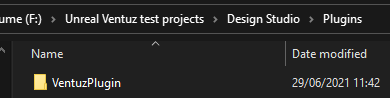
Restart your Unreal Editor. When Unreal Engine starts Project Browser will contain a Recent Projects category. You can doubleclick the recent project or click the project to select it and click Open Project.
As the project opens, a notification that a new plugin was found may be present. To confirm that the plugin VentuzPlugin has been loaded successfully the Plugin Browser inside of the Unreal Editor can be used.
click Edit -> Plugins to open the Plugins Browser and use the Searchbar to find the VentuzPlugin. The following Screenshot is representation of the installed Plugin.

If Ventuz E2E Plugin is present, it has been succesfully loaded, though the version number may be different.
Ensure that the Enabled checkbox is checked.
The Plugin Browser can be closed.
If the VentuzPlugin is not listed, check for the correct Project folder Location - remember to create a Plugins directory inside the Project and copy the Unzipped VentuzPlugins Folder into it.
Unreal Editor and Project Settings
To maximize compatibilty between Ventuz and Unreal, some adjustments need to be made in Unreal's Project Settings.
Project Settings
The Ventuz plugin will automatically apply some changes to Unreal when it is enabled/loaded.
Manditory Settings
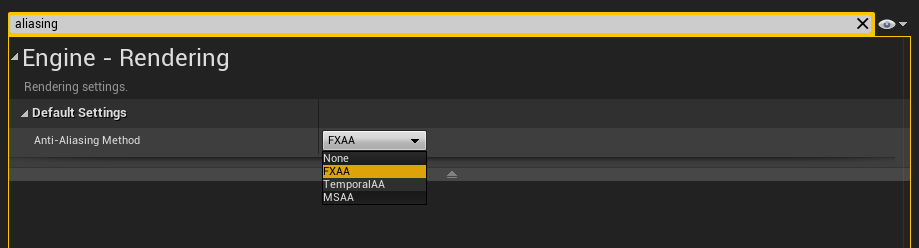
Anti-Aliasing:
click Edit -> Project Settings to open the Project Settings window. Use the Searchbar to find Anti-Aliasing. Set the Method to FXAA.
Optional Settings
If you encounter issues with the Camera not moving synchronously, or Unreal stalls when the Editor is out of focus, check for the following settings:
Editor Settings
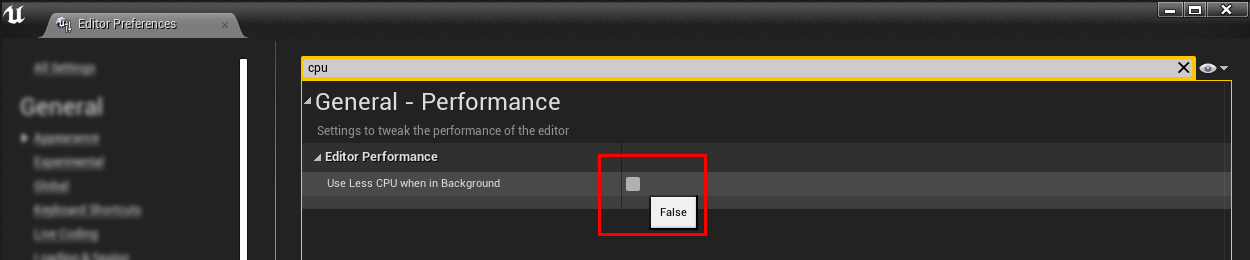
In recent versions of Unreal, the following option may not be found.
click Edit-> Editor Preferences to open the Project Settings window. Use the Searchbar to find CPU performance settings. Disable "Use Less CPU in Background" in the Editor Preferences to avoid the situation where the frame rate in Unreal drops whenever the Unreal Editor loses application focus.
Project Settings
GameMode:
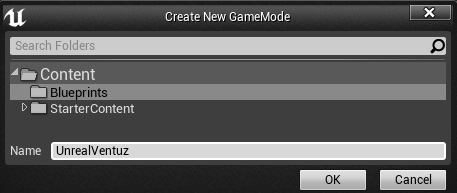
Use the Searchbar and find default. This will open the default settings for the project or look under Project - Maps & Modes - Default Modes - Selected Game Mode - Default Pawn Class and set SpectatorPawn. If it is greyed out, you need to create your own Default GameMode. To do so you click the + next to the Default GameMode and use UnrealVentuz as new GameMode name. click ok to create a new GameMode.
Now you should be able to select the SpectatorPawn as Default Pawn Class to avoid problems with controlling the Unreal Camera from within Ventuz.
Local Player Class:
In order to have full control over the camera settings - in particular to be able to set the off-center cameras required for some projection scenarios - you'll need to set the Local Player Class to the one provided by the Ventuz plugin called VentuzLocalPlayer. Without this setting the ability to control the Unreal camera will be limited. After changing the Local Player Class you may have to restart the Unreal Editor for changes to take effect.
Use the Searchbar to find local player class or navigate to Engine - General Settings - Default Classes - Local Player Class and select VentuzLocalPlayer from the drop down list.

Close the Project Settings and your Project is now ready to be linked with Ventuz.
Live Link Unreal and Ventuz
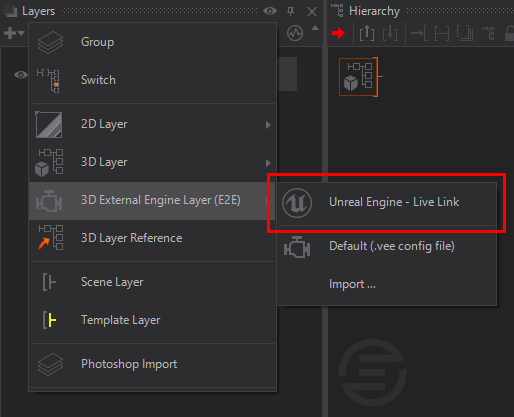
Now it is time to check if the Live Link between Unreal and Ventuz has been established. Open an existing Ventuz project and scene, or create a new one. In the Layer Editor add a new E2E Live Link Layer.
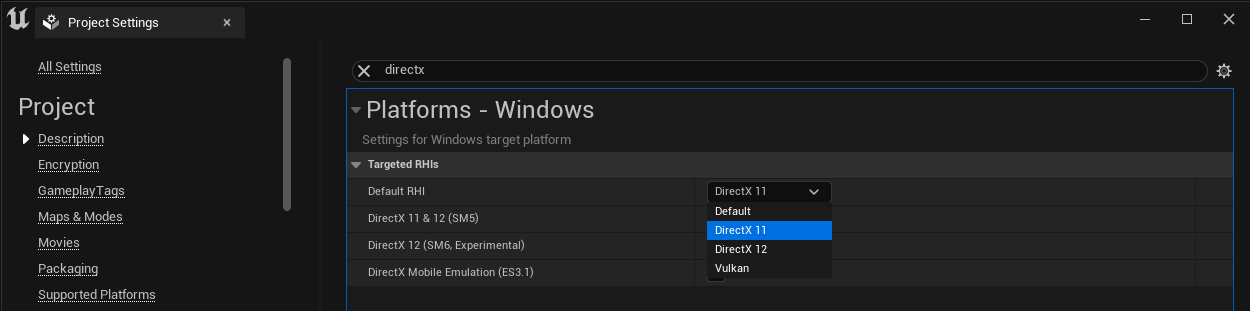
In Unreal version 5, its render settings have DirectX 12 selected by default. Unreal's API does not support the texture sharing features needed to work with applications like Ventuz. You may notice that you have control of your Unreal Project from Ventuz, but not be able to see its rendered output.
To fix this, in the Unreal Project Settings window, use the Searchbar to find the settings for DirectX. In the dropdown, select DirectX 11 and restart Unreal.
To start seeing your Unreal scene rendered in Ventuz, click the Play button in the Unreal Editor and you should see it immediately rendering in Ventuz!
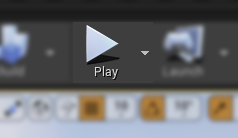
As soon as play is pressed, you should have an instant connection to your running Unreal Instance and see the Unreal Rendering inside the Ventuz Render Window. ha
If you have configured Unreal correctly, the Unreal Camera is now controlled by Ventuz. To manipulate the Ventuz Camera either create a Ventuz Camera Node inside the E2E Live Link Layer or use the Ventuz Free Flight Camera.
The E2E Live Link Layer behaves like a normal Ventuz 3D Layer and can be used the same way as a traditional Ventuz 3D Layer.
Populating the contents of Unreal Layers in Ventuz using Ventuz Nodes, Unreal Rendering is in the background. Its depth is composited using Ventuz Elements.
Activate the Free Flight mode by pressing TAB and navigate the camera to have nice perspective view of the checkerboard surface - while in the free flight mode press ctrl + insert to create a new camera from the actual position/view. This will create a new camera inside the E2E Live Link Layer and automaticaly activate it if you disable the Free Flight mode with TAB.
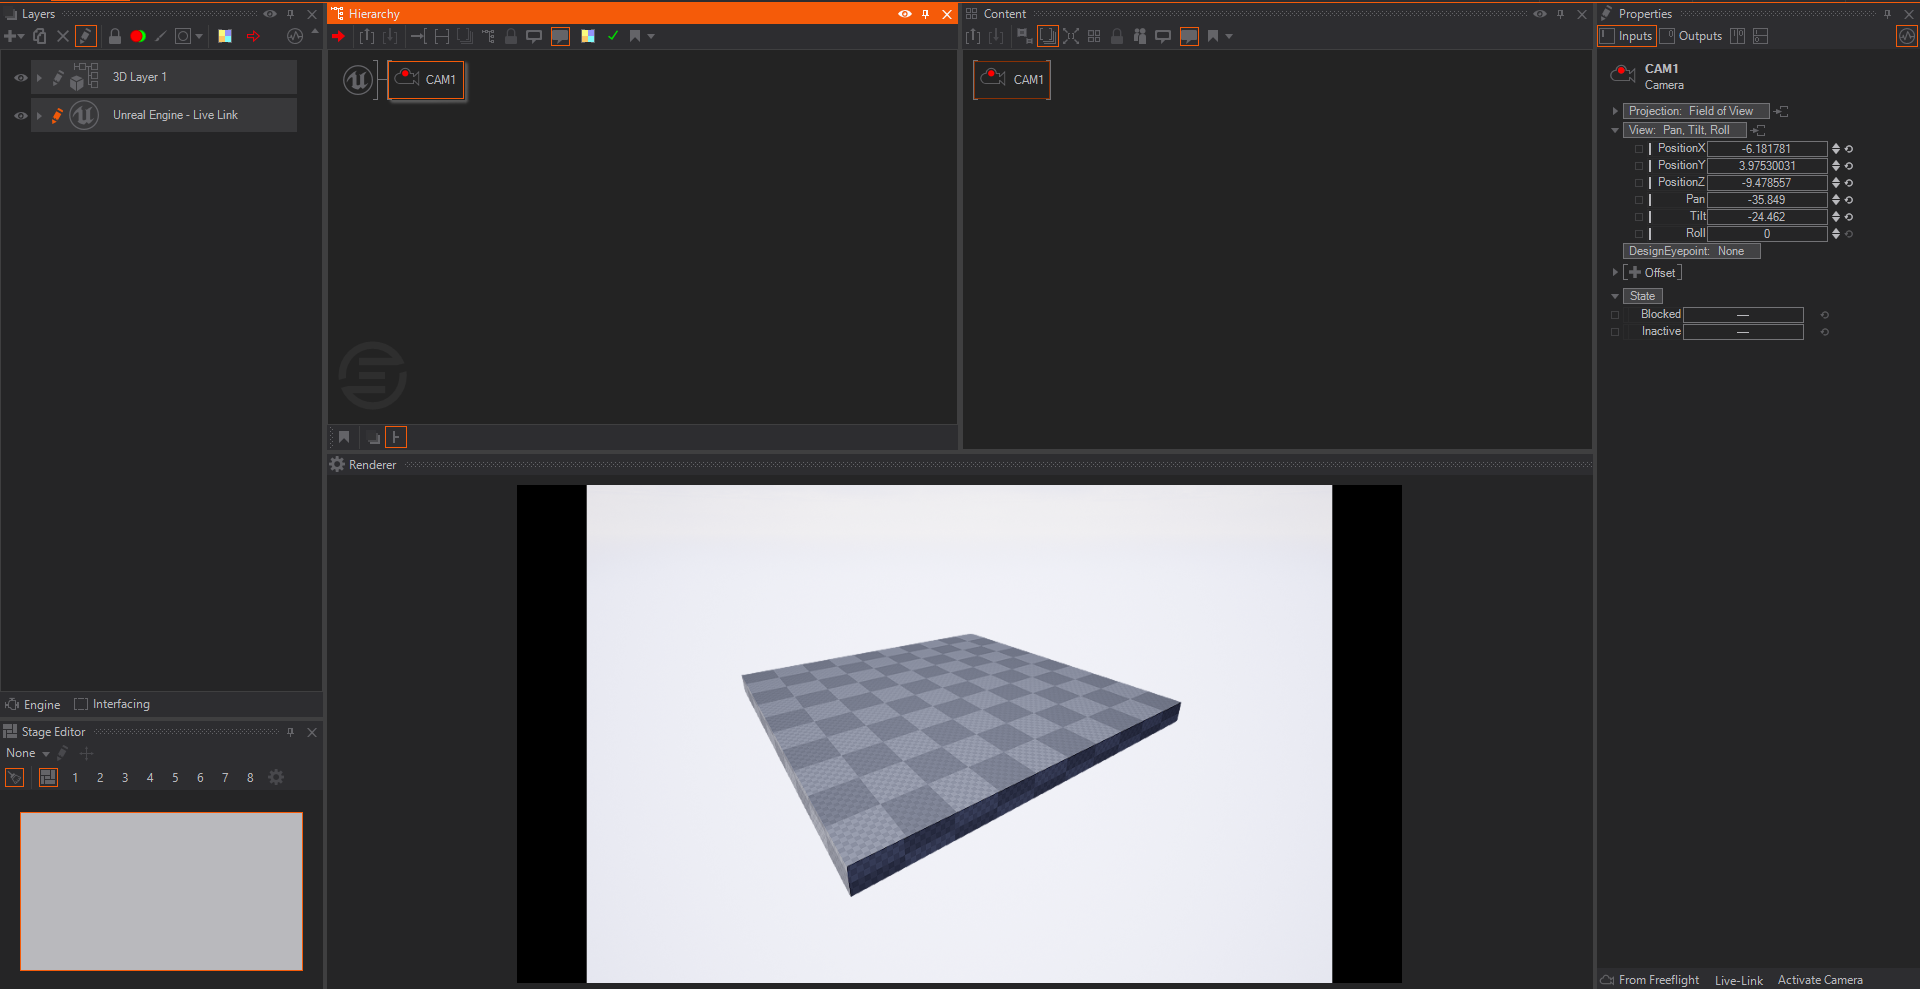
From here you can start building your Ventuz and Unreal content side by side and use all the Ventuz specific E2E Nodes and Unreal E2E Blueprint Nodes to communicate bidirectionally. click Stop to stop the running Unreal Engine for now.
Working with the E2E with Live Link
The very first example of the Engine2Engine usage will be to send Data from Ventuz to Unreal. You can make use of the E2E Data Out Node in this case. We will send data, in this case the position values of a mover, to Unreal to move an Actor in Unreal.
On the Ventuz side, if not done already, create a E2E Live Link Layer. Select the E2E Live Link Layer and create a mover and a E2E Data Out Node in the Content Editor.
Add a float Property for the E2E Data Out Node by click the icon in front of Fields and name it PosX. Connect the PosX to the mover as shown below.
With this Node combination, an Actor inside of Unreal can be animated.
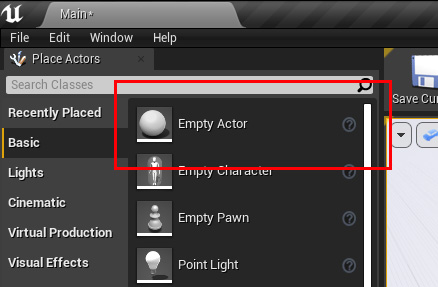
In Unreal, create a simple Empty Actor by drag&drop the Empty Actor into our 3D View.
The Actor is already selected and we click Add a Blueprint.
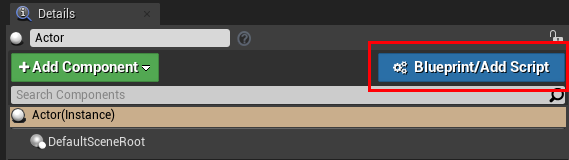
The default name for the Actor will work fine, just create the blueprint by click the green Select button.
This will open the Blue Print Editor.
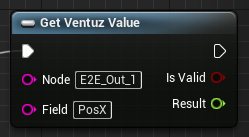
click the Event Graph to switch to the Event Graph view and create a Get Ventuz Value Blueprint Node.
Scroll down to the Event Tick Blueprint Node and drag&drop a connector from the Exec pin to create a new Blueprint Node.
Type in get ventuz value and select it to create the Node.
Type in the Ventuz Node Name to the Blueprint Node field - the default name of the Node in Ventuz is E2E_Out_1.
Type in PosX in Field for this exercise. The Field name itself has to match the Property Name we used on the Ventuz Side.
click in the Blueprint Graph and use the Searchfield to find and create the SetActorRelativeLocation Blueprint Node.
As Ventuz and Unreal's Engines use different coordinate systems, some Blueprint Nodes will need to be used to make the Engine units compatible; Otherwise the PosX values sent from Ventuz will not transform the Actor in Unreal. To accomplish this, this the Ventuz UE4 Position Blueprint Node is used. This is applicable for communication both from Ventuz to Unreal, but from Unreal to Ventuz as well, but the appropriate Blueprint Node will need to be used based on the direction of communication for converting the coordinate systems Ventuz <-> Unreal
Below is an example list of available Blueprint Nodes for the Blueprint editor to be used.
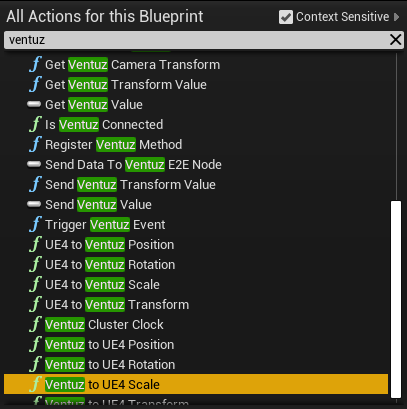
click in the Blueprint Node Editor, use the Searchfield to find and create the Ventuz to UE4 Position Blueprint Node.
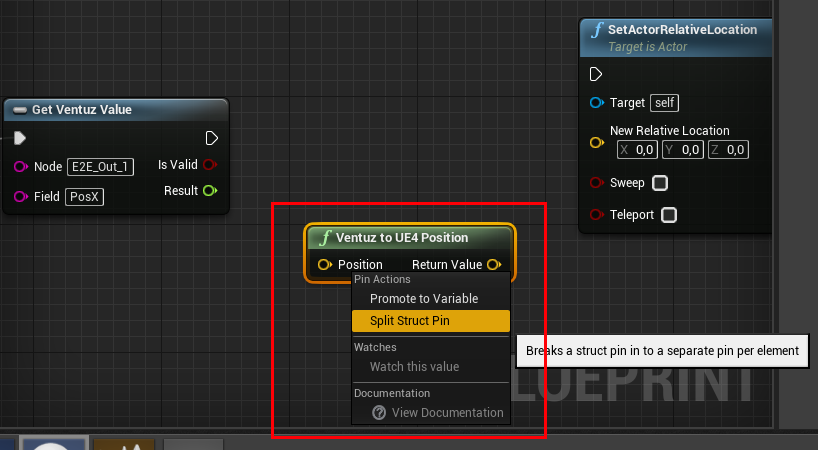
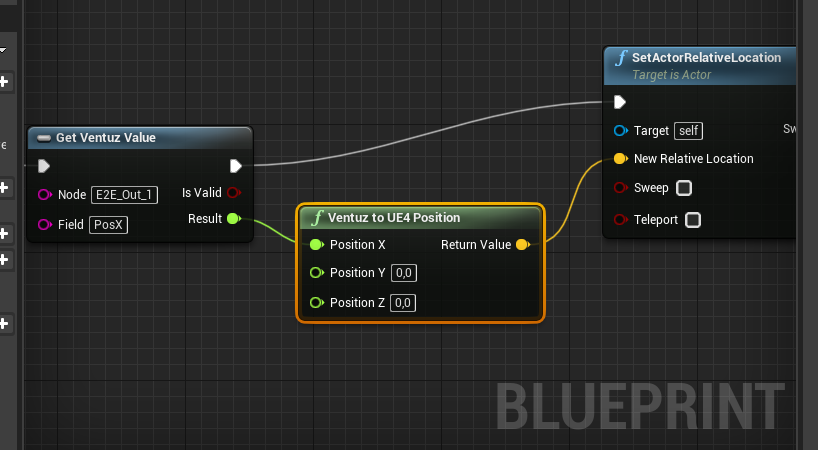
click the Position and select Split Struct Pin. By doing so the Position will be split into seperate X/Y/Z Pin inputs. The layout of the created blueprint Nodes should look similar to the picture below:
Now create the bindings for the exec and from Get Ventuz Value - Result to the Ventuz to UE4 Position - Positon X Input.
Bind the Ventuz to UE4 Position - Return Value to the SetActorRelativeLocation - New Relative Location input pin.
The complete bindings should similar to te picture below:
A link between Ventuz and Unreal to send the PosX values Unreal's Actor has been created.
When Play is pressed in Unreal the Sphere like Actor will disappear.
The Actor previously created will act as anchor or a null that can be used to control other Actors.
To use this anchor Actor, select the Actor_Blueprint in the World Outliner or click the Actor inside the Unreal Editor Renderer. click Add Component from the Details window and choose a Cube.

Use the Transformation Manipulator in Unreal to move the Cube above the surface of the floor.
When Play is pressed in Unreal, the Cube will be moving in real time based on values received from Ventuz.
As a Mover was connected to the E2E_Out_1 Node in the steps above, Cube is moving on its own.
When the Mover property values from inside Ventuz are modified, the changes will be reflected in real time in Unreal.
Sending an Alpha Channel to Ventuz
By default Unreal is not able to render an alpha channel and instead only supports a Color Buffer without transparency. To get around that behavior and use the Unreal rendering in your Ventuz Layer Composition, one of two things can be done: use the Depth Keyer or enable experimental alpha usage in Unreal.
To use the experimental alpha feature; In Unreal, open Project Settings and use the Searchbar to find alpha settings.
Change the Enable alpha channel support in post processing (experimental). setting to Allow through tonemapper.
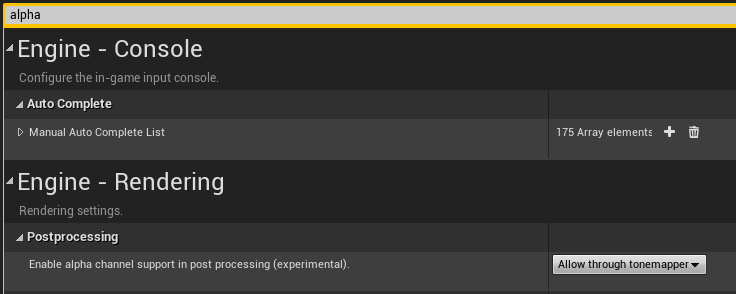
Note that this setting is experimental and the features will be limited in controlling the alpha channel in Unreal. It is possible better results may be achieved when using the Depth Keyer approach.
Conclusion
This is an example of using the Unreal Live link from Ventuz to send Position Data by using the E2E Data Output Node. There are many E2E Nodes that Ventuz offers that can be found in the E2E Blueprint Nodes Overview - or by have a look into the Tool Box in Ventuz.
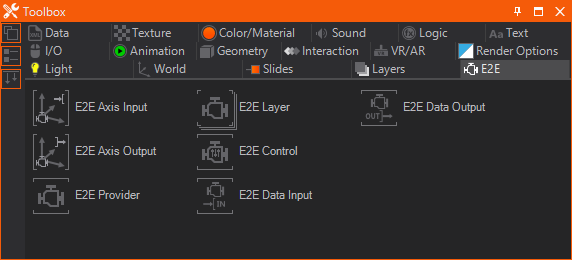
Ventuz has bidirectional communication with Unreal Engine, therefore data can be sent from Unreal to Ventuz as well.
The possibilities are endless. It is even possible to have Camera Tracking working in Unreal from Ventuz.
Limitations
While being highly flexible, the Unreal Integration also comes with some limitations. Keep these things in mind while designing an application using the integration:
- Transparent Unreal Objects: As transparent objects need to be rendered last to function properly, it is not possible to place Ventuz behind half-transparent Unreal Objects. This includes glass, smoke, light cones etc.
- Alpha/Keying: Unreal does not preserve any alpha information in its color buffer. So it is not possible to alpha blend an Unreal rendering onto another Ventuz Layer or to externally key a live video signal "into" the Unreal rendering. For virtual sets specifically this means: the host of a show cannot be keyed behind an Unreal Object - e.g. a table. Thus, occluding objects must be rendered in Ventuz.
- Synchronization: Sometimes switching to full screen in Ventuz causes a one frame delay between the two engines. Rarely this desynchronization temporarily also happens without going into fullscreen - appearing more often when Ventuz is under heavy performance load.
- Reflections, Shadows etc.: Keep in mind that Ventuz has no further information about the Unreal World, except how it looks from the camera perspective. And Unreal doesn't even have these information from Ventuz while rendering. So reflections, shadows and anything that needs rendering from another perspective is harder to implement, while still possible.
Due to the sync issues mentioned above it is not advised to use the Unreal Integration in a MGPU or Cluster Scenario!
The Unreal instance and Ventuz have to run on the same GPU. For Laptops with integrated GPU this can cause crashes, and might need the iGPU to be deactivated.