This How To describes and goes through the steps to the HTC-Vive, Oculus Quest, and/or Oculus Rift working with Ventuz.
Ventuz has built-in support for Head Mounted Displays (HMD), including the HTC-Vive, Oculus Quest and Oculus Rift. VR controllers can also be used to interact with Ventuz scenes using the standard Ventuz Touch Nodes.
The minimum System Requirements for Ventuz must be met.
Ventuz uses OpenVR managed on each machine by Steam.
Depending on which HMD being used, additional software may be needed from the manufacturer of the HMD.
| GPU | NVidia GTX 970 / AMD R9 290 or higher |
|---|---|
| CPU | Intel i5-4590 or higher |
| RAM | 8GB + |
| Video Output | Compatible HDMI 1.3 |
| USB Ports | 3x USB 3.0 1x USB 2.0 |
| OS | Windows 10 64bit |
| Windows Mixed Reality (60fps) | Windows Mixed Reality Ultra (90fps) | |
|---|---|---|
| GPU | Intel HD Graphics 620 or greater GPU with DX12 support | NVidia GTX 1050/AMD RX 460 or greater |
| CPU | Intel Core i5 (7th generation), Intel Hyper-Threading, AVX | Intel Core i5 (6th generation) or 4 or more cores, AVX |
| RAM | 8GB+ DDR3 | |
| Video Output | 1x Compatible HDMI 1.4 or Displayport 1.2 | |
| USB Ports | 1x USB 3.0 and Bluetooth or 2x USB | |
| OS | Windows 10 | |
| GPU | NVidia GTX 1060 / AMD RX 480 or higher |
|---|---|
| CPU | Intel i5-4590 or higher |
| RAM | 4GB + |
| Video Output | Compatible HDMI 1.4 or Displayport 1.2 |
| USB Ports | 1x USB 2.0 |
| OS | Windows 7 SP1 64bit |
Requirements are taken from the Official Sites of the HMD manufacturers, please check them regularly for any changes.
It is possible to test whether or not a machine is likely to support VR using different benchmark tools.
Occulus Rift and Rift S
Occulus Quest 1
HTC Vive
Valve Index
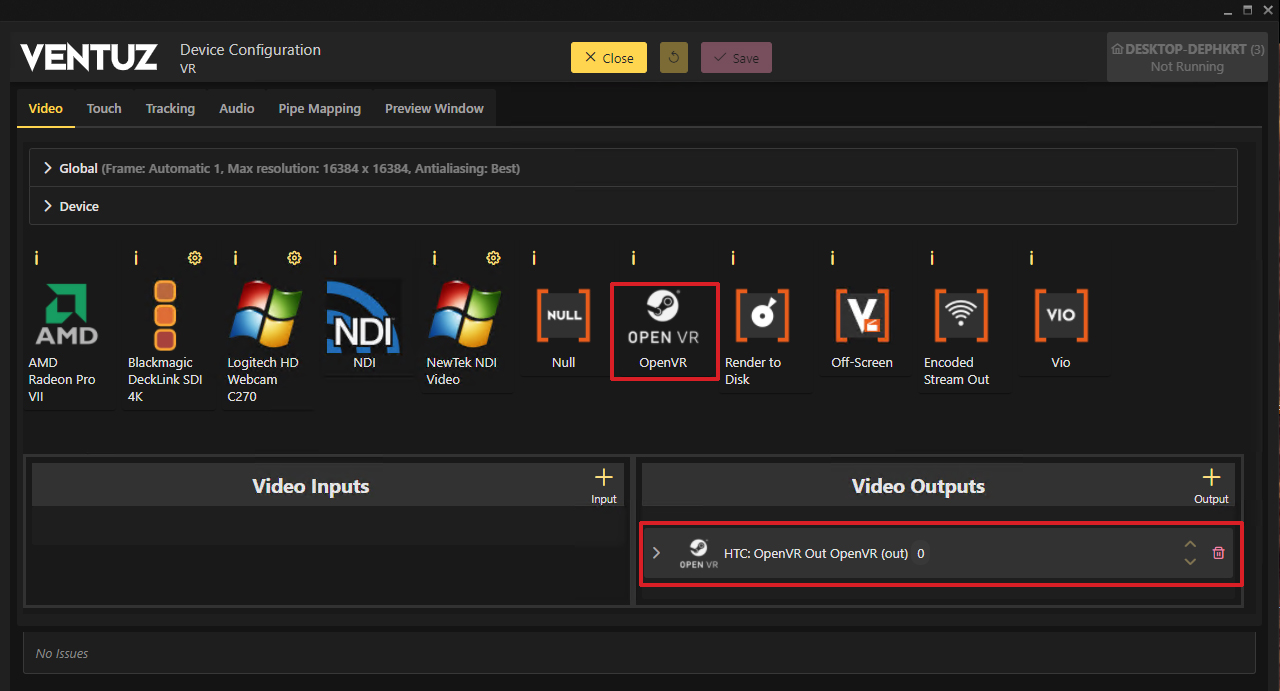
To be able to use Ventuz with any of the HMD, the HMD software must be installed and configured in their application before configuring them in Ventuz. All of the HMDs need Steam VR installed as Ventuz uses the OpenVR SDK to work.
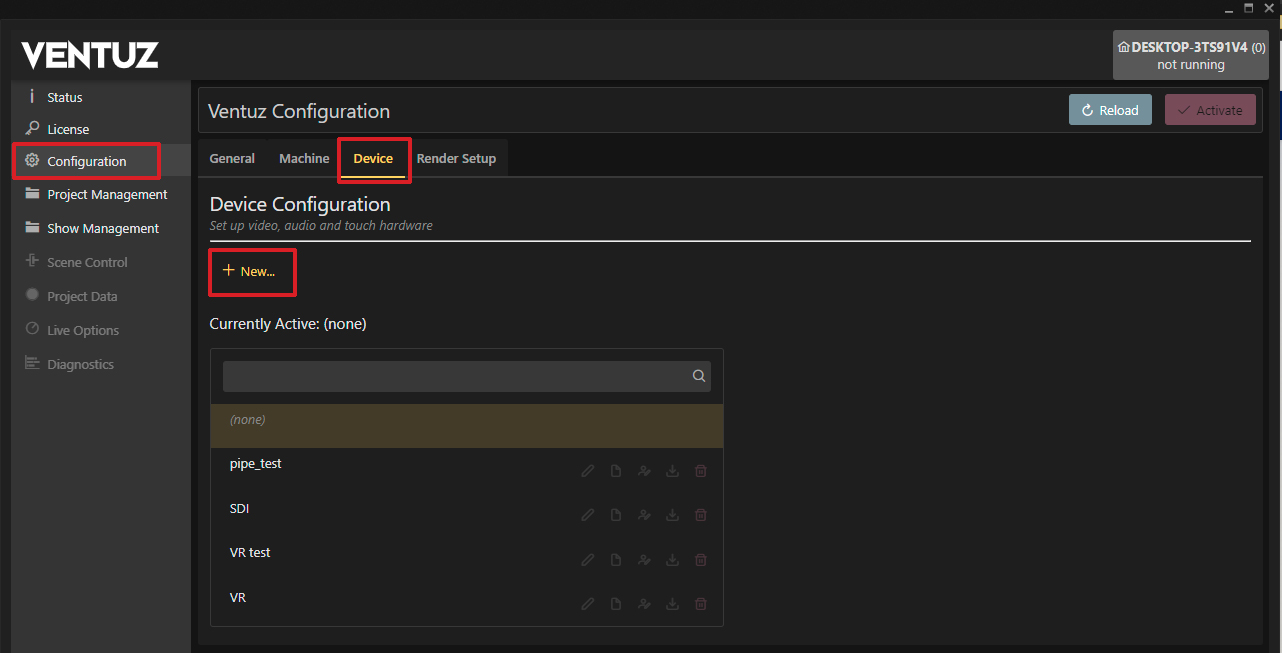
After the necessary steps have been followed above:
Several Nodes are available for use in the VR-Experience. All VR related nodes can be found in the Toolbox in the category VR/AR.
 | Tracked Device | This node can be configured to provide tracking information for connected HMD's, Controller and References |
|---|---|---|
| | Tracked HMD | This node provides the tracking information of a connected Head Mounted Display |
 | Tracked Vive | This node provides the tracking information and button presses of a connected HTC Vive Controller or Samsung Odyssey Controller |
 | Tracked Oculus | This node provides the tracking information and button presses of a connected Oculus Touch Controller |
 | Tracked Reference | This node provides the tracking information for all reference elements i.e HTC Vive Light Houses |
 | Draw Tracked Device | This node can be configured to provide the meshes for connected HMD's, Controller and References |
| | Draw HMD | This node provides the meshes of the connected Head Mounted Display |
 | Draw Vive | This node provides the meshes of the connected Oculus Touch Controller |
 | Draw Oculus | This node provides the meshes of the connected HTC Vive Controller |
 | Draw Odyssey Controller | This node provides the meshes of the connected Samsung Odyssey Controller |
 | Draw Reference | This node provides the meshes of the connected references i.e HTC Vive Light Houses |
 | Draw Touch Ray | This node draws the ray of the referenced controller regarding its Touch Method. |
By default, Ventuz uses the HMD's tracking information. The default Camera in Ventuz will react to the HMD's movement and orientation automatically.
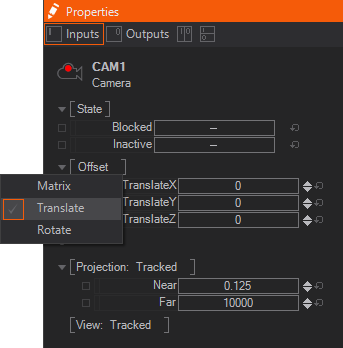
The Camera Node can be used to adjust settings such as Near and Far planes, to relocate the user in 3D Space or to set different offsets as required.
To use a Camera Node for VR:
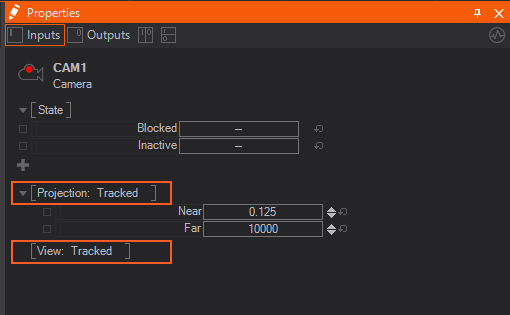
From here, the Camera properties can be adjusted for the VR-Camera. The camera position is directly in the center of the scene inside of the rotating "V". The Offset of the Camera must be set for the HMD to correctly view the scene.
If an Axis Node is used in front of your 3D Scene, Specular Reflections, Cubemaps, and so on, would look incorrect.
The HTC Vive and Oculus Touch supports controllers that can use the basic Ventuz Interaction Nodes to create immersive interaction in a VR Scene.
With VR Systems other than the HTC Vive or Oculus with Touch, the interaction will need to created using a Joystick Node.
In this example, the HTC VIVE controllers are used, the same can be achieved with the Oculus and the Oculus Touch controllers.
In order to add interaction in a Scene, the controllers are needed inside of the Scene.
If your second controller isnt working then you probably forgot to set the ID. The left Controller is usually ID 0 and the right ID 1
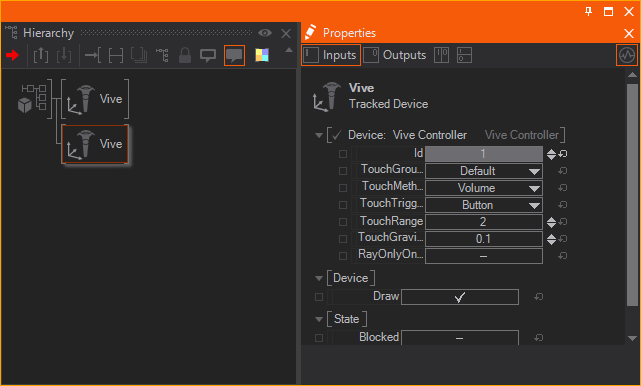
By changing the Touch properties, the Touch Behavior of the controller can be changed, including the Method of the Interaction, Trigger Button, length of the Touch Ray, or the Gravity that is affecting the Parabolic Touch Ray.
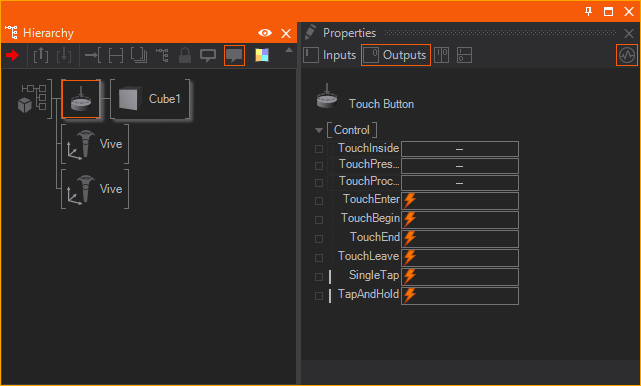
To interact with objects, an Object Based Interaction Node placed in front of the desired objects in your Hierarchy such as a Touch Button or Touch Transformation Node.
Stationary Virtual Reality may not be desired or interesting.
To enable a User to move around the 3D Ventuz Scene, the Touch Teleport Node is used.
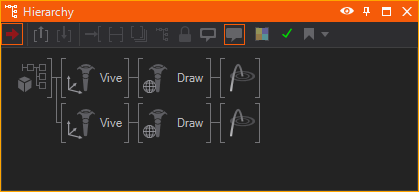
The appearance of the controllers can be changed. The Tracked Vive Controller Node draws the whole Controller and can be affected by a Material to apply textures or color the controller.
The Draw Vive Controller Node enables more finite control of the drawn controller by changing the controller mesh or by editing the existing controller mesh.
Place the Draw Vive Controller Node behind the Tracked Vive Controller Node
A Draw Touch Ray Node draws a Ray from the controller(s).
Use the same Id as the desired controller.
A Material can be placed in front of this node to customize its appearance.
When using a HMD in conjunction with a Previsualization Scene, there are some required changes to the configuration of Ventuz.
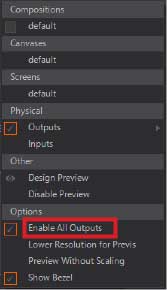
A Render Setup is needed to map the Previs to an output, otherwise the engine will not render to a HMD.
If the correct Device and Render configuration are loaded, the Previs scene should be displayed on the HMD.
Displaying content on the HMD can be achieved without a Render Setup; however, this leaves you with less control over your outputs. Ensure there is a Camera inside of your previs scene that is set to 'Tracked!'
If the Previs screens aren't rendered in the HMD, it's possible that there isn't a camera looking in the direction of the content, or the HMD could be 'inside' of the object(s) in your scene.
When using VR, Ventuz assigns the Default Camera to the HMD, this is also the Camera used inside of the Previs scene. In order to see anything on the Previs screens ensure there is a camera inside of the Previs Content layer as laid out in the steps above.
It is essential that the camera is correctly setup inside of Ventuz to use a Head Mounted Display.
To relocate the User, modify the offset of the camera using a Tracked Camera. If an Axis Node is used, undesired visual issues will occur.
Setting up a Head Mounted Display with a Professional Graphics Card can be challenging. This process will require some "Trial and Error" as the Adapter configuration may work on one machine but not another. A Gaming Graphics Card may be the best way to use a Head Mounted Display.
Using VR with multiple GPU'S will not work correctly in Runtime, inside of a Cluster Setup, or with multiple GPUs. These kind of setups should be avoided.
Because of the way that Head Mounted Displays are used, it is not possible to synchronize HMDs across multiple GPUs, or multiple Machines in a Cluster.