Text Effects
Table of Contents
 | Alpha Effect | This node fades text in and out by manipulating the alpha value of the characters. |
 | Scale Effect | This node scales characters on the X, Y and Z axes. |
 | Rotate Effect | This node rotates characters on the X, Y and Z axes. |
 | Spark Effect | This node moves and fades characters in several modes. |
 | Circle Effect | This node arranges text on a circle. |
 | ShrinkToFit Effect | This node shrinks text to fit a specified bounding box size. |
Introduction
The Text Effects described here can be applied to both types of text rendered in Ventuz (Text 2D and Text 3D). They can be inserted in any binding that transports a Ventuz text resource (VResText). This makes it possible to combine multiple Text Effects by linking the output of one Text Effect to the input of another Text Effect.
Basically, Text Effects apply a transformation of position, rotation, size or the alpha value to the characters of a text. Currently the Text Effects can be divided into two types: Blending and Full Text Effects. The Full Text Effects (Circle, ShrinkToFit) always affect the complete text. With the Blending Text Effects (Alpha, Scale, Rotate, Spark) it is possible to control the amount of text which is affected by the Text Effect.
If the characters are modified by the Blending Text Effect, they can be assigned to one of three phases. The first phase is the state before any transformation. In phase two the characters are in progress of transformation. After complete transformation, the characters are in phase three. The properties which all Blending Text Effects have in common, are described in the Alpha Effect section.
Excessive use of Text Effects can decrease the rendering performance!
Alpha Effect
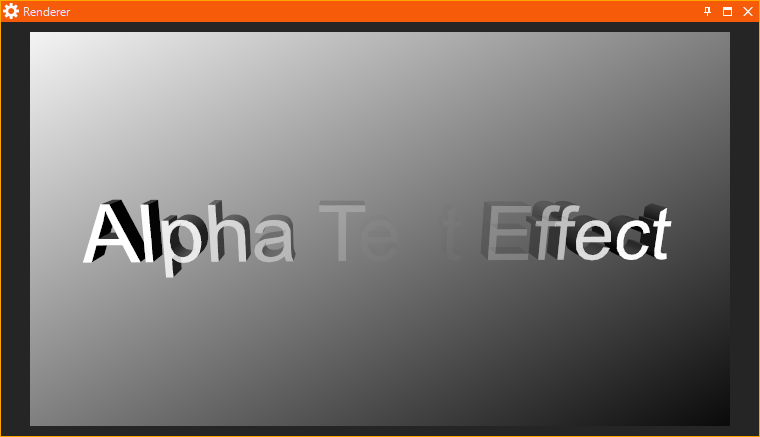
The Alpha Effect node modifies the alpha value of text characters and is perfectly suited to fade text in and out. The source text is bound to the TextSource property. The transformed text is provided by the output property TextResult.
The Text Effect is adjustable by a wide range of properties. The properties in the category Progress control how the effect is applied to the source text. The Progress property controls how many of the characters are affected by the Text Effect. The Progress value is related to the ProgressMode property. In Relative mode, a Progress value of 0 means that none of the characters are affected, a value of 100 means that all characters are affected by the Text Effect.
The property Progress controls the progression of the transformation of the original text. A Progress value of 0 means that all characters are in the state before the transformation (phase one, alpha value = AlphaStart). A Progress value of 100 means that all characters are completely transformed (phase three, alpha value = AlphaEnd). This however applies only if ProgressMode is set to Relative. In this case, the Progress value represents the percentage of the transformation that has been completed. If ProgressMode is set to Absolute, the Progress value for reaching a complete transformation depends on the text length. This mode results in a constant transformation speed, independent of the text length. The property Speed specifies this constant speed. The property Direction determines the direction, in which the transformation proceeds. It accepts the following values:
| NearToFar | Transformation from start to end of text. |
| FarToNear | Transformation from end to start of text. |
| Center | Transformation from the right and left end of the text to the center. |
| Random | Transformation in a random but determined order. |
The Property Range determines how many characters are in phase two at the same time (transformation from alpha value Start to the alpha value End; width of the ramp function). The RandomSeed property affects the random behavior in Direction mode Random.
There are two DissolveModes available: FullText applies the effect on the whole text from first to last character; PerLine applies the same effect for every line of text in parallel.
The category Effect contains the input properties Active and Invert. Switching the property Active, the text effect can be activated and deactivated respectively. If the Text Effect is inactive, the original text is passed through unchanged. The property Invert inverts the direction of the text transformation. This makes it possible to fade in a text for instance from left to right and afterwards fade it out again from left to right. To achieve this, the Invert property must be switched after the text completely faded in.
The properties AlphaStart and AlphaEnd define the initial and closing alpha value.
The Text Effect possesses two output properties in the category Events. They trigger events under certain circumstances. The event EffectIn is triggered if the complete text is entirely transformed (the complete text is in phase three). The event EffectOut is triggered if the transformation is completely reverted (Progress is 0; the entire text is in phase one).
Scale Effect
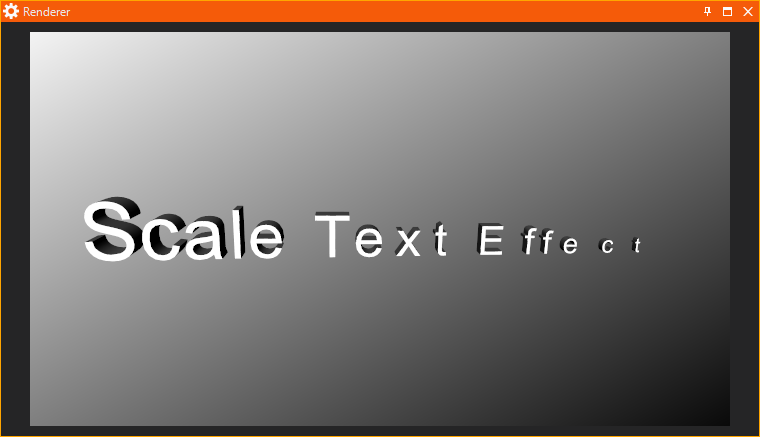
The Scale Effect node modifies the size of the characters of a text. The properties in the categories Progress, Effect and Text are described in the Alpha Effect section!
The properties in the category Scaling define how the characters are scaled. The properties ScalingStart and ScalingEnd define the range in which the scaling values will be applied to the characters. All characters in phase one will be scaled by the value ScalingStart. Characters in phase three will be scaled by the value ScalingEnd. The characters in phase two possess a scaling value that is linearly interpolated between the Start and End value.
The property AlignX specifies the character-related X-position of the scaling center. The possible values are:
| Left | The scaling center lies on the left boundary of the character. |
| Right | The scaling center lies on the right boundary of the character. |
| Center | The scaling center lies in the center of the character. |
The property AlignY specifies the character-related Y-position of the scaling center. The possible values are:
| Top | The scaling center lies on the upper boundary of the character. |
| Center | The scaling center lies in the center of the character. |
| BaseLine | The scaling center lies on the baseline of the character. |
| Bottom | The scaling center lies on the lower boundary of the character. |
The property AlignZ specifies the character-related Z-position of the scaling center. The possible values are:
| Front | The scaling center lies on the front boundary of the character. |
| Center | The scaling center lies in the center of the character. |
| Rear | The scaling center lies on the rear boundary of the character. |
By activating the properties X, Y, Z you can specify, on which axes the characters will be scaled.
Rotate Effect
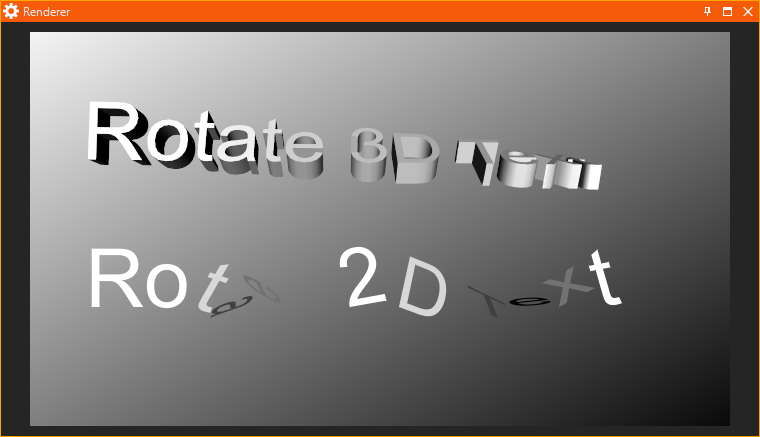
The Rotate Effect node changes the rotation angle of the characters of a text. The properties in the categories Progress, Effect and Text are described in the Alpha Effect section.
The properties in the category Rotation define how the characters are rotated. The properties RotationStart and RotationEnd define the range in which the rotation values will be applied to the characters. All characters in phase one will be rotated by the value RotationStart. Characters in phase three will be scaled by the value RotationEnd. The characters in phase two possess a rotation value that is linearly interpolated between the Start and End value.
The property AlignX specifies the character-related X-position of the rotation center. The possible values are:
| Left | The rotation center lies on the left boundary of the character. |
| Right | The rotation center lies on the right boundary of the character. |
| Center | The rotation center lies in the center of the character. |
The property AlignY specifies the character-related Y-position of the rotation center. The possible values are:
| Top | The rotation center lies on the upper boundary of the character. |
| Center | The rotation center lies in the center of the character. |
| BaseLine | The rotation center lies on the baseline of the character. |
| Bottom | The scaling rotation lies on the lower boundary of the character. |
The property AlignZ specifies the character-related Z-position of the rotation center. The possible values are:
| Front | The rotation center lies on the front boundary of the character. |
| Center | The rotation center lies in the center of the character. |
| Rear | The rotation center lies on the rear boundary of the character. |
By activating the properties X, Y, Z you can specify, on which axes the characters will be rotated.
Spark Effect
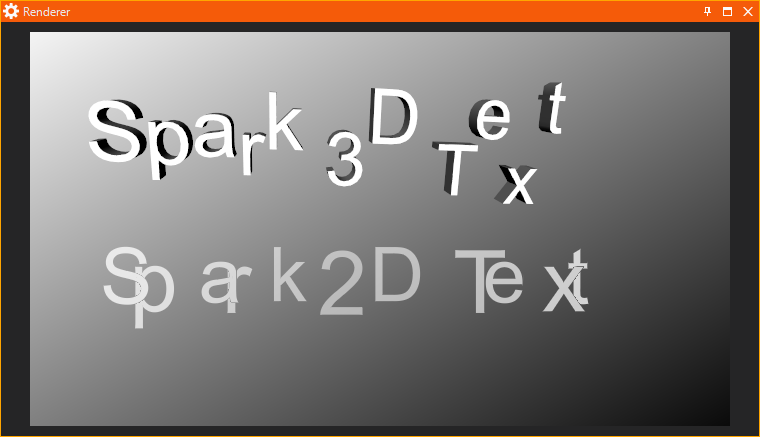
The Spark Effects node changes the position of the characters of a text. Optionally it can fade characters in and out by modifying the alpha value. The properties in the categories Progress, Effect and Text are described in the Alpha Effect section!
The properties in the category Sparking affect the way the characters are re-located. The property Distance defines in which distance from its origin position, a character is still visible. If the property UseAlpha is activated, the characters fade in via the alpha value with decreasing distance. If UseAlpha is deactivated, the characters just pop up.
The properties X, Y, Z specify, in which directions the characters move. X, Y, Z can take the following values:
| None | The characters do not move along the according axis. |
| Positive | The characters move in positive direction along the according axis. |
| Negative | The characters move in negative direction along the according axis. |
| Both | The characters move in positive and negative direction along the according axis. |
The property AxisSelect specifies the directions of motion for each character. There exist four modes:
| Static | The selected X, Y, Z directions are summed according to the vector analysis. Note that for an axis set to value 'Both' only the positive direction is added (otherwise positive and negative direction would cancel each other out). If for example the Properties are set to X = 'Positive', Y = 'Positive' and Z = 'None', the characters move on a diagonal from bottom-left to top-right.. |
| Repeat | Successively the characters are assigned to one of the directions selected via X, Y, Z. The procedure is as follows. Let's assume the direction selection is X = 'Positive', Y = 'Both' and Z = 'None'. This results in the directions +X, +Y and -Y. In this mode the first character moves on the X axis. The second character moves on the Y axis. The third character moves on the Y axis too, but in the contrary direction. The next one again moves on the X axis. |
| Alternate | This is similar to the procedure in Repeat. The difference is that the directions are not assigned in the order 1, 2, 3, 1, 2, 3,… but in the order 1, 2, 3, 2, 1, 2, 3,… |
| Random | From a pool of possible directions, one is randomly assigned to each character. |
Circle Effect
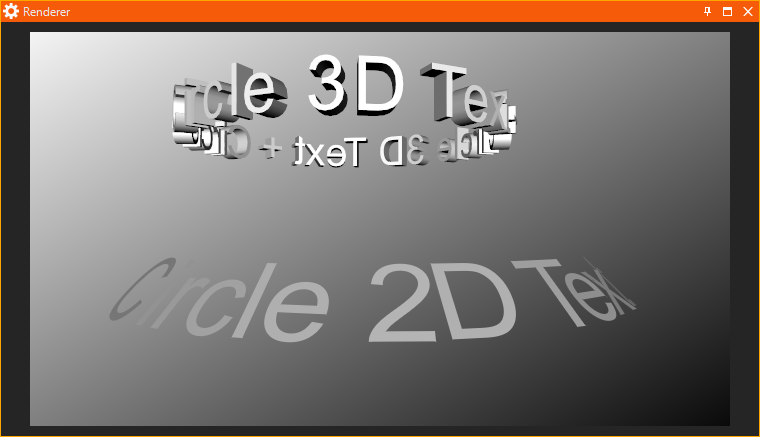
The Circle Effects node arranges text on a circle around the Y axis. The original text is linked to the input property TextSource. The output property TextResult provides the modified text. The appearance of the circle can be modified by the two input properties Radius and Angle. Radius modifies the size of the circle. Angle determines the angle of the characters relative to the Y axis.
ShrinkToFit Effect
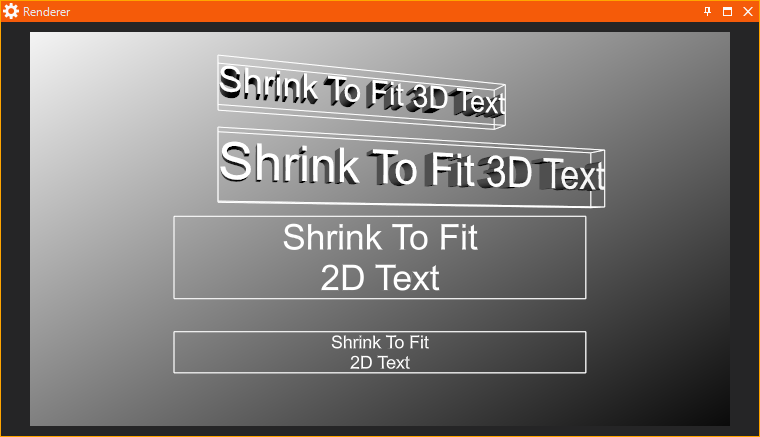
The ShrinkToFit Effect scales text so it fits in a specified bounding box. This Effect scales text only down but does not scale it up! The original text is linked to the input property TextSource. The output property TextResult provides the modified text.
Inputs
 Shrink to fit
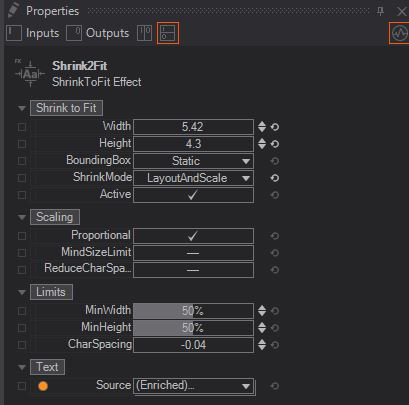
- Width: Sets the Width of the Bounding Box
- Height: Sets the Height of the Bounding Box
- Bounding Box: Has 2 modes on how to handle the Bounding Box
- Dynamic: Uses the smallest possible Bounding Box where the complete text fits in
- Static: Takes the Width and Height limits and keeps the Bounding box on those limits
- Shrink Mode:
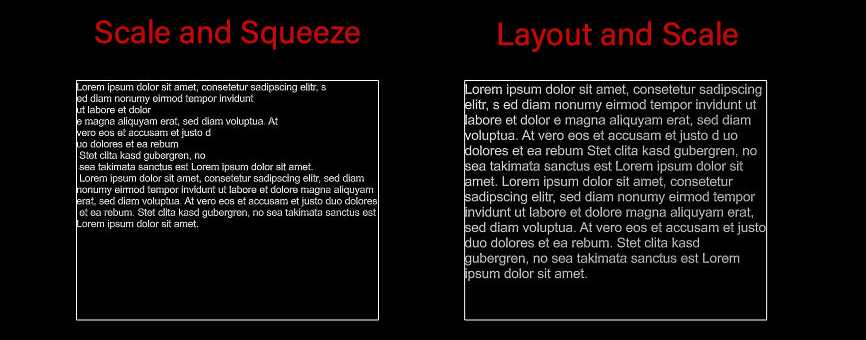
- Scale and Squeeze: Tries to scale and squeeze the text into the bounding box while preserving set line breaks. Only in this mode the optional character space reduction is applied.
- Layout and Scale: Ignores set line breaks and tries to fill the bounding box space as efficient as possible. This happens in an iterative process until certain fitting thresholds are reached. That's why the results may sometimes look sub-optimal.
- Active: Determines if the node is active or not
Scaling
- Proportional: Enables a proportional scaling. In this case the scaling factors for width and height are equal
- Mind Size Limit: Text will only be scaled down to a factor specified in MinWidth and MinHeight
- Reduce Char Space: Enables the reduction of space between characters to achieve the requested width. If the reduction does not reach the required text width, the text is scaled in addition
Limits
- Min Width: Only working if Mind Size Limit is on. Changes the minimal width the text should have. This is able to override the Bounding Box limits set under Shrink to Fit
- Min Height: Only working if Mind Size Limit is on. Changes the minimal height the text should have. This is able to override the Bounding Box limits set under Shrink to Fit
- Char Spacing: This changes the general char spacing. Only works when the option Reduce Char Space is on.
Outputs

Text
- Result: Result of the current text formating
Bounding Box
- X: Current position of the Bounding Box on the X axis in your 3D Space
- Y: Current position of the Bounding Box on the Y axis in your 3D Space
- Width: Current width of the Bounding Box
- Height: Current height of the Bounding Box
- Scaling X: Scaling factor on X of the Bounding Box
- Scaling Y: Scaling factor on Y of the Bounding Box