Table of Contents
Transformation Gizmo
Transformation Gizmos are used by 3D modeling packages to transform objects without having to care about the actual numerical values. Ventuz has three Gizmos (Translate/Rotate/Scale) which can be activated with the respective buttons in the renderer window or by pressing short-cut keys (T, R, S) while the mouse focus is on the renderer window.
See below the icons to switch between the different TRS modes:
| Translate / Move | Rotate | Scale |
|---|---|---|
| |  | |
Note: The renderer has to be in Editing mode to show the gizmo. You can either switch between normal run and edit mode by pressing Tab while the renderer has the focus or by pressing the respective button in the renderer toolbar. While in editing mode, an orange selection highlight shows which objects are selected.
While in any kind of editing mode, no Keyboard, Mouse or Touch interaction/input will be sent to the scene.
The transformation induced by the Gizmo is stored in an Axis node. If there is a unique Axis associated with the current selection, that Axis is used.
Things get interesting when nodes are linked multiple times in the scene. For such cases, Ventuz keeps information that helps it distinguish between different instances of the same node. If the selected node and its associated Axis are linked multiple times, a gizmo will be rendered at all of those positions; changing one of them will affect all instances (because there is only one actual axis in the scene). If, however, the selection is linked multiple times but each instance of that selection has its own associated Axis, the gizmo will only be rendered at the position of that associated axis. In essence, Ventuz follows a "let's do the best we can" strategy. Using multiple-referenced nodes adds a tremendous amount of complexity to the scene management and although there may be cases where the desired solution is obvious to the user, further analysis often shows that in a slightly different situation the solution would be deemed incorrect.
Unfortunately, the requirement of having a unique axis can cause some very complex situations if multiple objects are selected and new axes would have to be inserted. Therefore, it is generally not possible to transform a multi-selection unless the internal algorithm can figure out that all the selected nodes are associated with the same axis.
If an object has some rotation applied to it, moving the object along one of its local axes will often require a translation along all three axes. Similarly, translating/rotating/scaling can create odd numerical values while achieving your desired visual result.
Finally, the modifiers SHIFT, CTRL, SHIFT + CTRL can be used to slow down the rate of mouse movement to actual property change or snap the values to a regular interval.
Translation
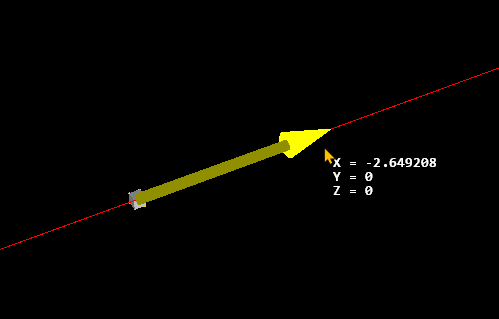
The translate gizmo has three axis and three planes. By hovering over an axis with the mouse, the axis will be highlighted in yellow. Clicking & dragging on one of those axes will cause a translation in that axis only. A line will be shown as a guide while translating along one axis. Clicking & drag on the planes in the gizmo, you will translate on either XY, XZ, or YZ plane. Clicking & dragging on the center white box will allow translation based on the object's aligned in camera view. While performing a translation, the actual coordinates being modified will be shown on screen.
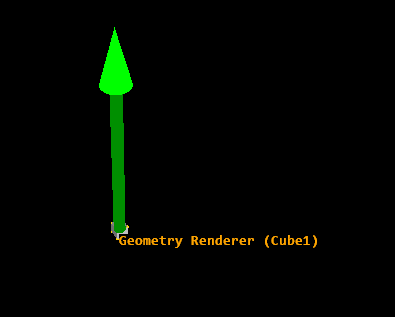
You can make use of the shortcuts (X, Y, Z) to enable an axis lock. When holding one of these keys, show only the selected axis will be shown.
| Translation Modes | Single Axis Translation | Axis Lock |
|---|---|---|
| |  | 
|
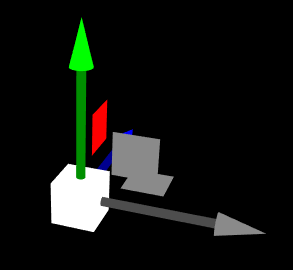
If an axis is bound to another Node, that axis and associated planes will be grayed out. While interacting the gizmo, the tool tip will show (Bound) for any bound axis. As shown below:
| Bound Axis | |
|---|---|
 | |
While performing any kind of translation (TRS) - Right Click to cancel and reset the transformation to the value before you clicked it!
Rotation
The scale gizmo has three axis and a camera view aligned ring. By hovering over an axis with the mouse, the axis will be highlighted in yellow. Click & drag on one of those axis will rotation based on that axis only. Click & drag the outer white ring to rotate the object aligned with the camera's view. While performing a translate, the tooltip will show its actual coordinates.
The rotation will follow the mouse cursor. This results in better precision when the cursor is further away from the object!
Use the shortcuts (X, Y, Z) to enable an axis lock. This will show only the selected axis.
| Rotation Modes |
|---|

|
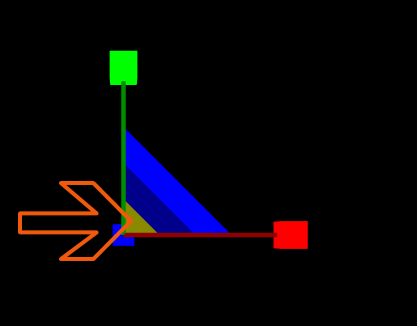
Scaling
The scale gizmo has three axis and three corner areas. By hovering over an axis with the mouse, the axis will be highlighted in yellow. Click & drag on one of those axes will scale the object along the selected axis.
| Scaling Modes |
|---|
|
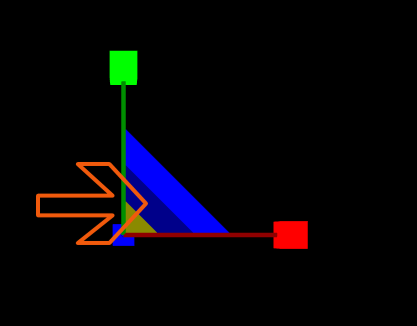
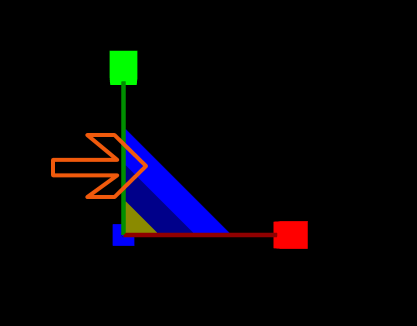
The corner areas in the scaling gizmo are divided into several sections for each axis pair, like XY, XZ, YZ, as well as a dark yellowish corner where all of the Axis meet.
- The innermost yellowish corner allows uniform scaling in XYZ.
- The next dim colored area will perform planar uniform scaling for the selected axis pair.
- The outermost bright colored area will perform planar non-uniform scaling.
| Scaling Modes and Areas | ||
|---|---|---|
| ||
| Uniform Scaling | Planar Uniform Scaling | Planar Non-Uniform Scaling |
 |  | 
|
You may scale negative! This will result in a flipped mesh and also flip the gizmos!
Gizmo Alignment
You can switch between three different gizmo alignments: Local, World, Parent.
The gizmo alignment buttons can be found in the toolbar:
| Local | World | Parent |
|---|---|---|
 |  | 
|
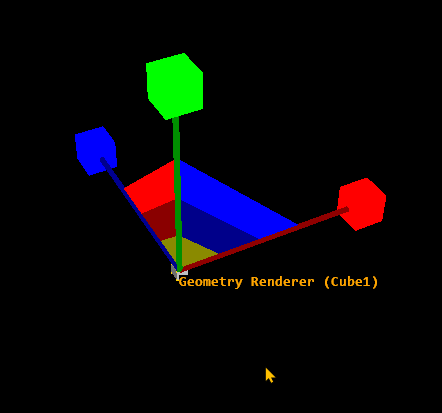
- The Local alignment will align the gizmos along their local direction. Whenever you rotate an object, the translate gizmo will always be aligned to the local transformation following the objects initial pivot alignment.
- The World alignment will keep the gizmos aligned following the Ventuz world coordinates no matter what orientation or rotation the object has.
- The Parent alignment will inherit the orientation or alignment of the axis or object in front of its selected axis.