How To use Bitfocus Companion and Stream Deck
Table of Contents
This How To will show you the fundamentals of using the Bitfocus Companion to control the Ventuz Director, well at least a Director Show. You can combine the Companion together with the Stream Deck from elgato.
Introduction
We have Integrated the most important controls into a Companion Module. You still can create your own buttons and behaviors within the companion by using the actions we provide and variables you define. The possibilities are endless and we will show you just some basics here.
Preparation
You would need to have the latest Companion installed. Please follow the instructions on Bitfocus.io to download and install the Companion. The Ventuz Director Module is already part of the Companion installation, therefore there is no need to download and install anything separately. An elgato Stream Deck is optional, the Companion works without any hardware. This makes it very easy to create and design your own pages and simply copy the layout and settings to another machine, where you probably have the Stream Deck installed.
If you have the Stream Deck installed, please make sure to shut down the "Stream Deck Software/ App" otherwise the Stream Deck App will override the Panel and you wont see the Companion! Or choose the option to use the plugin on your stream deck when first opening the WebGUI
Please make sure to start the Ventuz Director and enable the control via websocket which can be found in Tools->Options:

Connection
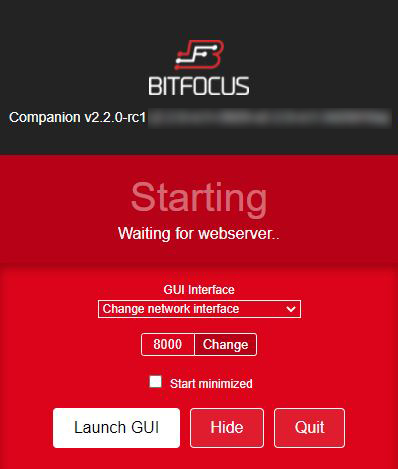
First we want to establish a connection between the Companion and Ventuz Director. To do so we have to create a connection in the Companion. Start the Bitfocus Companion App and click Launch GUI.
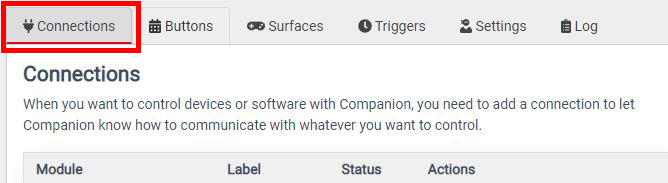
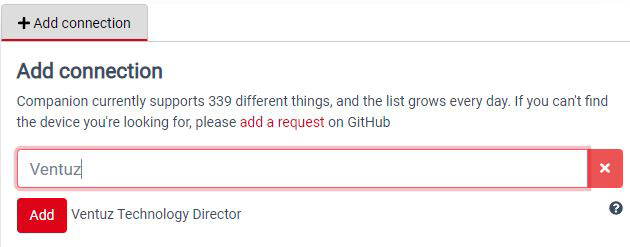
In the GUI, which should have opened up in a browser, select and click the Connections Tab. Inside you can find a tab labeled + Add Connection on the right hand side, with a Search Panel below. Type Ventuz in the search field and it will show the Ventuz Technology Director Module. click the red Add button in front of the result to create a new connection for the Ventuz Director.
The Module will be listed on the left hand side in the Modules List - it will be labeled ventuz-dir, if you want to change or edit any properties simply click the red EDIT button. Per default the Target IP is set to 127.0.0.1 / localhost. If you want to control a different machine than your local one, you should set its Target IP now. Depending on your Ventuz version you need to set the correct port. For Ventuz 8: VMS port 22404 and for V7: 21404

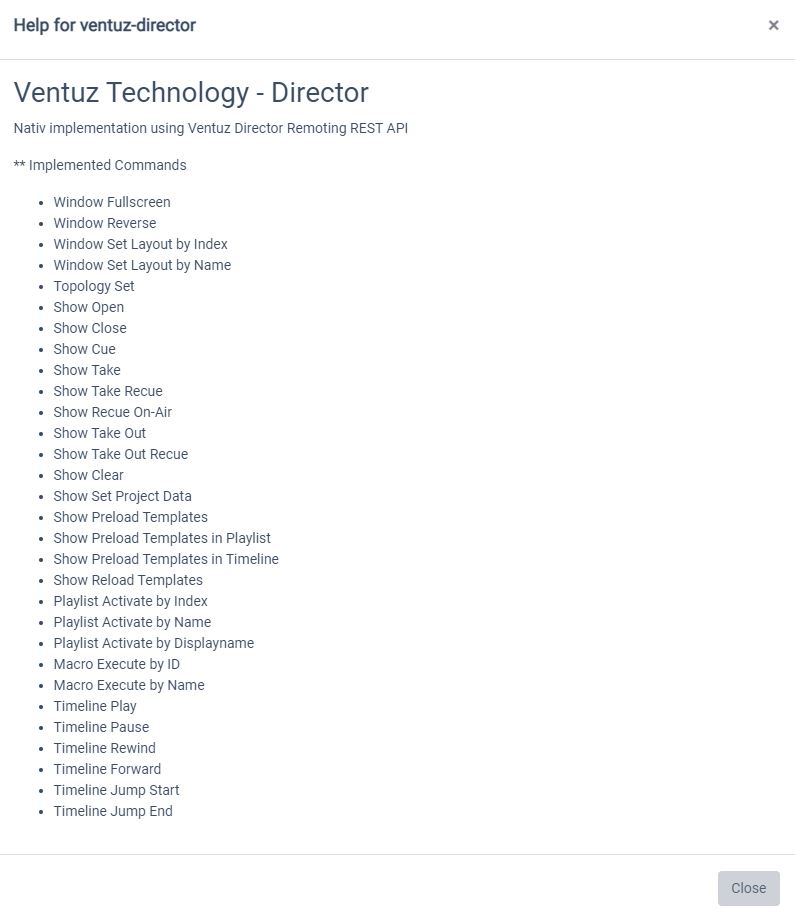
click the small question mark (?) right behind the ventuz-dir label to get a list of available commands to control the Ventuz Director. The Companion remoting is using the Director Remoting API via websocket. Therefore the same commands and properties are usable.
Make use of Presets, Commands and Variables
We will make use of the Presets we ship with the Ventuz Director Module and get our hands on Commands- and Variables in the following examples.
As mentioned above you can get a list of available commands by click the (?) next to the Module Name. These will come in handy if you want to manually create Buttons from within the companion app.
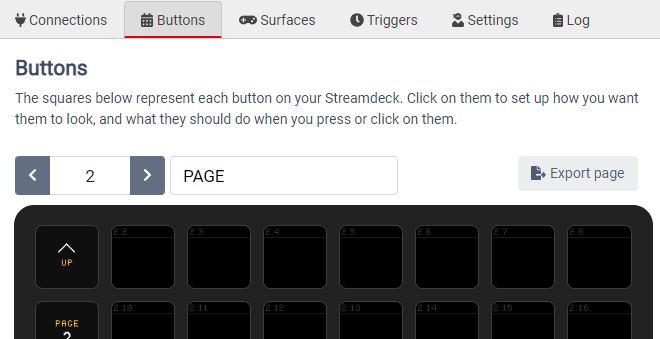
We want to create new Buttons based on our Presets- click the Tab labeled Buttons to view and edit the Pages of the Stream Deck within the Companion.
Available Presets
The easiest way to make use of the Ventuz Director Module is to use one of the Presets we ship with it.
The Presets are:
| Preset | description |
| take | This takes Items based on a Channel Index |
| take recue | This takes the actual cued Item and recue's it again based on a Channel Index |
| cue | Cue's an Item based Template Data, URI, Template display name or Page display name - Channel index can be assigned |
| recue on air | Recue the Item which is actually on air |
| clear | Will clear the channel based on Channel Index |
| take out | Takes out the Item based on Channel Index |
| take out recue | Takes out the actual on air Item and recue's it |
| playlist restart | Simply starts at the beginning of the playlist based on Channel Index |
| playlist activate | Activates/Cues an Item based on Index ,Template Data, URI, Template display name or Page display name - Channel index can be assigned |
| macro execute | Execute a custom created macro based on ID or Name |
| window set layout | Activate a custom window layout based on Index or Name |
Control Playlists
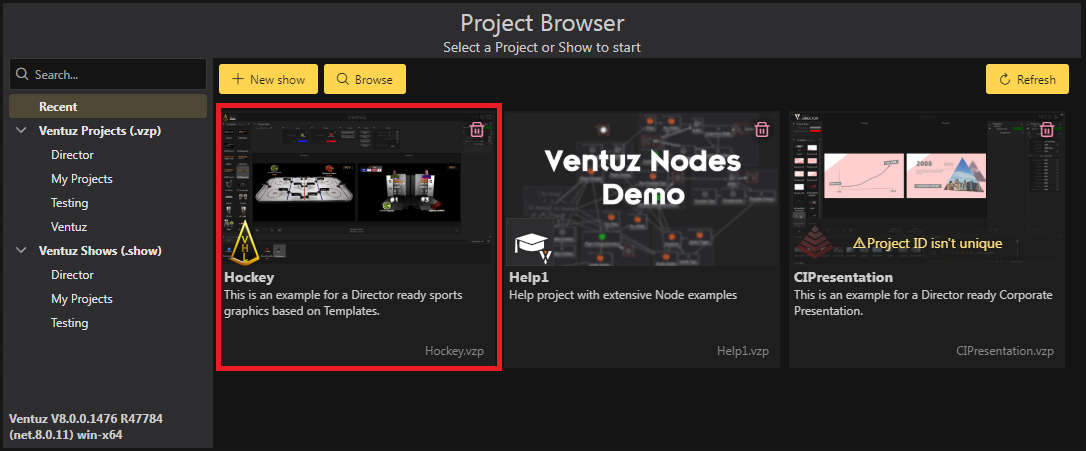
Lets control the playlist of our Hockey Example for the Director by the ease use of the Ventuz Director Presets. Open the Ventuz Director and start the Hockey Example Show with a local topology:
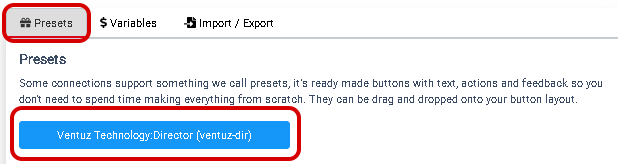
Keep in mind to Enable control via Websocket - like we had to do in the Preparation. Navigate to the Companion GUI and find the Buttons page. On the right hand side you find a Tab called Presets, click the Ventuz Technology: Director module presets:
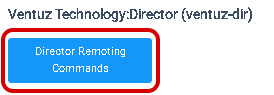
Then click Director Remoting Commands:
You will be shown a list of available Presets - which already appear and look like buttons. You can simply Drag&Drop these buttons onto the button page.
So Drag&Drop the playlist activate onto our page 1 of the companion:

You will note that the button immediately turns red - this is because we can also get feedback from the Ventuz Director. Actually we have 3 predefined Visual Feedbacks/Colors :
 | Action not possible - can be a missing argument like index, channel, or name |
 | Action is processing - can occur during a cue, while the template is loading |
 | Action can be activated or was successful |
In our case, for the playlist activate the companion needs a valid feedback. Since the playlist activate will set an item in our playlist as an active one, we have to define which item should get activate on button press.
Select the recently created playlist activate button and set in the Press actions and Feedback for Index a value of 3.

Now the playlist activate button will turn green since it also gets a correct feedback from the Ventuz Director. You can also use a ID, name or Display name to activate a specific template. The available properties change by the type of the button/preset. For now we also left the Channel Index at the default value 0 - it will now use the playlist for channel 0. By changing this to another value, you activate the template for another channel (Ventuz Channel 1 starts with 0).
Press the recently created and configured button and notice the template number 4 in the actual playlist will be selected and cue'd:
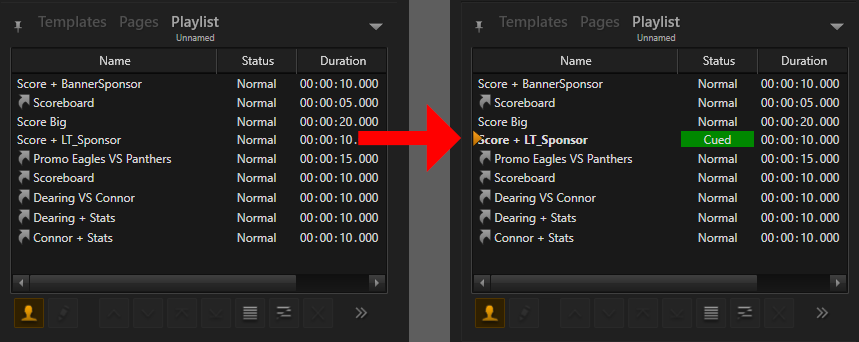
Again keep in mind that the Index starts with 0 therefore Index 3 is actually the fourth Template in our list. To select and cue the very first template, our index would need to be 0
You can do the same with playlist restart and many other actions.
Cue
Cueing can also be done with one of the Ventuz Director Module Presets. Just Drag&Drop the preset labeled cue into one of the empty button slots. Select this newly added button and change the properties on the right hand side of the Companion.
Ensure you apply the changes you do to both, the Press actions and Feedback.
We can cue a template or page by either using the Template Data, URI, Template display name or Page display name.
Take Templates / Pages
Since we have created a button for playlist activate which activates a specific template, and a cue button, we would like to Take the actual cue'd template.
To do so we simply select another button slot in the companion and Drag&Drop the take button into the slot. We really dont need that much action values to be set, except the Channel index for which channel the cue'd template should be taken.
Just change the Channel index to be 0. This will take the cued template. It doesnt matter if you use the created playlist activate button or manually cue a template or page, or use any other way.. as long as something has been cue'd in channel 0, you can now use the button to take it.
Custom variable
Lets make use of a custom variable and have the playlist skip two steps whenever you press the according button in the Companion or Stream Deck.
Make sure you have the Buttons tab selected and click the $ Variables tab on the right hand side:

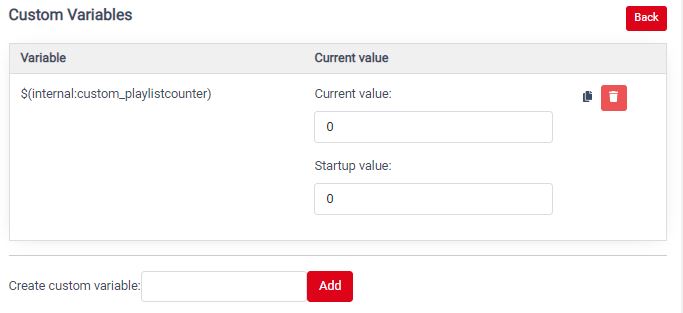
The Custom Variables tab should show up and just simply create a custom variable called playlistcounter - click Add and the newly created custom variable should show up in the variables list:
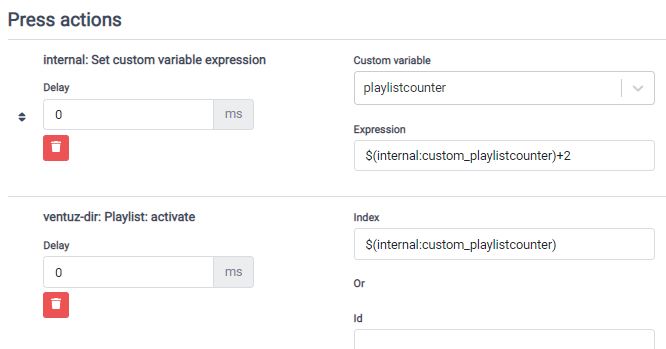
click an empty button slot and let us create new actions for the selected button by click the Edit Button tab on the right hand side, and click Regular Button. You can give this button a description in the Button text field like Skip 2 Templates. Now we add Press actions - click in the +Add key down/on action and find the internal: Set custom variable expression action. In the Custom variable field we enter playlistcounter and the Expression should read $(internal:custom_playlistcounter)+2.
Add another action, but this time ventuz-dir: Playlist: activate. The Index field should read $(internal:custom_playlistcounter).
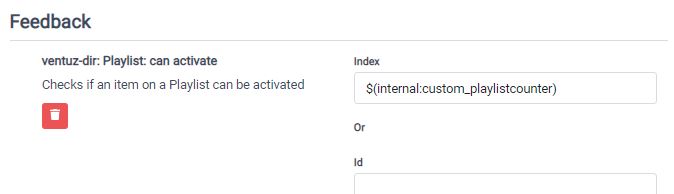
We can add an action for the Feedback and add the ventuz-dir: Playlist: can activate. The Index field will read as well $(internal:custom_playlistcounter).
Now you can skip two playlist items, whenever you press our recently created button. By changing the +2 in the Expression field, you would skip for X then.
Use Feedback to write to variable and perform an auto-take
With Companion 3.0 onwards, the Ventuz Companion module is able to write the feedback status of a command to a custom variable.
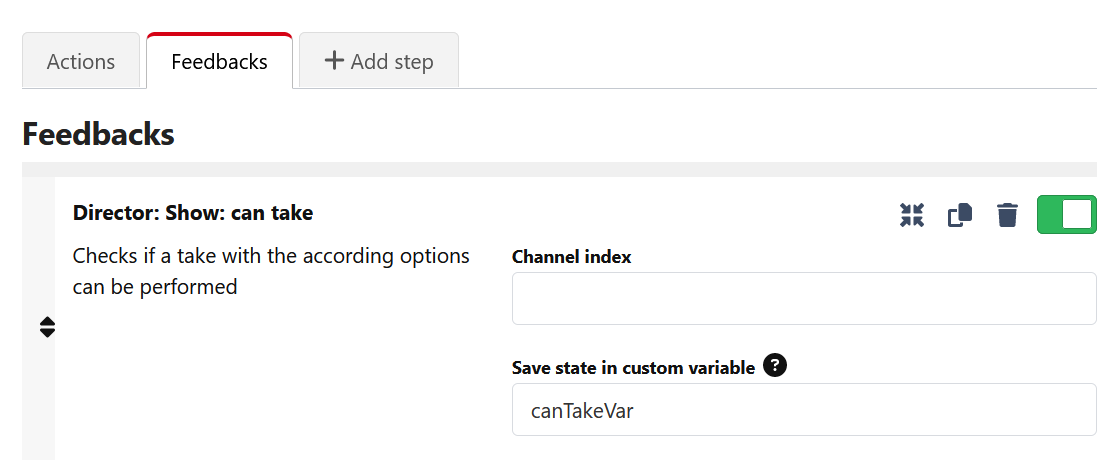
This will write the bool state of the can take property to the variable canTakeVar. This variable can be accessed in Companion by the variable name Director:canTakeVar. With the use of this variable you can create a Trigger which automatically performs a take if possible.
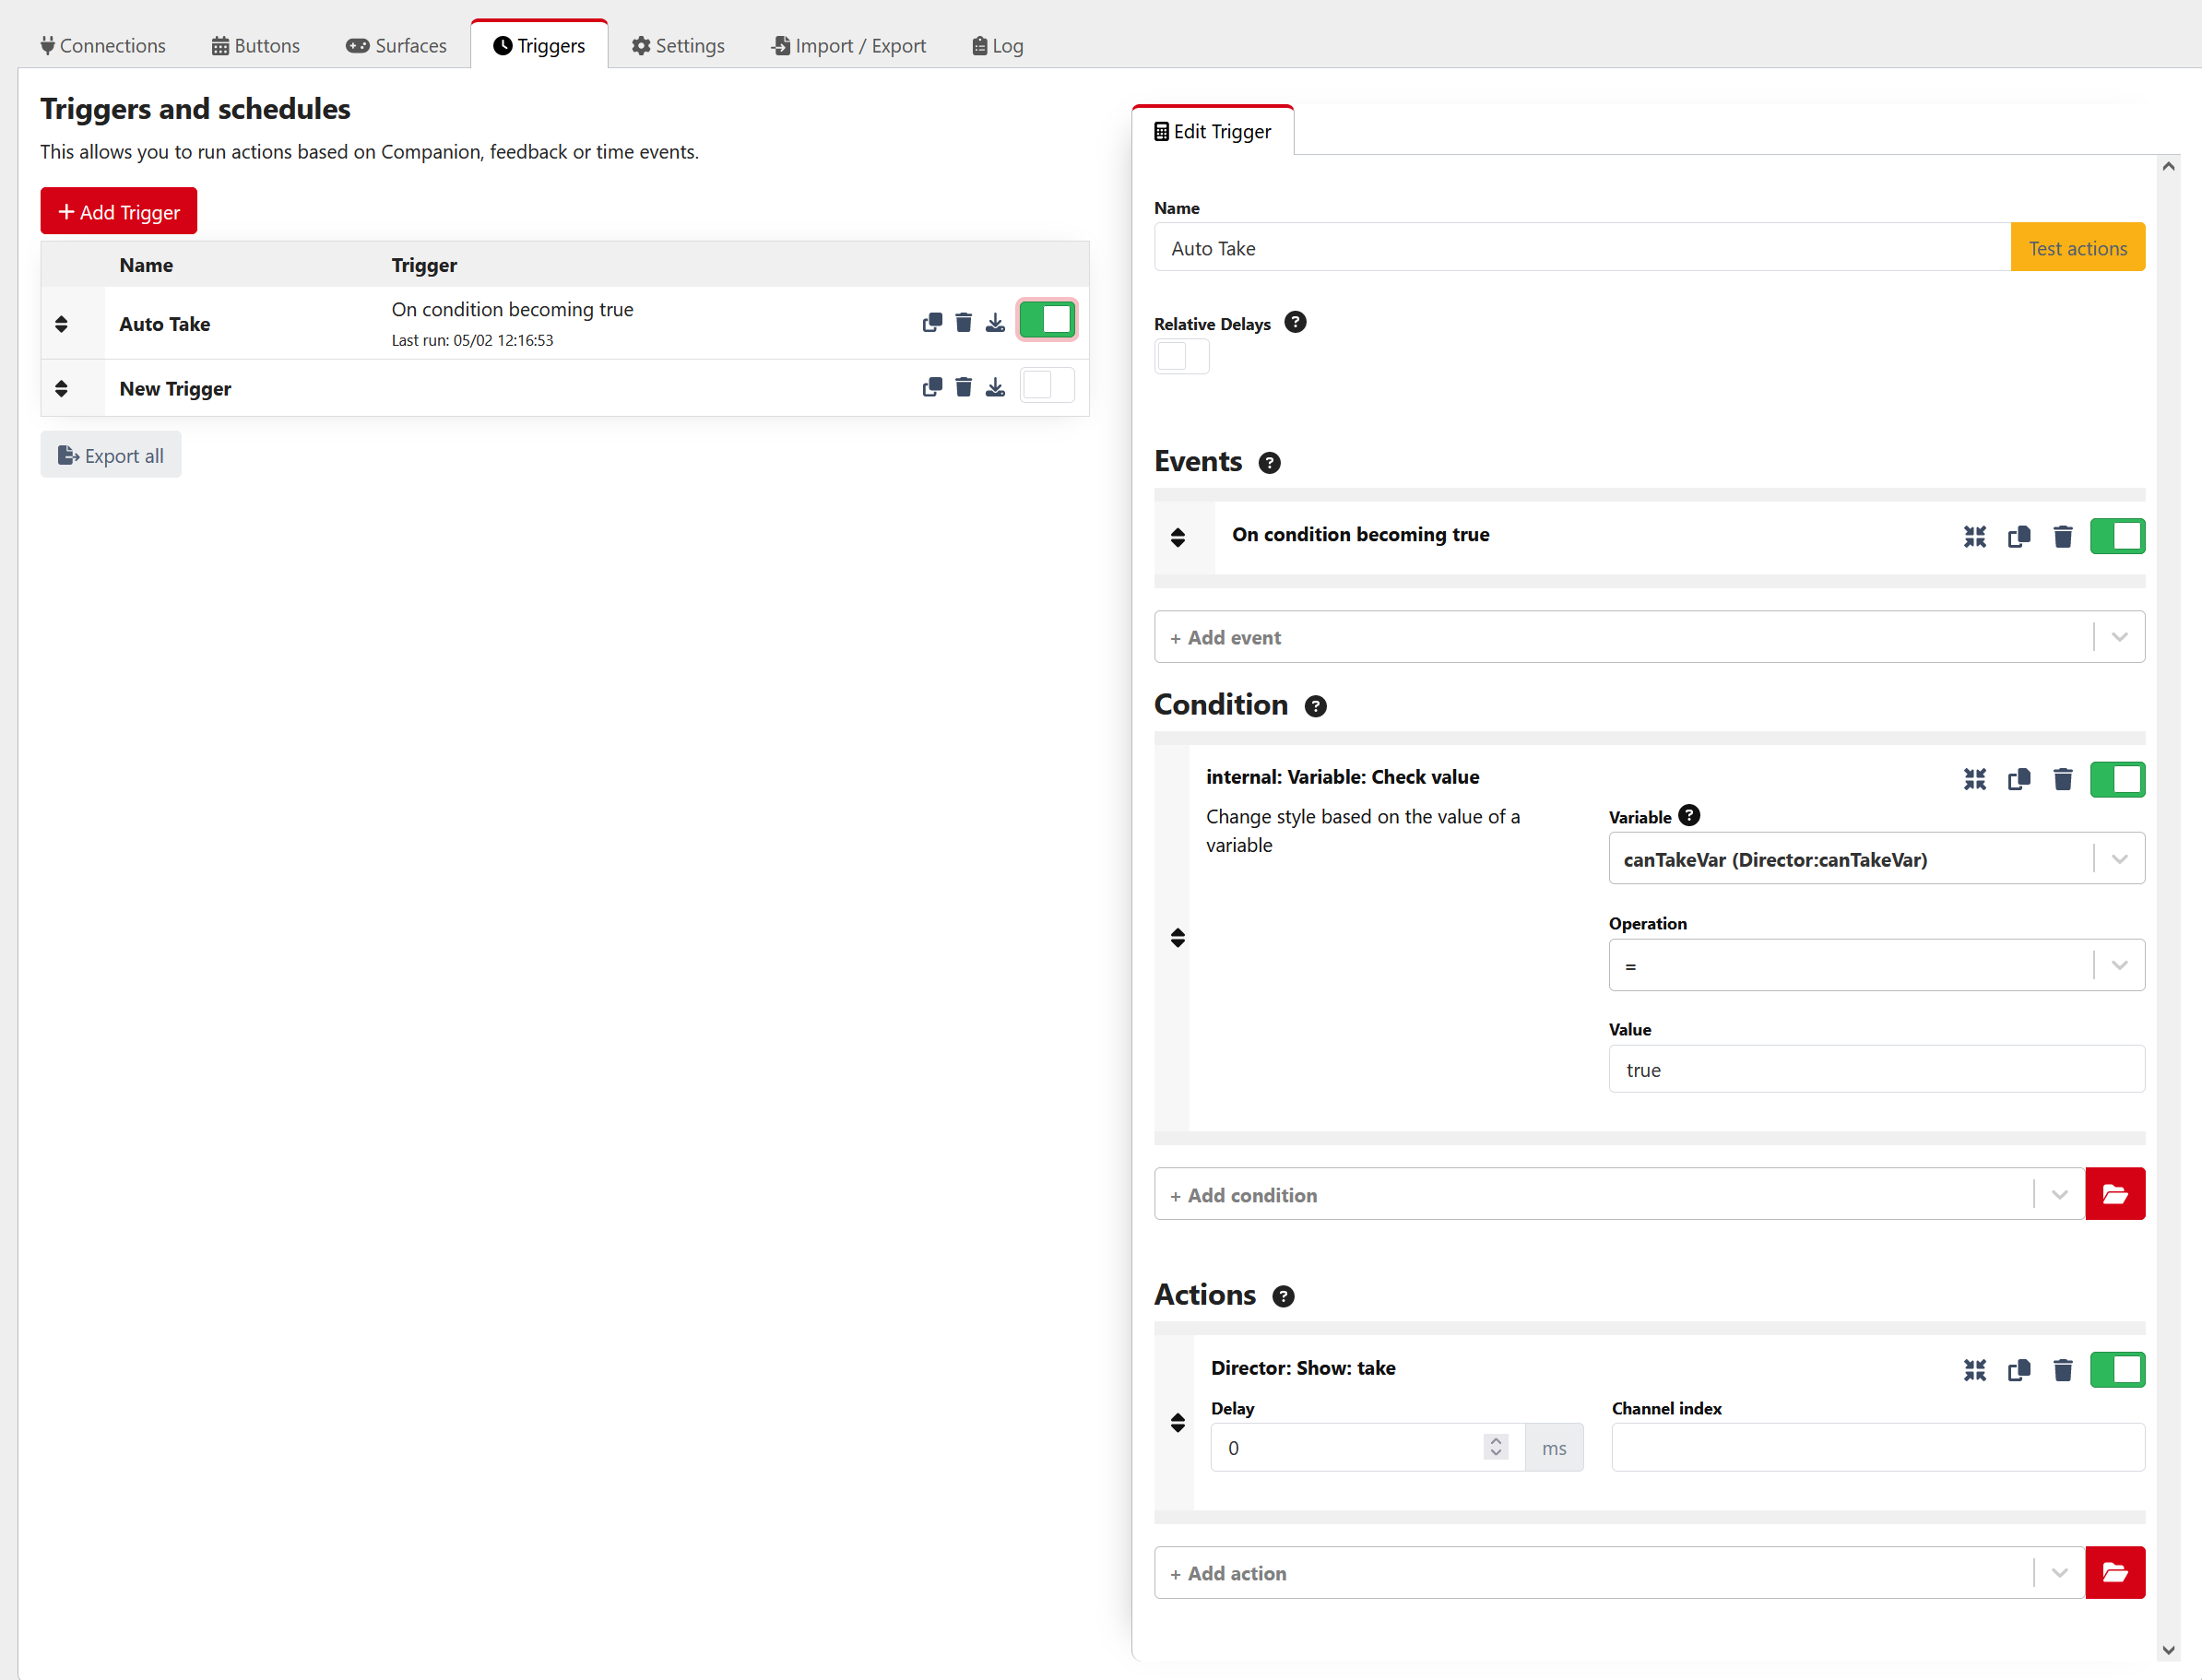
Go to the Triggers section and add a new trigger. Add a on condition becoming true event. The condition is internal: Variable: Check value. With the check on the Director:canTakeVar is equal true, the Director:show:take action performs. While the trigger is activated and a template is cued, the take will automatically perform. To disable the trigger, switch it off in the trigger list.
Random hints and tips
You could paste whole template data into the given Template Data input field, like shown in the screenshot below.

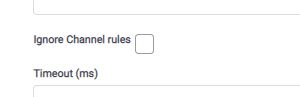
There is an override to ignore the applied channel rules from Ventuz Director. Just use the checkbox and set Ignore Channel rules:
Conclusion
The bitfocus companion can be a very powerful addition for the Ventuz Director to control a show or the Ventuz Director itself. This how to just scratched the surface of whats possible with the combination of the bitfocus companion and the Ventuz Director. Check regularly for updates on the companion side, since the tool is open source and everybody can contribute to it. This will make it possible for you to contribute with your own bunch of presets.