Ventuz Designer Overview
Table of Contents
This page will guide you through your first steps with Ventuz Designer and show you how to achieve first results within the software.
The guide assumes you already have installed the software suite and activated the license - see the Getting Started Guide for more on that. We will directly focus on creating content without looking at the concepts or structures behind the software to create first feelings of success as fast as possible.
Creating the First Project

After having started the Ventuz Designer you can see the Start Page with recently opened Projects. Here we want to create a new Project to directly dive into content production. Double click onto the New project button to open the Project Creation Wizard.
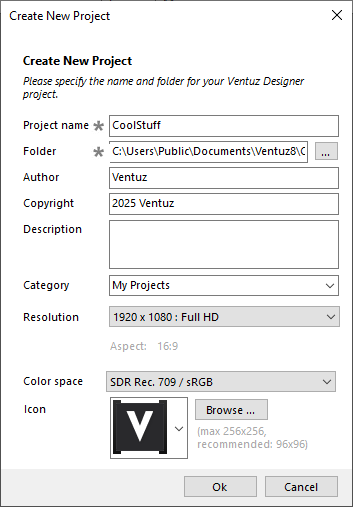
Here you can define the Project Name, the Folder the project should be saved in, the Author's name and Copyright, create a small Description, define the Category the project should be placed (which becomes useful when having to manage a lot of projects on your machines), change the project's Resolution and browse for an Icon to represent the project on the start page. When you are finished entering the project's properties click Ok.
Ventuz will now usually open the project and automatically open a new empty scene. If not you can click on  that can be found in the Layers docked window on the left - when the dropdown opens click Empty Scene.
Ventuz Layers
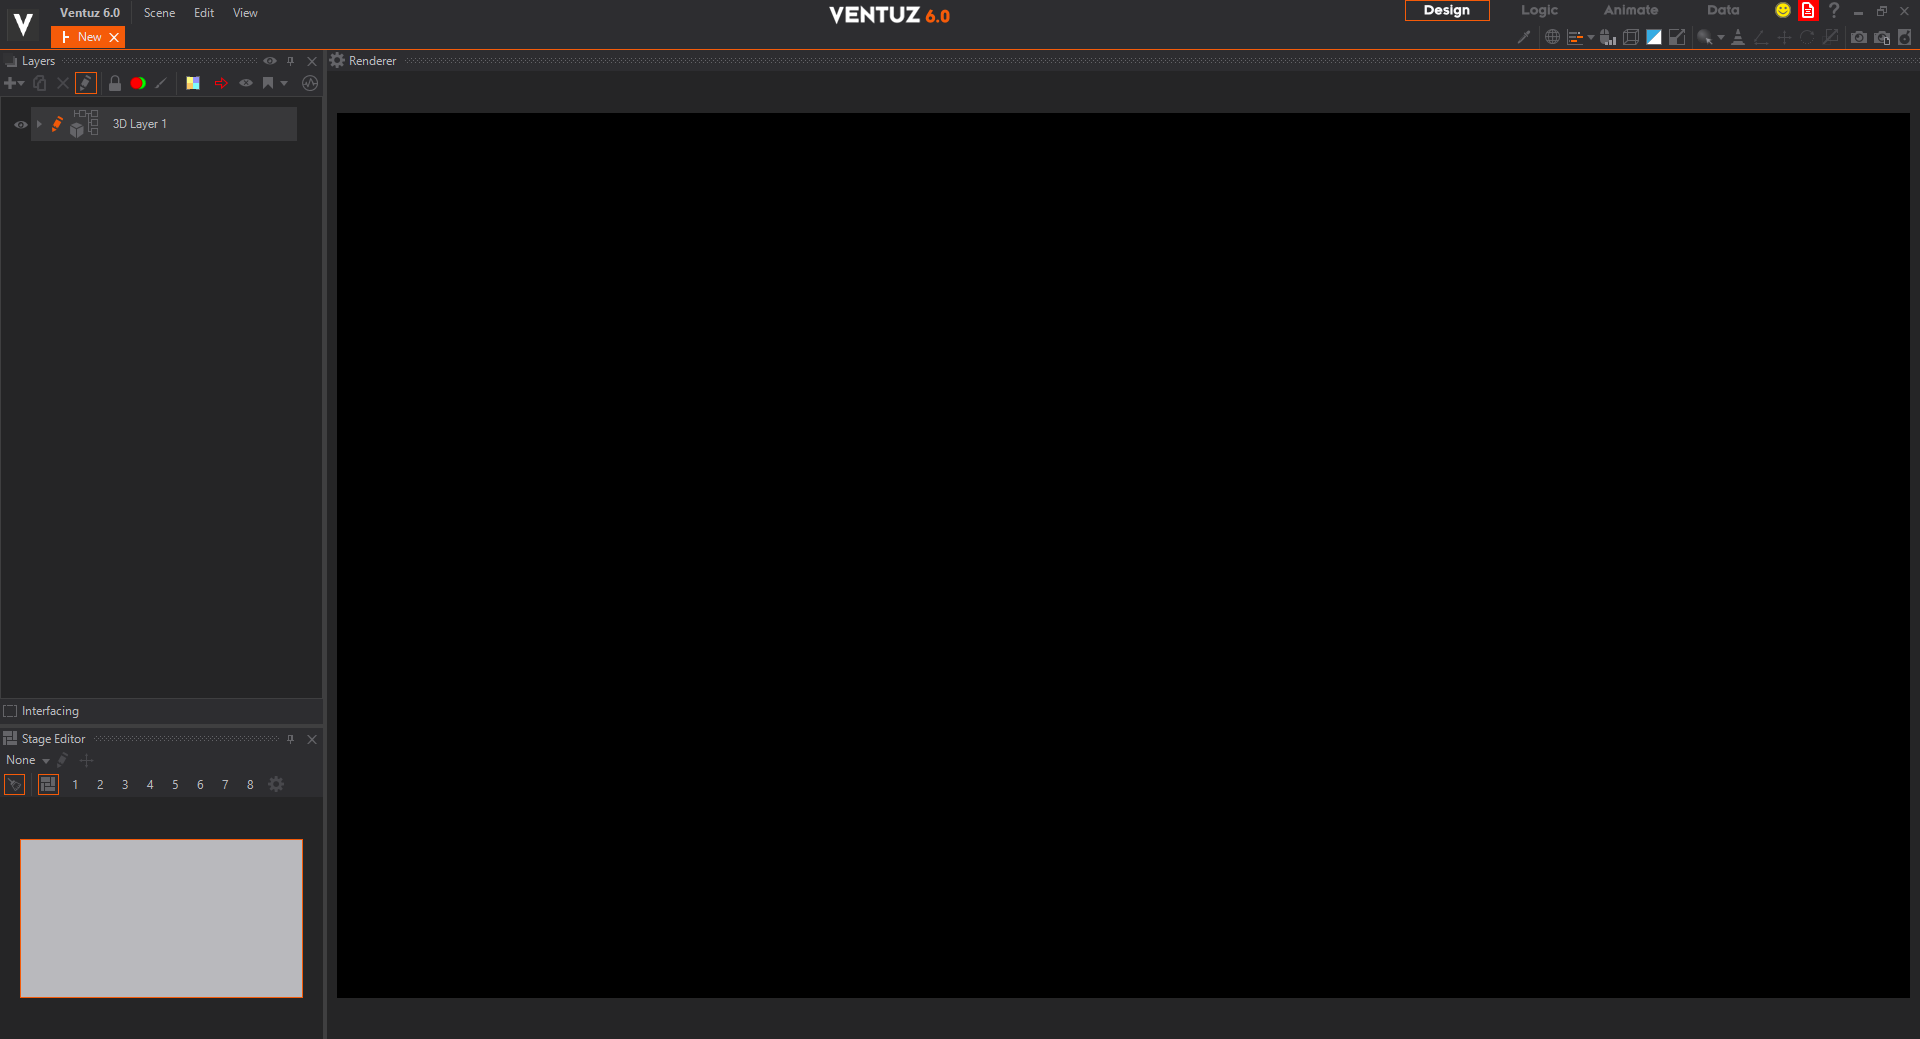
The User Interface should look something like the picture below now. On the right you have the Renderer Window which currently only shows a black screen. On the left is the Layer Editor where you can see the first Layer normally called 3D Layer 1. Below it you can see the Stage Editor which we can ignore for this guide. In the Layer Editor you can create and manage the Layers of your Ventuz Scene. There are several different kinds of Layers. When clicking on the  Icon on the top-left of the Editor you can see all kinds of layers that Ventuz provides. For now we can ignore all Layers except the 3D Layers and 2D Layers.
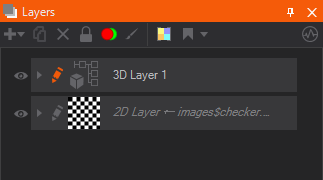
You can start by adding a 2D Layer as a background to our scene. Click on 2D Layer in the Dropdown and choose Image. The Layer will be added below the already existing 3D Layer and you can see the result in the Renderer Window directly: The Layer is provided with the standard checker texture and it is displayed stretched over the whole screen in the renderer.
By clicking on the  Thumbnail of the used texture you can easily switch the used texture to any image that is on your machine. Do so to quickly change the Background to something more beautiful than the standard texture.
To use the 2D Layer as an actual Background you will need to place it above the 3D Layer by dragging and dropping it on top of the 3D Layer.
By now you would only see the 2D Layer since it is rendered on top of the 3D Layer. Note that the order of Layers is different from many 2D Compositing Programs and Ventuz is based on a 3D approach. The top most Layer is placed behind all other ones while the bottom most one is in front of the others.
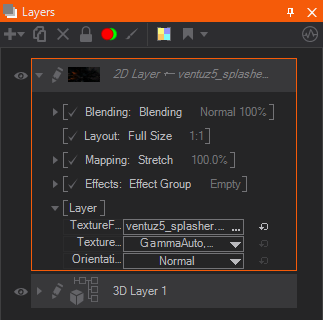
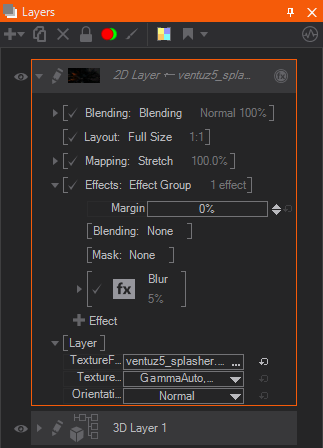
Now let us have a look at the Properties of our newly created Layer. Either click on the 2D Layer or click on the ![]() on the left of the Layer to expand its properties. Here we can change the Blending of the layer or the Size and Position when we do not want it to be full screen. Also we can change the used TextureFile in here as well as its Orientation and Mapping.
on the left of the Layer to expand its properties. Here we can change the Blending of the layer or the Size and Position when we do not want it to be full screen. Also we can change the used TextureFile in here as well as its Orientation and Mapping.
Next, you can apply Effects. Expand the property group again by clicking on it and you can see some Effect related properties. Again you can change the Blending of these effects or you can add a Mask to them to only apply the effects to certain areas of the layer. Add a new effect by clicking on the on the bottom of the property group. Choose to add a Blur and again you can see the effects of the changes directly in the Renderer Window on the right - your image appears blurred.
You may expand the Blur property group again by clicking on it to change some parameters of the blur if you want to.
It is up to you to add further effects or change the blending, masking etc. When done let us look at the 3D Layer.
Using the 3D Engine of Ventuz
Since we already had the 3D Layer in our scene on project creation we do not need to add it. To edit the world the 3D Layer should represent we need to use three different Editors that we have not accessed yet: The Hierarchy Editor, the Content Editor and the Property Editor. They are not open now because we currently are working in the Design View. To access them you need to switch to the Logic View by clicking on the corresponding button on the top right of the Ventuz Designer.

Now the Renderer Window is a lot smaller but the other three Editors are open. Now we need to go inside the 3D Layer. To do so click on the  Icon to the left of the Layer in the Layer Editor. The Icon should turn orange.

The Hierarchy Editor and the Content Editor can be fed with Ventuz Nodes. While Hierarchy Nodes can be placed in the Hierarchy Editor only, Content Nodes only fit in the Content Editor.
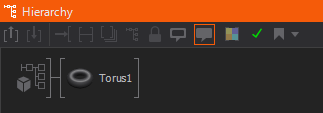
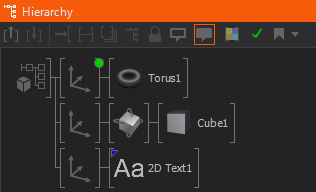
Let us add our first nodes to the 3D Layer. Press space to open the Fast Toolbox. This is a dropdown menu from which you can choose every existing Ventuz Node, be it Hierarchy, Content Nodes or Layers. The Toolbox is organized by category. Go into the Geometry category and add a Torus to the scene by dragging and dropping it to the Root on the top-left of the Hierarchy Editor. Now you can see the Torus inside the Renderer Window.
This might look a little bit boring, since it is not rotated or positioned at all. To do so you will need to add an Axis Node in front of the Torus. Open the Fast Toolbox, go into the World category and drag and drop an Axis in front of the Torus.
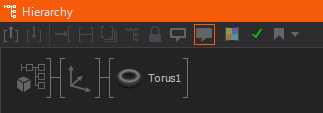
Click on the Axis Node to make its properties visible in the Property Editor on the right of the Ventuz Designer Window. Here you can now change the scaling, the rotation and the position of your Torus.
Adding External Data
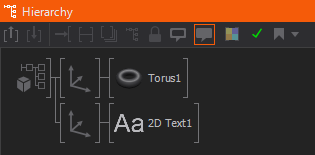
But placing and scaling Geometries are not the great advantages of using Ventuz. Next we want to add some external data and provide some elements in the scene with it - we use a Text to show the content of a simple .txt-file. To start add a Text2D Node (from the Text category) to the Hierarchy just below the Axis Node. When dropping the Node a Dropdown menu should open up - click on Block Text once it does. You should now see a text somewhere behind the Torus. Place an axis node in front to position the text somewhere readable.
Now we need external data. Go into the project's directory and open the Data Folder. Here you can create a new .txt file and write something into it. If you do not know the location of your project anymore you can also place the file anywhere else and search for it later, when we want to reference it from inside the scene. It will then automatically be added to the project structure.
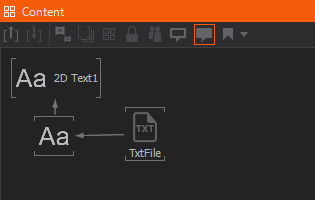
Now go back to Ventuz Designer again. Go into the Hierarchy Editor and click on the 2D Text Node. You can see it in the Content Editor now as well. The Node is bound to a Block Text Node which is a Content Node. This Node takes a plain text and is capable of formatting it in a way that the 2D Text Node is able to show it on screen. So we will want to provide the text from our external file to the Block Text Node. Open the Fast Toolbox and add a Text File Node from the Data category to the Content Editor. Click on it to see its properties in the Property Editor.
Here you can change the File property by clicking on the three dots on the right of the box. Choose your .txt file in the opening dialog. Now click on the Block Text Node to open its properties. Drag and drop the Text property onto the Text File Node. To drag a property properly you will need to click the property name in the left box instead of the property value on the right. Once dropped, the property is bound to the output of the Text File. Now you should see the text from inside your Text File in the Renderer Window and a  decoration in front of the Text property.
When binding properties you should always remember to bind the Input to an Output, not vice versa - think about Where does this Node get its parameter from?
As long as the AutoUpdate flag of the Text File Node is checked, every change inside the Text File is directly applied to the Text2D inside Ventuz once the File is saved.
Animating the Scene
Until now the scene might be a little bit boring and static. So let us start to add some Animation. Go into the Animate View on the top right of the Designer Window. Now you can see an additional Animation Editor on the bottom of the screen. Let us start animating our Torus.
Whenever you want to animate a Node you should think of animating single properties - this is as easy as binding a property to the animation of your scene. Click on the Axis Node in front of the Torus and drag and drop any property you want to animate anywhere in the Animation Editor. As a result you can see a  decoration in front of the property and a new Animation Channel in the Animation Editor.
Now we can animate the properties. First click on the properties' channels and then somewhere in the Timeline to the right of the visualisation of the Animation Channel to place the Slider there. Go to the very beginning and press Ins to create a Keyframe for all selected Animation Channels. You can change the value of a property for the Animation Channel by changing the Current Value between the Channels and the Timeline. Repeat this for as many keyframes as you want to use.
Note that whenever you change a value while the Slider is not placed on a Keyframe of the corresponding Animation Channel the value will be lost and reset to the previous one again once the Slider is moved. You can add a Keyframe after you changed the value as well to prevent this.
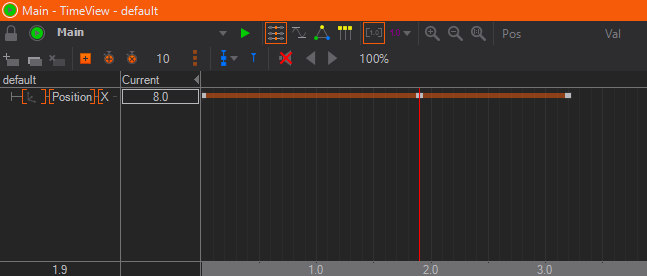
By now the animation will automatically play once the scene is loaded which is fine. But probably we want it to play looped or swinged. To do so you have to click the  Icon on the top right of the Animation Editor and activate Looped and/or Swing in Autoplay. When clicking the
  Icon the animation starts to play with the desired options.
Adding Touch Interaction
Lastly we want to make the scene interactive - which is even easier than anything else we did before. To do so let us add a new Geometry - let us use a Cube this time. Once added to the scene you can scale it using an Axis Node like we did with the Torus.
Now search for the Touch Orbit Node inside the Interaction category and place it before the Cube. Basically now we are done. When dragging the cube inside the Renderer Window it will rotate without us having to do anything else. We can now adjust some properties of the Touch Orbit Node or bind one of its Outputs to any other node to create more complex touch logic.
Deploying the Scene as a Ventuz Presentation
We now had a very quick look at the features and the workflow of Ventuz Designer and created our first scene. The last thing to do is to deploy the Scene as a Presentation and run it without the Designer but inside the Ventuz Runtime instead.
This is rather simple as well. In the Menu Bar on the top left click on Scene->Export->Ventuz Presentation. A Save Dialog will open up and you can choose where to save the created Presentation. Afterwards a Resource Manager opens. Here you can include or exclude all used Assets like our built Scene or the Text File we created. Ventuz will automatically tick all Assets that are referenced from within the scene, but you can adjust these settings manually as well.

When done, click Ok and Ventuz will start to pack the Presentation File in the desired location. Close the Designer and search for the File and double click to open it in the Ventuz Runtime. Usually it should open in Fullscreen Mode and you can interact with it like in the Designer's Renderer Window. The Animation Plays and the Text is still read from the Text file.
Congratulations! You just created your first Ventuz Presentation! Okay, it might be a very small and easy one but you just took your first steps with the Ventuz Software Suite. Now you just need to build up on that and practice and you will very soon be able to create more complex and very special projects and presentations.