Ventuz Best Practices
Table of Contents
This page will give you a solid overview of the best practices while building content inside the Ventuz Designer.
Introduction
Working on bigger projects can get messy real quick. On this page we will show you whats important to keep your projects clean and maintainable. This will include things like scalable naming, Grouping, Container, and good practices when working in a team, besides many other useful tips and tricks.
Containers and Interfacing
If you dont know what Containers are or how to create one, visit this page to get a quick introduction. While using containers it is important to know where the strength of this node lies and where its weaknesses are. Containers are very useful if you need re-usable content or content that should be sealed so it wont be accidently changed when working in a team. If you just want to clean up your scene it is more advisable to use the Group node since these can be accessed faster and its content is visible more easily.
To use Containers effectively you should know what the Interfacing mode does and how to use it.
When working extensively with Containers, inevitably in-use Containers will require modification. Whether it is a bug that needs to be fixed or additional functionality added, the change is done in one instance and manually has to be transferred to all other instances. The usual method to do this is to remove all other instances, duplicate the modified version and manually reconstruct all pre-existing bindings.
Interfaces are an extension of the Container idea to address the above, and other, problems. They define which properties a Container has to provide in order to be used in a certain part of the scene. A Container Interface keeps its properties (and therefore its bindings as well) intact even when the encapsulated nodes are removed. When the content of a container is replaced, new exposes can fulfill the interface properties.
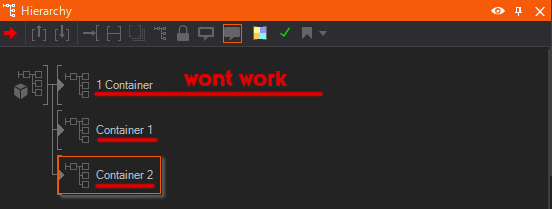
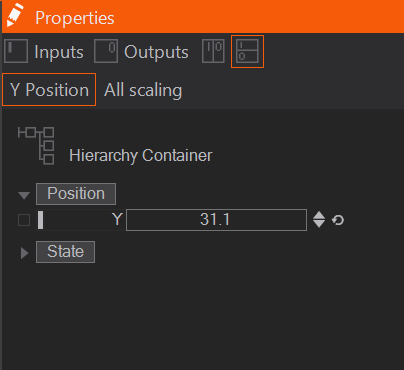
This is especially handy if you are building content that is mostly the same. Like buttons for a user interface or lower thirds with animations. Here is a short explanation on how to update Interfacing Containers and what is important while doing so. After creating your first container click on the Interfacing button on the bottom of the Property Editor.
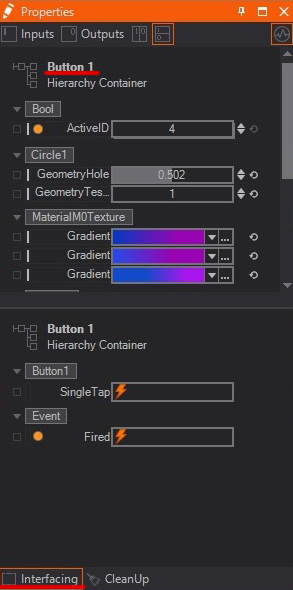
Notice the name of the container, too. This has a number at the end so later the number will go up with each copy that we create.
Now you can just copy and paste the container with CTRL + C and CTRL + V or by holding down CTRL and click and hold while draging it to the place where it should be copied inside the Hierachy Editor. If you now change anything in one Container you can update the other ones with it so they all have the same settings. To do this click and hold the left mouse button from the changed Container and drag it over to the one you want to update. While hovering over this Container click it to update it. You can continue holding the left mouse button while right clicking on all the other Containers that should be updated.
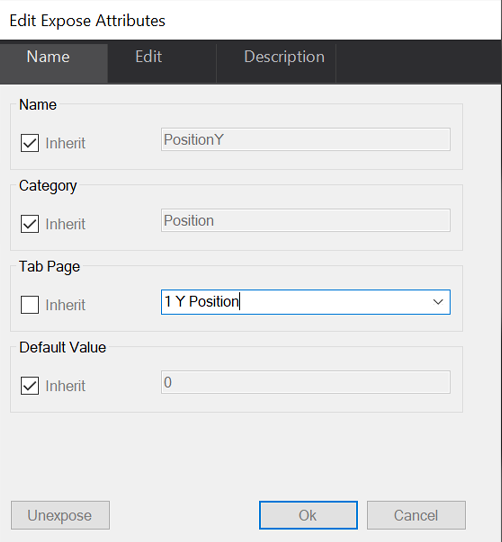
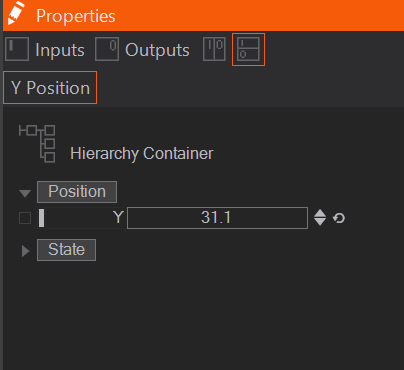
Usually you dont want to have X numbers of Containers with exactly the same values in their properties, e.g. to place them at different locations. So to keep those values unique, you need to Expose all properties that should not be changed while updating them - exposing a property makes it a part of the Container's interface, and - as discussed earlier - the interface defines which properties are coming from outside the Container. Lets say the content inside the Containers should all have a different X position value. Then you dont need to expose it on every single container and update them. You can rather just expose the X position value on one Container and then update every other Container. You will notice that they will still sit on the same position, but if you now change the X value for every updated Container individually the values and position will stay the same the next time you update them. This can be done with every Property inside a Interfacing Container.
More importantly though, you can bind interface properties and these bindings will persist between
Repositories
The Repository lets you store either individual nodes or subtrees of nodes by dragging them into the Repository window (for Content Nodes, press and hold CTRL while dragging them to the Repository). If that window is not open for you, open it by going in the View menu and click on Repository followed by what you want to open.
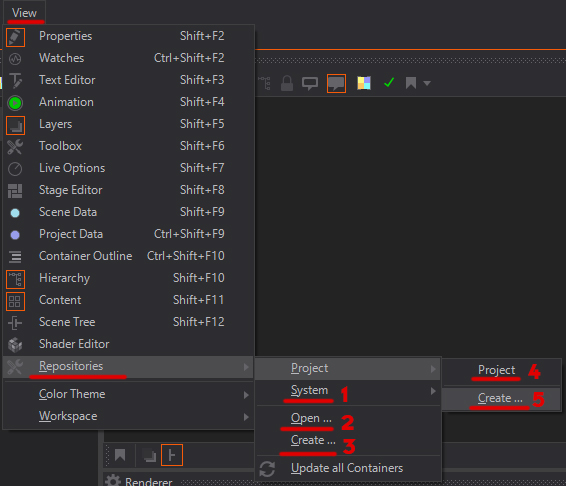
- 1.Will create a system wide Repository which can be accessed via the default Ventuz 6 documents folder or with a custom folder from any project on this machine.
- 2.Open up a repository from a folder.
- 3.Create a new Repository saved to a custom folder.
- 4.Open the projects default Repository.
- 5.Create a new Repository inside the project folder structure.
Now you are able to store individual nodes or whole subtrees, give them custom names and icons in there. Furthermore you can access more options for organizing purposes by clicking on a saved node. Here it is possible to create a new folder or a new tab. As well as editing or deleting the selected node.
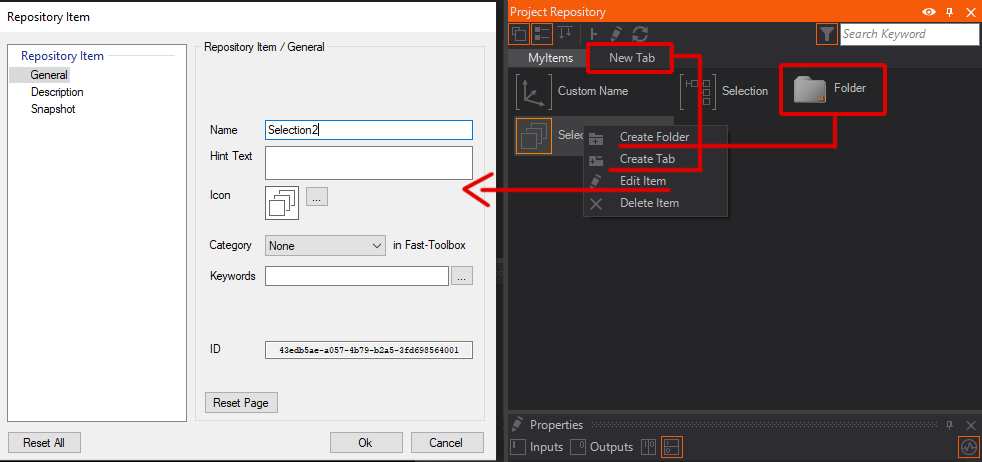
When using a custom icon it is advised to not use images larger then 128x128 since this could potentially increase the loading time of the project, while larger images will not have more visible detail due to the icon size inside Ventuz.
When using Interfacing Containers from the Repository they will keep a link to the repository item and you can easily update all referenced Interfacing Containers in your open scenes with the Refresh entry in the context menu of the Repository Item.
For more information on this topic take a look here.
Modular Workflow
Containers Interfaces and Repositories allow for a modular workflow in Ventuz. Instead of simply thinking of a presentation as a whole and how to meet the functional requirements, you can use these tools to make the presentation more maintainable, extendible etc. Try to think of your presentation as a collection of different modules, that are interconnected and create a bigger more meaningful result. A simple example is: Instead of simply adding nodes that represent a UI element like a Slider, you could instead make that slider easily reusable. Create an Interfacing Container that allows to easily change the appearance of the slider, like colors and the range of possible inputs. Then you can place that slider in your project's or system's repository to re-use it anytime in any other Scene or even Project. Now, whenever you find a bug in that slider or want to add more functionality to it (like adding customizable width), you can simply do so in any instance of that repository item, drag and drop that back to the repository item (like you do when interface copying) and then update any other instance that needs these changes, too.
Node Families
Node Families are a way to group up Nodes inside the Content Editor by marking the nodes needed and holding the button till a menu pops up or use either the shortcut ctrl + shift + f or click the Create Familiy icon in the top bar of the content editor:
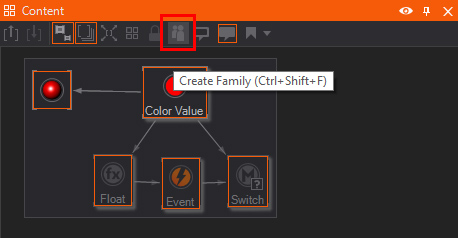
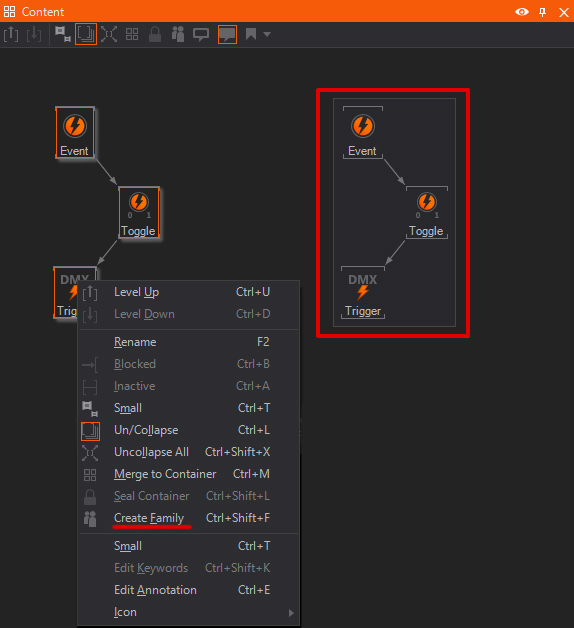
These nodes are now in a family and can be moved together by dragging the nodes around by clicking in the empty space of the family. Paired with an Annotation this can help remembering what a certain logic does and is crucial when working in a team.
Annotations
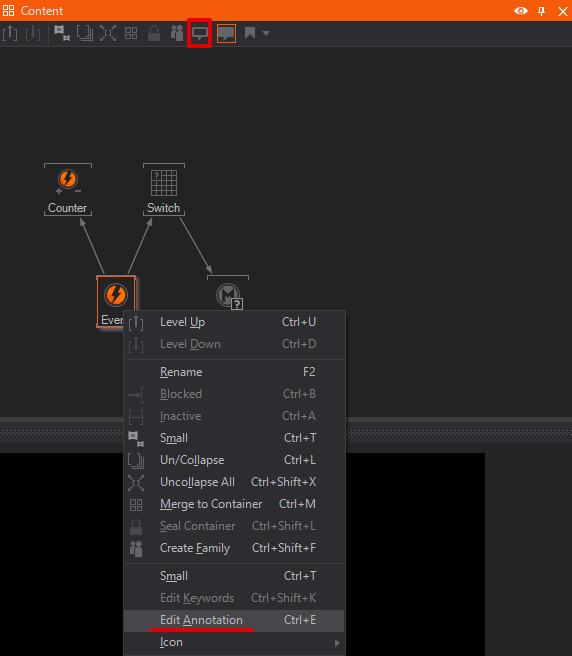
Another great way of organizing and documenting a project are Annotations. With these you can write notes into your project to document what a certain node or a group of nodes does. To add an Annotation just hold the mouse button on the node that should be Annotated and hit "Edit Annotation". Or use the button on the top of the Content Editor / Hierarchy Editor. To disable all Annotations hit the button right beside it.
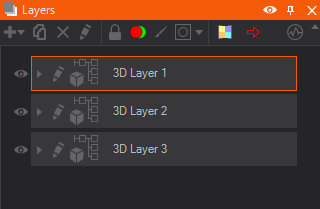
 It is also possible to add an Annotation to the inside of any container or the scene, this is only possible inside the Hierarchy Editor, just click and hold in an empty space and the menu comes up or use the annotation button on top of the Hierarchy Editor. Since Layers are also Containers you can do this at the root of a 3D Layer.
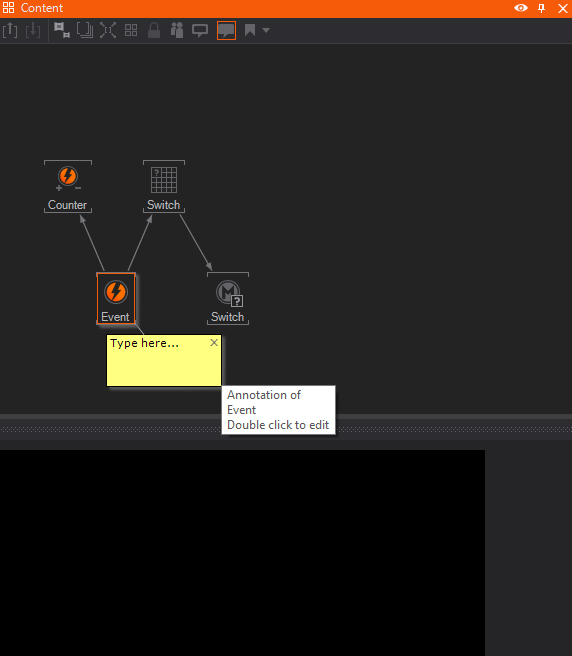
Double click inside an Annotation to edit it. Use the HTML syntax to format your text. Here is a good page to learn more about the text fundamentals HTML Fundamentals
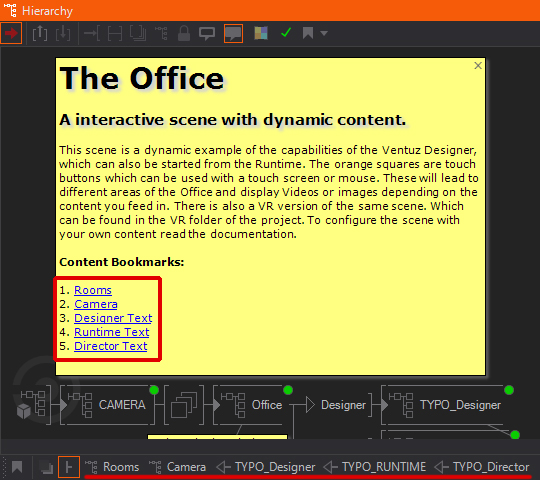
With the help of Bookmarks you are able to build whole navigation structures inside the documentation to easily navigate inside a more complex scene.
Here is a little example which you can copy inside your Annotation:
<blur color="lightgray" radius="4" xoffset="3" yoffset="3"><h1>
Scene Name
</h1></blur>

<blur color="lightgray" radius="4" xoffset="3" yoffset="3"><h5>
A short subtitle
</h5></blur><br>

Lorem ipsum dolor sit amet, consectetuer adipiscing elit. Aenean commodo ligula eget dolor. Aenean massa.
Cum sociis natoque penatibus et magnis dis parturient montes, nascetur ridiculus mus.
Donec quam felis, ultricies nec, pellentesque eu, pretium quis, sem.<br><br>


Lists:
<ol type="1"><b>
<li>Main Point</li>
<li>Main Point 2</li></b>
<ol type="a">
<li>Sub Point</li>
<li>Sub Point 2</li>
</ol></ol><br>

//Boomark Selection
Select <a href="bm:Mesh1">Mesh1</a> or select <a href="bm:Mesh2">Mesh2</a> and have fun!

Weblink: <a href="www.ventuz.com"> www.ventuz.com</a><br>
Special tips, comments and warnings: <font color="red"><b>Warning Text</b></font><br>
Bookmarks
Bookmarks mark certain points inside your node structure inside the Hierarchy or Content Editor, so you can instantly jump to those points without the need of searching trough the whole scene. This is very helpful in scenes that are bigger and more complex. To add a bookmark click on the button on top of the Hierarchy or Content Editor. Bookmarks appear at the bottom of the Hierarchy Editor and can be clicked to navigate to that bookmark.

The Bookmarks can be individually further edited by clicking them.
Node and layer Colors
One more thing to further organize and document your scene is the feature to color Layers or Hierarchy Nodes. The button for this can be found on the Layer or Hierarchy Editors.

Note that this feature is only active when a hierarchy node or a layer is selected.
Naming conventions
It is advisable to use certain naming conventions when working with Containers, Layers or Property Tabs and Properties on Containers for a better Workflow.
Additionally Ventuz offers some features for easier maintainability:
- Use numbers at the end of the name to let Ventuz count upwards for every copy made.
- Use numbers at the end of the name to let Ventuz count upwards for every copy made.
- It is possible to use hidden number sorting when working with Property Tabs. By using a leading number in the name of the tab you can give it a position, so the alphabetical order is ignored.
This number will keep the Property Tab up front. Even if we add another tab that is starting with an A for example.
Generally speaking it is advised to name all your Nodes, Containers and Layers properly so the scene stays clean and readable.
Version Control Workflows
Not only when working together with other people but also alone you will most often want to somehow track your changes in case you introduce errors in your presentation with certain changes. In programming it is a common technique to use any kind of Version Control.
Regardless of which Version Control System you use - it always contains a server that you send your data to when you made changes that you want to track (i.e. save). This way whenever you realise that a change introduced a new error you can search in the history of your versions of the project and trace down the change that introduced the error. Messages for each change help with this as much as displays of the exact difference that a change has made to certain files.
When working in Ventuz you will mostly have to deal with Binary Files - while tracking changes in text files is fairly easy to do it becomes almost impossible in any binary data. This is why the version control can only track which Ventuz Scenes have changed but cannot give much information about how they changed. So it is especially important to provide meaningful messages to the version control when working with Ventuz.
Scripting vs Node Logic
A lot of the logic that you can build with Ventuz Nodes you can also script using the Script Node. So oftentimes the question arises whether or not to use script for certain parts of your scene. Here are some advantages of each way and following some guidelines to help answer that question and to working with scripts - note that these do not claim to be complete nor correct in each and every case:
Advantages of nodes:
- In most cases nodes are easier to understand for other people - especially for people without knowledge of C# or Visual Basic.
- In most cases nodes do not cause unexpected behavior or crashes - whereas we cannot guarantee that for user created scripts
- Each time a script is loaded Ventuz generates a temporary DLL from it that will only be released when the Ventuz process is stopped - even though the DLL is not used anymore. This might become (an inevitable) memory leak in some specific setups. Also if you have several identical scripts each of them generate another DLL.
Advantages of scripts:
- Nodes might become very tangled - especially when building logic that needs to buffer values across several frames. Specifically that case can be achieved a lot easier with instance variables in a script.
- 3rd party libraries can make a logic a lot simpler.
- Editing a script's code in Visual Studio makes tracking in Version Control a lot easier because it converts the script's code from binary to a simple text file.
Guidelines:
- When you need to integrate devices, APIs or SDKs that Ventuz does not support out of the box, you need to create a script for that.
- Oftentimes simpler operations can also be created in an Expression Node. These do not have the same performance issues like Script Nodes.
- Generally, if you can you should use nodes or use a single script in the scene pass down its results to the respective rendering nodes (with needed logic nodes in between) to avoid the overhead from the additional DLLs.