Display Images and Movies
Table of Contents
This page gives you an overview on how to integrate images and movie files into your Ventuz project. This is useful not only when displaying static or animated backgrounds, but also when dynamically loading images or playing movies based on real-time input like user interaction.
Introduction
To display an image or a movie file on screen you need to set up the Ventuz Engine for how you want it to be displayed. There are several different ways to do this that vary in flexibility and ease of implementation.
- 2D Layers are the quickest way to integrate images and movies into Ventuz using the 2D Compositing engine.
- Image and Background Nodes are a more advanced way to integrate images and movies into Ventuz using the 3D Compositing engine.
- The Material Node is the most advanced way to integrate images and movies into Ventuz, but also provides the greatest amount of flexibility and supports features such as real-time lighting.
While discussing these techniques we will also have a look at Advanced Loading with Resource Loaders and the Handling of Resources inside Ventuz.
2D Compositing
When working with movies and images the simplest way to get them on screen is to use 2D Layers. All of this work is performed in the Layer Editor. If you do not need to perform 3D transformations or use the image or movie in a 3D context (e.g. occlude them with a 3D object) this is a good way to go.
You can add an Image or Movie Layer by clicking the  icon on the top left of the Layer Editor. Alternatively, you can open the Toolbox (Shift + F6) and drag and drop an Image or Movie Layer Node into the Layer Editor.
To make things even easier, you can drag and drop image and movie files directly into the Layer Editor from Windows Explorer.
You can easily change which file to load by double-clicking the thumbnail for the Layer in the Layer Editor.
When using a 2D layer to render images and videos you have available all the regular 2D Layer controls: Blending, Layout, Mapping, and Effects. Please refer to the 2D Workflow Page for a more detailed explaination on how 2D Layers work in Ventuz.
Opacity settings for the layer can found by clicking the small triangle to expose the Blending properties.
Advanced Loading Options
Sometimes simply loading a file does not provide the flexibility required for the specific task. Below are two options for loading Images that provide a lot more options:
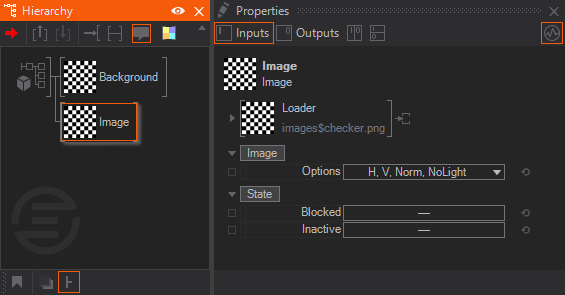
- The Image Loader Property Group gives you the most important options for loading Images and is available in the Properties of the rendering node (2D Layers, Image Nodes, or Material Nodes).
- The Texture Loader Node is a separate node and provides the loaded Image as a Texture Property that can then be processed in the scene logic and finally bound to the rendering node.
In contrast, the loading of a Movie File is always done through usage of the Movie Clip Loader Node.
Image Loader Property Group
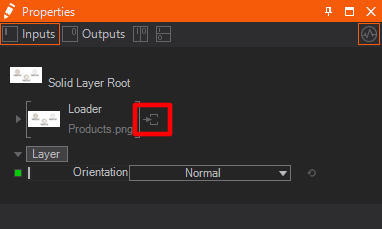
It does not matter where you want to use the images - in 2D Layers, Image Nodes, or Material Nodes - the routine to load them and to adjust loading options is the same for all. Loading an Image by default happens through the use of a Texture Loader Property Group that is present in the Properties Editor.
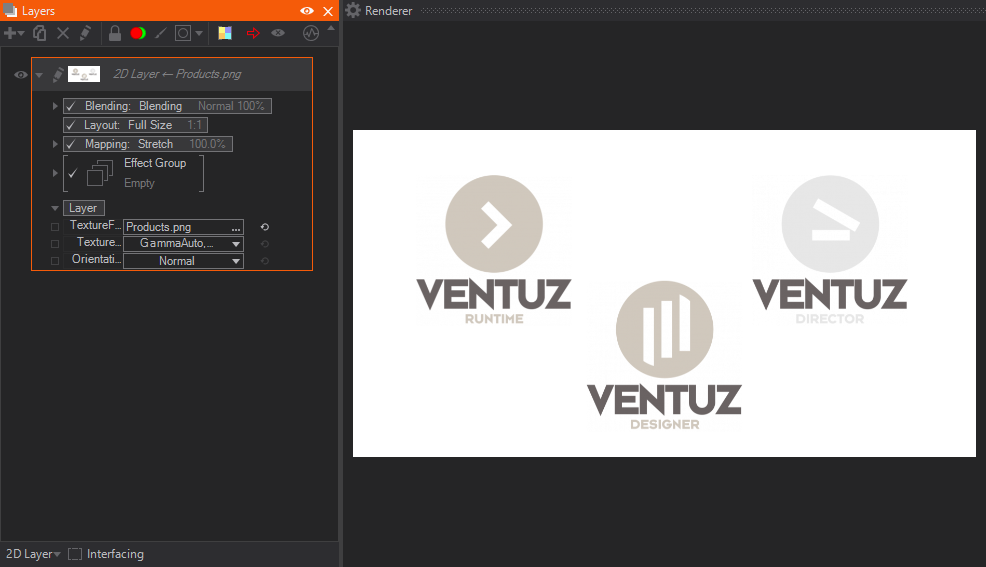
For a 2D Layer, select the layer you would like to manipulate by clicking pencil next to the layer name in the Layer Editor. Next, select the Layer Root Node in the Content Editor to manipulate the loaded image.
Layers cannot be edited when using the Design Layout. Switching to any other Layout will expose the Layer Editor, where you click the pencil icon on the left of the layer you would like to edit.
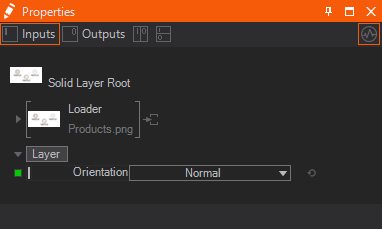
Click the  icon or right-click the Loader Property Group to expose its properties. Here you can change the File property and change some Hint flags that tell the loader how to interpret the image.
For more information regarding the Image Loader and Texture Loader Nodes, please visit the Image Loader and Texture Loader reference pages. For information regarding the Hint flags please refer to the Texture Loader reference page.
Texture Loader
There are several reasons you might want to use individual Texture Loader nodes instead of a Property Group:
- You need more advanced options for loading the image, like asynchronous loading.
- You need more information about the loaded image, like width or height.
- You need to add some additional logic to the loading, like a fallback image, a buffering mechanism or a switch between multiple loaded images.
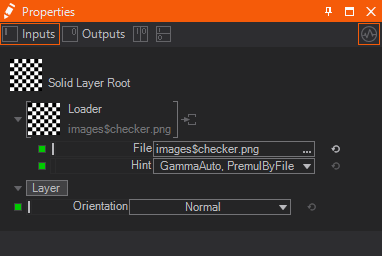
The Texture Loader Node is located in the Texture category of the Toolbox. Placing this node in the Content Editor enables you to bind its Texture output property to any rendering node. For this, the rendering node needs to change the default Image Loader Property Group to a Texture Property Property Group. This can be done with the drop down menu next to the thumbnail of the Property group:
Instead of placing the Texture Loader Node manually you can also just Extract the default Image Loader Property Group. This creates a Texture Loader Node for the selected file and hints.
If you have been working with an Image Loader Property Group and now need features only available on the Texture Loader Node you can also Extract the current Image Loader Property Group. To do so click the  icon next to the Property Group.
Most importantly, the Texture Loader Node is capable of loading images in an asynchronously. This allows images to be loaded in the background without the presentation freezing during the loading process. Additionally, you get information like the Width and Height from this node that can be used inside your scene logic.
For more detailed information please refer to the Texture Loader Node page.
Movie Loader
If a 2D Layer lacks the level of control you need for a movie clip, you will need to use the Movie Clip Node for loading and playback control.
You can find the Movie Clip Node in the Texture category of the Toolbox. Drag it from there and drop it into the Content Editor. Just like the Texture Loader Node it provides a texture property that can be bound to any rendering node. Again, the rendering node needs to change its default Image Loader Property Group to a Texture Property Property Group. And again you can use the built-in Extract mechanism.
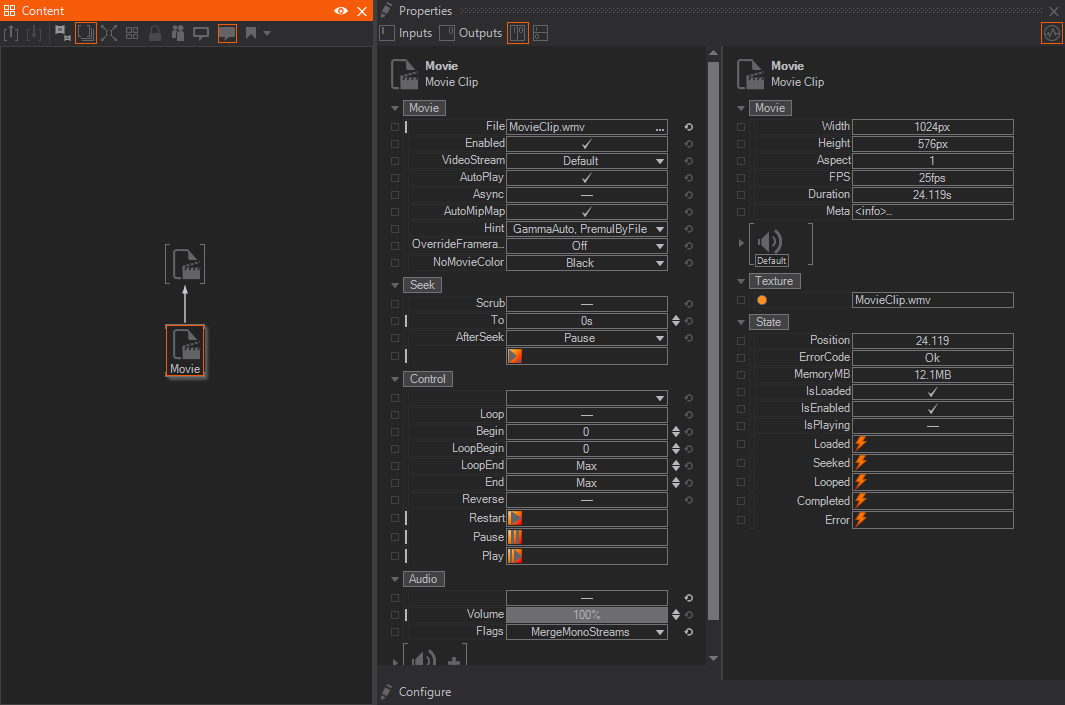
Again you gain information about the movie like its width and height as outputs and you can instruct it to load asynchronously. With its Play, Pause and Restart methods you can control the playback of the movie using events.
For more information regarding movies, please refer to the Movie Clip Loader Node page.
Simple 3D Compositing
If you need to display an Image or Movie file in the 3D World with only very basic options available you will still want to use either the Image Node or Background Node. They are used inside the Hierarchy Editor, so you will need to switch to any Layout other than Design to work with them.
Essentially both these nodes work the same, just the rendering of the provided texture is different.
- The Background Node renders the image on top of each already rendered object and will be occluded by each object rendered after it.
- The Image Node will create a Rectangle which extends in 3D space and is rendered and occluded by other objects as usual for any 3D object.
Most times, the Background Node is best rendered at the very first position in a 3D Layer so that it does not occlude anything.
For information on the render order inside the Hierarchy Editor see its reference page or the Introduction Page to the Hierarchy and Content Editors.
Note that the Image and Background nodes can render Textures loaded by Texture Loaders or Movie Loaders just like any other 2D Layer!
The Image Node renders an image in the same aspect as the loaded image - the larger side of the rectangle will have a scaling of 1. Use an Axis Node in front to change the position, rotation and scaling of the Image. To change the transparency of the image you will need to place an Alpha Options node in front of the Image node in the Hierarchy Editor.
Have a look at the reference pages of the Background Node and Image Node for more detailed information on their properties and functionality.
Advanced 3D Compositing
In many cases it might be enough to only adjust a visual's transformation in 3D space, however you may want to have access to more advanced features like real-time lighting. This is where the Material Node comes into play. This enables you to apply your visual to any geometry and blend it in every way the render engine supports.
You can find the Material Node in the Color/Material section of the Toolbox and it can be added into the Hierarchy Editor. When you first place a Material Node you will not see anything rendered on screen, unlike what happens with the 2D Layers and Image and Background Nodes. This is because the Material Node does not have any geometry to render onto by default.
You can also drag and drop any Image or Movie file from the Windows Explorer into the Designer's Hierarchy or Content Editors to create a Material Node or Material Provider Node respectively.
To make the Material visible, you can place a Rectangle in the Hierarchy behind it. You may need to adjust the rectangles sizes with the SizeX and SizeY properties in order to match the aspect ratio of your loaded visual. The Normalize property scales the largest dimension of the visual down to 1 unit, and scales the other dimension accordingly to maintain the correct aspect ratio for the loaded visual. With this property enabled you can easily bind the SizeX and SizeY properties of your Rectangle to the Texture Height and Texture Width properties of the loading Texture or Movie Loader Node.
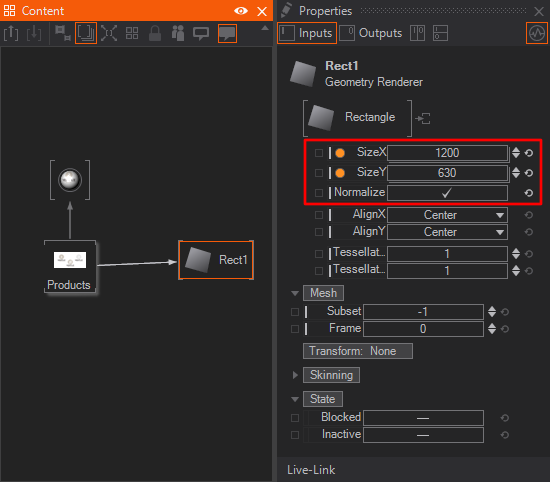
The biggest advantage of this method is not only that you do not need to manually type in the size of the visuals you load - but rather that you can still load visuals of any size without ever knowing of them when building your presentation, and it will automatically fit in the slot you designed for it.
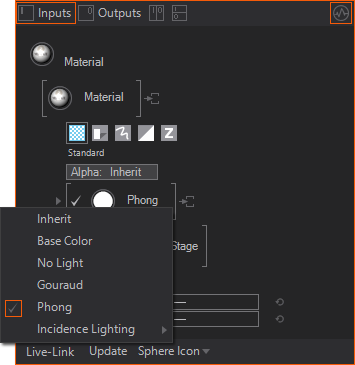
Finally, with the Material Node in Place you can enable or disable lighting by changing the Lighting Mode property group to Phong.
There are additional options that allow you to change how the texture is Mapped onto the geometry - not only can you change the scaling, rotation or translation, but you can also change to a totally different mapping techniques like a Screen Aligned mapping or 3D mappings.
Resource Handling in Ventuz
Generally it does not matter whether you are working with Images, Movies, Live Video Input or any other kind of pixel data since they are used as Textures inside the rest of the scene logic. But there are some differences when it comes to Resource Loading and Resource Handling. These paragraphs give a rough overview of the loading options and the resource's behavior in the engine. Most of the time you do not need to know about them, but sometimes it may come in handy!
- Images are always loaded as a single instance - whenever a Loader tries to load the same file, it will simply reference the already loaded texture in memory.
- Movies are streamed once per loader. This is because each loader creates a stream from the HDD that each hold a different selection of frames (the buffer) - depending on the position of the movie clip.
Images and Movies thus have different options for loading.
- Image loading options (color space etc.)
- Movie loading options (buffers, playing direction etc.)
- Handling multiple references to the same file in case of image and in case of movies
Image Loading
The Texture Loader Node provides you with different flags for loading via the Hint property. You can change the color distribution of the texture - normally the color channels of a texture have different ranges depending on their usage. E.g. a color texture has more values in darker tones because the human eye can distinguish better between them than between bright tones (sRGB or Gamma2.2). A Normal Map on the other hand normally uses a linear distribution since each pixel simply represents the three components of a 3D vector.
Additionally you can set to automatically generate mipmaps if the texture does not provide any (this is the case with PNG or BMP image files). Generally speaking, mipmaps are used to create scaled-down versions of the loaded images to improve performance and create better results while the image is drawn in a very small area of the screen.
Different loading configurations on multiple Texture Loader Nodes mean that the image is loaded multiple times, because the resulting textures in memory differ from each other. Keep that in mind when changing these options.
Movie Loading
The Movie Clip Node provides an ever greater set of options for loading, since streaming might need a lot more adjustments to properly function in your use case.
All options that are present on the Texture Loader are also present on the Movie Clip Node. Additionally you have a set of options that can be adjusted with the Configure button at the bottom of the Properties Editor (you need to select the node in the Hierarchy or Content Editor to see it).
These options generally allow you to adjust the behavior of the movie clip in a more detailed manner: you can adjust the number of buffered frames, in which direction you want to buffer, change the interlacing behavior and used color space. Lastly you have some more advanced options that are normally changed in very specific cases. You can find more information regarding these options on the Movie Clip reference page.
Conclusion
This concludes the overview of displaying images or movies in Ventuz. You should experiment using these different options to better understand when is the most appropriate time to use each method. This process may not be trivial, and may require some trial and error to really get things dialed-in.
Also you should get a hang on the more advanced features that enable the full potential of Ventuz, mainly asynchronous loading of dynamic assets. While it enables you to load images on the fly that did not even exist during design time, you need to handle asynchronous loading carefully - a good project for practicing would be an image rotator, that asynchronously loads the next image inside a specified Directory and only displays it on screen once its loaded, until then the old image is displayed.
Additionally you should have a read of other introductory pages and the reference pages of the nodes and features that are mentioned on this subject.