Layer Editor
Table of Contents
Introduction
The Layer Editor is the starting point for new scenes in Ventuz. You can consider it to be a layer-based compositing environment inside Ventuz. Roughly speaking, there are two kinds of layers, 2D and 3D layers.
3D layers contain a 3D environment and a Hierarchy Tree, essentially the environment that could be found in Ventuz 4 and earlier. In addition, Ventuz also features 2D layers which are very useful for working with content without having to dig deeply into the Hierarchy and node trees. Thus, these 2D layers are a good starting point for newcomers. Additionally, users with previous motion graphics or compositing experience will feel more "at home" using the layer system at first.
By default, the Layer editor appears in most of the Interface Layouts in Ventuz, usually on the top left side of the User Interface.
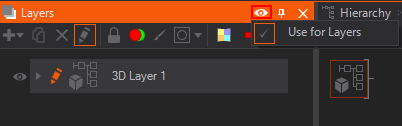
In addition, the Layer Editor can be exposed in any custom Layout by marking the Layers option into the View menu, or by using the keyboard shortcut CTRL + F5.
The Layer Nodes can also be used inside the Hierarchy Editor to save some screen space. Check the Window Option in the Layer or Hierarchy Editor.
Layer Editor Toolbar

On the upper part of the Layers Editor you can find the Editor toolbar, featuring these tools:
| Icon | Tool Name | Description |
|---|---|---|
 | Add Layer | This tool opens a dropdown menu where you can pick the type of Layer to be added - layers are always added over the Selected Layer, they appear underneath it in the editor. |
 | Duplicate Layer | This tool duplicates the currently selected layers, additionally you can use the standard Copy and Paste procedure, or the Ventuz standard CTRL + drag shortcut to duplicate a Layer or Layers. |
 | Delete Layer | This tool deletes the currently Selected layers, additionally you can hit DEL to delete the selected Layer or Layers. |
 | Edit Layer | This tool will enable the Edit Layer mode. This is indicated by an orange pencil. |
 | Lock Layer | This tool locks the currently Selected layers, a lock icon is added to the locked layers in order to identify them. |
 | Preview/Program Visibility | This tool toggles the visibility of the Layer in both the Preview and Program windows of Director. |
 | Designer Visibility | Layers are marked with an icon for Preview only (green) or Program only (red) visibility, the default is visible on both - No icon |
 | Chroma Keyer Rank | This tool allows making layers chroma key layers, so they can be used as Background (default), Foreground or Garbage Matte. |
 | Layer Color | This tool colors the selected layers so they can be identified easily. It is similar to the Node Color tool in the Hierarchy Editor. |
 | Render Point | This tool solos the selected layer so it can be viewed isolated. It is similar to the Render Point tool in the Hierarchy Editor. |
 | Locked Visibility | This tool locks the visibility of the selected layers. A layer with locked visibility will always be visible, even when another layer is viewed isolated using the Render Point. |
 | Add Bookmark | This tool stores a selection of layers as a bookmark, that can be recalled later to easily load complex selections. Bookmarks include any kind of selection, not only layers, thus they can be also combined with any selection of Nodes both in the Hierarchy and Content Editors. |
 | Monitor Values | This tool shows the current values of any parameter, and sets them to be updated in real-time. This makes understanding the ongoing processes or animations easier, but can use up a bit of processing power. |
Layer Bar
Each Ventuz Layer includes certain icons and controls to set certain Layer properties and to give information about the Layer. Furthermore, layers can be expanded to access their properties within the layer Editor - and of course they will open in the Properties editor as well.
The Tools and icons starting from the left hand side of the Layer bar are:
| Icon | Name | Description |
|---|---|---|
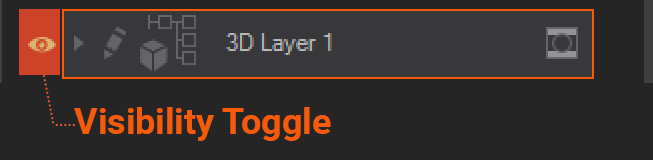 | Layer Visibility | This toggles the layer visibility in the final composition. The icon has three states, On, Off and Override - parent layers, like group or switch Layers, override individual layer visibility options, and therefore the icon is grayed out to reflect that |
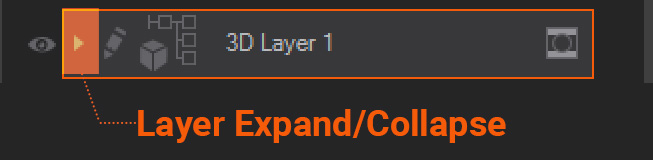 | Layer Collapsed | This arrow-shaped icon indicates that the layer is collapsed, its properties are not shown in the Layer Editor. After pressing it, the arrow points downwards, meaning that the layer is expanded and its properties are displayed in the Layer Editor. Group layers which contain other layers, behave in the same way, so expanding them will show the layers inside the Group. They can be expanded to access other layers or properties, and so on. This is the area that gets colored when using the color tool in the Layer Editor toolbar. |
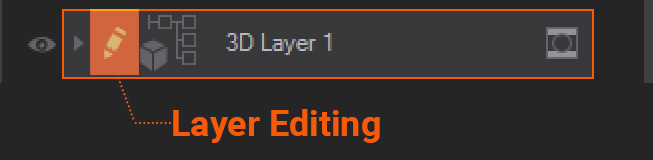 | Layer Editing | This pencil icon enables editing of the layer. This is applicable for 3D layers in particular, because it enters the hierarchy for that particular 3D layer, where 3D scenes can be created and worked on. For 2D layers, this function opens the content in the Content Editor, allowing for the creation of complex Logic and data connections, for instance. You can also enter a 3D Layer container by clicking middle mouse button . |
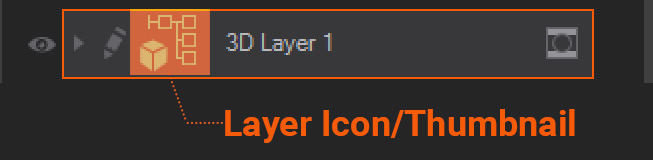 | Layer Icon/Thumbnail | This area displays an icon to show the type of layer, whether it is a group, 3D or 2D layer, etc.. Furthermore, for most 2D layers it also acts as a quick way to edit its content. By double-clicking on the icon, a contextual editor will appear to select the image file, adjust the color or gradient, etc... It also creates a small thumbnail of the layer current content. |
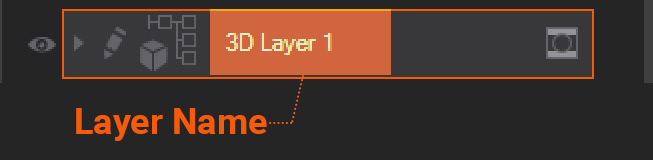 | Layer Name | This area shows the current layer name, it can be edited by double-clicking on this area. The layer names assigned by the software by default also indicate the type of layer. |
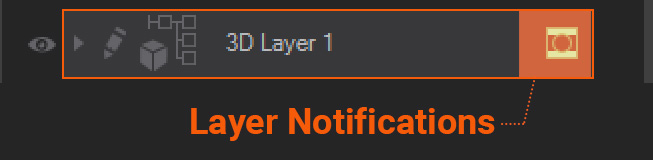 | Layer Notifications | Some icons will appear on this area to reflect the options selected in the toolbar, like lock, preview/program visibility, etc.. It will also show an icon whenever effects are applied to the layer. |
Arranging Layers
The Ventuz Layer Editor works in a Top-Down fashion, this means that layers lower in the layer stack are placed on top of the layers higher up in the stack - this is in order to keep the same philosophy we have on other parts of the software, such as the hierarchy editor. You can think of it as the image being passed through all the different layers starting from the top of the editor. This is opposite to some other software conventions, where the layers are ordered from bottom up.
| Editing Function | Description |
|---|---|
| Selecting Layers | In order to select layers all you have to do is left-click on the layer bar area around the layer name or on the layer name itself - the selected layers will be outlined in orange. In order to add layers to the current selection, simply SHIFT + click on the layers that you want to add to the selection. This acts like a toggle, so if you SHIFT + click on already selected layers, they will be deselected. |
| Moving Layers | To reorder layers or move them up and down in the composition, drag the selected layer and then drop it where you want to place it. |
| Adding Layers | There are many ways to add a layer, you can add them from the add layer tool in the toolbar, in which case it will be placed below the currently selected layer in the layer editor. The other way to add layers is by dragging the desired type of layer from the toolbox and dropping it to the layer editor. It is also possible to simply drag and drop an Image or Movie file and a new 2D Image Layer or 2D Movie Layer will be created. |
| Deleting Layers | To Delete a layer, select the desired layer and press DEL, or the delete layer button in the interface. |
| Duplicating Layers | In order to duplicate layers, you can use the standard CUT, COPY and PASTE operations - CTRL + X to CUT, CTRL + C to COPY and CTRL + V to PASTE. When pasting layers, the new layer will be placed below the selected layer. To duplicate a Layer you can also use CTRL + P. Use CTRL + SHIFT + P to also use the same source nodes. |